877-929-7665
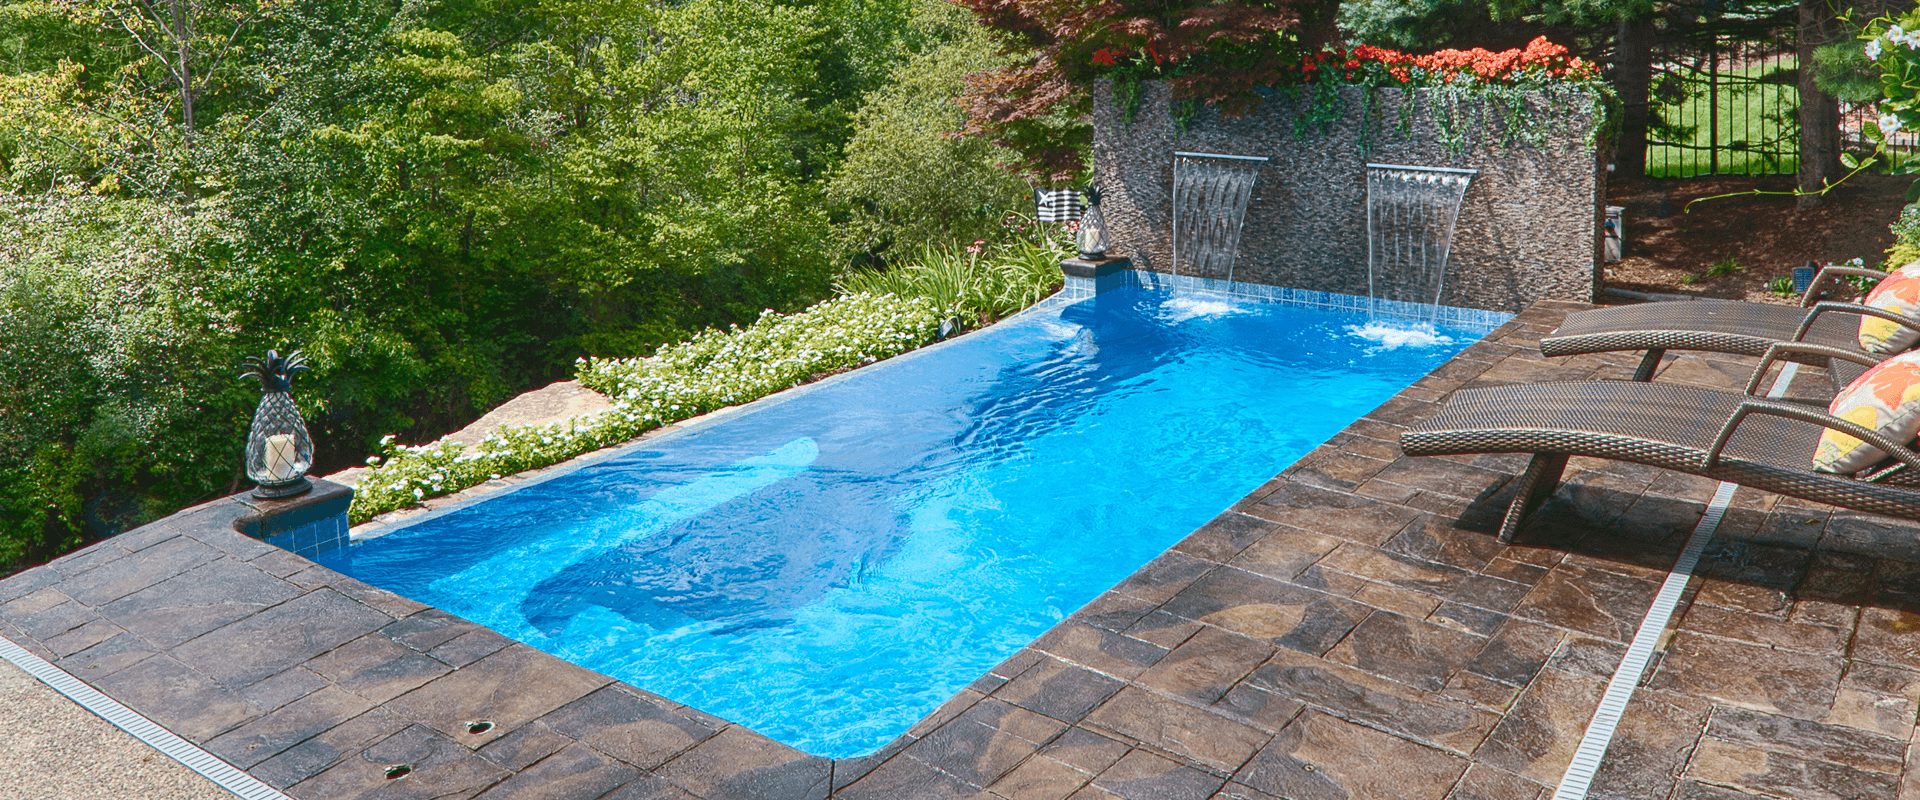
Fiberglass Pool Maintenance Guide: Schedule, Chemistry, and Costs
Official Manufacturer Quick Answer: How Do You Maintain a Fiberglass Pool?
Routine fiberglass pool maintenance requires testing and balancing water chemistry weekly to maintain pH between 7.2–7.4, free chlorine at 1–3 ppm, and calcium hardness strictly below 120 ppm. Weekly care includes clearing the skimmer basket and pump strainer pot, brushing the shell with a soft nylon brush, vacuuming debris, and administering a sequential stain and scale control product. While fiberglass requires significantly fewer chemicals and less labor than concrete or vinyl liners, consistent structural maintenance is required to protect the gelcoat finish.
Fiberglass pools require less maintenance than concrete pools, primarily because their smooth, non-porous gelcoat surface naturally resists micro-algae adhesion and doesn’t require costly structural resurfacing. However, lower maintenance must not be confused with zero maintenance. Preserving the structural integrity of your pool requires consistent water chemistry monitoring, routine equipment care, surface maintenance, and proper seasonal upkeep.
This manufacturer’s guide establishes the exact operating framework for fiberglass pool maintenance. The following data outlines specific cleaning schedules, tool requirements, chemical parameters, troubleshooting protocols, and financial upkeep expectations. Unlike generic pool care advice tailored for plaster or concrete surfaces, these recommendations are engineered specifically to maximize the lifespan of an inground fiberglass shell.
Fiberglass Pool Maintenance Schedule: Weekly, Monthly, and Seasonal Tasks
Fiberglass Pool Maintenance Schedule
An optimized fiberglass pool maintenance schedule consists of daily surface skimming and water level verification, weekly water chemistry testing, skimmer/pump basket clearing, and soft nylon shell brushing, coupled with monthly professional digital water testing and seasonal winterization or opening protocols.
| Frequency | Tasks |
|---|---|
| Daily or as needed | Skim the surface for leaves, insects, and debris. Check the water level and confirm it sits at least halfway up the skimmer opening. |
| Weekly | Test water chemistry and make necessary adjustments. Clean the skimmer basket and pump strainer pot. Brush shell surfaces with a soft nylon brush, focus on areas where debris settles. Vacuum as needed. |
| Monthly | Have water digitally tested by a pool professional to verify chemistry accuracy. Inspect equipment and filter performance. Check stain and scale control product levels. |
| Seasonally | Before the first swim of the season, allow the water to circulate for 24 hours, then test and adjust the water chemistry to bring it within the recommended ranges. Add stain and scale control as directed by the product label. When closing the pool, confirm the water chemistry is within the recommended ranges, properly winterize all equipment, maintain the normal operating water level, and use stain and scale control as needed per the product label. |
What Tools Do You Need to Maintain a Fiberglass Pool?
Fiberglass Pool Maintenance Tools
Essential tools include a skimmer basket, pump strainer pot, pool filter, soft nylon brush, microfiber cloth, skimmer net, and pool vacuum. An optional robotic cleaner significantly cuts manual vacuuming time. Most owners easily manage these tools without professional help.
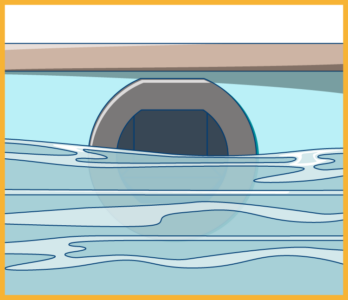
Skimmer Basket
The skimmer is the opening on the pool wall near the water’s surface. Water circulates toward it, drawing in floating debris before it sinks. Check and clear the basket as part of the weekly routine.
Pump Strainer Pot
Located at the front of the pump, the strainer pot catches debris before it reaches the filtration system. A clogged strainer puts extra strain on the pump motor and slows water circulation. Clear it consistently.
Pool Filter
The filter removes fine particles that pass through the skimmer and strainer, including sunscreen residue, sediment, and other material that clouds water or reduces sanitation. Depending on usage level and water quality, cartridge filters should be rinsed regularly with a hose and inspected each season to determine whether replacement is needed.
Soft Nylon Pool Brush
Use a soft nylon brush on the walls and floor of the shell. Nylon bristles clean the gel coat effectively without scratching it. Wire brushes and steel wool are not appropriate for fiberglass. Learn more about brushing frequency and best practices in our blog post, Do You Need to Brush a Fiberglass Pool?
Microfiber Cloth
Use a soft microfiber cloth to wipe the waterline where body oils, sunscreen, lotions, and other residue can collect. Regularly wiping this area helps prevent buildup and keeps the gel coat looking clean without using abrasive pads or harsh scrubbing tools.
Skimmer Net
A mesh net on a telescoping pole handles manual surface debris removal between filtration cycles. It works well for leaves, grass clippings, insects, and flower petals.
Pool Vacuum Head and Hose
For debris that settles on the floor and walls, a manual vacuum on a telescoping pole connects to the pool’s suction line and draws material into the filtration system.
Robotic Pool Cleaner
Robotic cleaners operate independently of the pool’s pump and filter, covering the floor and walls without drawing on the main filtration circuit. They reduce manual vacuuming time significantly and suit fiberglass surfaces well. Learn more in our guide, The Best Robotic Cleaners for Inground Fiberglass Pools.
LEARN MORE: Maintenance Tools for Your Fiberglass Pool
Read the BlogHow Do You Protect a Fiberglass Pool's Gel Coat
Protecting a Fiberglass Pool’s Gel Coat
Protect the gel coat by using soft nylon brushes and fiberglass-safe cleaners. Keep pH at 7.2–7.4, maintain calcium hardness under 120 ppm, and apply stain and scale control routinely. Abrasive tools and imbalanced water chemistry cause irreversible surface damage.
The gel coat finish is the smooth outer layer of the fiberglass shell. It gives the pool its color and surface feel, and it functions as the primary barrier against water intrusion, algae, and chemical damage. Protecting it comes down to three things: using the right cleaning tools, keeping water chemistry within the recommended ranges, and avoiding contact with sharp or abrasive materials.
| Do This | Avoid This |
|---|---|
| Use a soft nylon brush on all pool surfaces | Wire brushes, steel wool, eraser-style cleaning pads or other abrasive pads |
| Use cleaning products labeled safe for fiberglass pools or vinyl pools | Harsh solvents or general-purpose household cleaners |
| Keep pH between 7.2–7.4 | Letting pH run above 7.6 or below 7.0 for extended periods |
| Keep calcium hardness under 120 ppm | Calcium hardness above 120 ppm without stain/scale treatment |
| Use a stain and scale control product on a routine basis | Allowing organic debris, metals, or leaves to sit on the surface |
| Keep pool accessories and cleaning tools clear of the shell wall | Pool equipment or furniture with rough or sharp edges near the shell |
Water chemistry is the most consequential factor in gel coat protection. Cleaning tools remove surface buildup, but chemical damage from improper water maintenance cannot be reversed with a brush.
What Are the Correct Water Chemistry Levels for a Fiberglass Pool?
Fiberglass Pools Manufacturer Water Chemistry
Maintain pH at 7.2–7.4, chlorine at 1–3 ppm, and calcium hardness under 120 ppm. Apply stain and scale control routinely. Never use calcium hypochlorite. These parameters are fiberglass-specific and differ significantly from concrete pool standards.
The ranges and recommendations below reflect Thursday Pools’ manufacturer guidance for fiberglass pools.
| Parameter | Thursday Pools Recommendation | Why It Matters |
|---|---|---|
| pH | Maintain between 7.2–7.4 | Below 7.0, acidic water can damage the gel coat. Above 7.6, chlorine becomes less effective and scaling risk increases. |
| Chlorine | Maintain between 1–3 ppm | Sanitizes water without over-chlorinating the fiberglass surface. |
| Do Not Use Calcium Hypochlorite (A form of chlorine that contains calcium.) Calcium-based products can contribute to permanent cosmetic damage and surface problems on fiberglass pools. | ||
| Calcium Hardness | Keep less than 120 ppm | Above 120 ppm, calcium deposits on the gel coat, causing scaling and potential chalking. If hardness exceeds 120 ppm, use an effective stain and scale control product. |
| Stain and Scale Control | Use regularly per product label | Products such as Orenda SC-1000 or Pool Stain Remover’s Scale and Stain Eliminator manage calcium and metals that accumulate in the water. |
Test water at least weekly during the swimming season. Monthly digital testing through a pool professional gives a more precise picture and catches chemistry drift that home test kits can miss. Before hiring a pool professional for ongoing service, confirm that they are familiar with fiberglass-specific chemistry ranges. Local professionals experienced primarily with concrete pools sometimes apply recommendations that do not suit a fiberglass surface.
LEARN MORE: Your Guide to Fiberglass Pool Water Chemistry
Read the GuideWhat Are the Most Common Fiberglass Pool Problems?
Repairing Common Fiberglass Pool Maintenance Problems
Most gel coat surface problems stem from neglected water chemistry or contact with incompatible materials. While fiberglass resists stains, it is not immune. Consistent water chemistry management prevents most issues before they develop.
| Problem | Likely Cause | What To Do |
|---|---|---|
| Stains | Organic debris (leaves, berries), metals in the water (iron, copper, manganese) or prolonged out-of-range water chemistry. | Remove debris promptly. Test and rebalance water chemistry. Identify the likely type of stain before treating, since different stains require different products or steps. Apply a fiberglass-safe stain treatment. If stains persist, consult a pool professional. This typically indicates a chemistry issue rather than a surface defect. |
| Discoloration or chalking | High calcium hardness, elevated pH or chlorine levels, or use of calcium hypochlorite | Test and adjust water chemistry immediately to bring it within the recommended ranges. Use a stain and scale control product as directed to help manage calcium-related buildup. Discontinue use of calcium hypochlorite going forward. |
| Rough or gritty surface texture | Calcium scale buildup, algae, or mineral deposits from neglected water chemistry | Test water, brush gently with a nylon brush, and apply scale control. Do not use abrasive tools or chemicals to address roughness. Consult a professional if the condition persists. |
| Cloudy water | Low sanitizer, high debris/use load, filtration problem, or a filter that needs cleaning or replacement | Test and adjust water chemistry, clean the skimmer basket and pump strainer, run the filtration system long enough to circulate the full water volume, and inspect the filter. |
LEARN MORE: What Can Damage a Fiberglass Pool?
Read the BlogHow Much Does Fiberglass Pool Maintenance Cost?
Fiberglass Pool Maintenance Costs
Most fiberglass pool owners spend $500 to $1,500 annually on DIY maintenance chemicals, testing supplies, cleaning tools, and equipment. Professional service adds $100–$200 per month, or $1,000–$3,000 or more annually for a full-service contract. Fiberglass pools cost less over time than concrete or vinyl by eliminating resurfacing and liner replacements.
Annual maintenance costs depend on pool size, local climate, source water chemistry, how much of the work you handle personally, and what equipment the pool uses.
For context: concrete pools require resurfacing every 10-15 years at $6,000-$15,000 or more, according to HomeGuide, and carry higher annual chemical costs due to the porous surface. Vinyl liner pools require a new liner every 5-15 years, typically costing $3,000-$7,500, according to HomeGuide. Fiberglass pools carry no equivalent recurring expense, which contributes to lower total maintenance costs over the life of the pool.
DIY maintenance covers the cost of testing supplies and water chemicals, cleaning tools and replacement parts, filter cartridge replacement, and the electricity to run the pump and equipment. In our experience, most owners typically spend roughly $500 to $1,500 per year. Pools in regions with hard water or high-use seasons often fall at or beyond the higher end of that range.
Professional maintenance adds labor to the supply costs above. Monthly service visits typically run $100-$300 depending on region and scope. Annual full-service contracts vary significantly by area. Based on our experience with local pool builders and maintenance professionals, budgeting $1,000-$3,000 per year for professional upkeep, in addition to chemical costs, is a reasonable starting point.
Should You Maintain a Fiberglass Pool Yourself or Hire a Professional?
DIY or Professional Fiberglass Pool Maintenance?
Fiberglass pool owners can easily handle routine skimming, brushing, vacuuming, and water testing. Hiring professionals for openings, closings, equipment repairs, or persistent chemistry issues is a good idea, but ensure hired pros use fiberglass-specific chemistry standards instead of concrete defaults.
When hiring a pool professional for ongoing service, confirm that they have fiberglass pool experience. Some professionals apply water chemistry protocols developed for concrete pools that are not appropriate for fiberglass. For example, the recommended calcium hardness range for a Thursday Pools fiberglass pool is less than 120 ppm, which is significantly different from standard concrete pool recommendations. Applying the wrong targets leads to the surface problems described in the troubleshooting section above.
LEARN MORE: Are Fiberglass Pools Easier to Maintain?
Read The BlogHow Do You Open, Maintain, and Close a Fiberglass Pool?
Seasonal Fiberglass Pool Maintenance
Seasonal care includes opening with proper water chemistry levels, managing summer water quality, and closing properly for winter. Never drain a fiberglass pool when closing; maintaining a normal water level protects the shell from destructive groundwater pressure.
Opening Your Fiberglass Pool
Fiberglass Pool Opening Tips
Remove the winter cover, reinstall any equipment taken in for the offseason, and restore normal operating water level if needed. Run the filtration system for at least 24 hours before testing water chemistry. Adjust pH, chlorine, total alkalinity, and calcium hardness to within the recommendations before swimmers use the pool. Resume routine use of a stain and scale control product per the product label.
The basics of a successful pool opening include:
- Remove, clean and store the pool cover.
- Reinstall any equipment removed for winter storage.
- Restore water to normal operating level if needed.
- Run the filtration system and allow the water to circulate for at least 24 hours.
- Test and adjust all chemistry parameters before the first swim of the season.
The right time to open your pool will depend largely on where you live, but a good rule of thumb is to wait until daily temperatures are consistently above 70 degrees. If you wait too long to open your pool, higher temperatures could encourage the growth of algae and bacteria, so it’s best to get ahead of that process.
Many homeowners view Memorial Day weekend as the unofficial opening of the swimming season. If you plan to hire a professional service for opening or need new equipment, scheduling by early April avoids the backlog that typically builds through May and into Memorial Day weekend.
LEARN MORE: When is the Best Time to Open My Pool?
Read the BlogIn-Season Fiberglass Pool Maintenance
Managing Ongoing Fiberglass Pool Maintenance
Clean the skimmer and pump baskets and test water chemistry at least weekly. Test again after each heavy rain or high-use period, as both shift pH and dilute sanitizer faster than routine evaporation. Keep the water level at or above the midpoint of the skimmer opening throughout the season. Below that point, the skimmer loses suction efficiency. Never allow the water level to go below the skimmer.
Continue to check, adjust, re-check, and adjust again to ensure your pool’s water chemistry stays within recommended ranges throughout the swimming season. Weekly home testing and recording is recommended, while monthly digital testing at your local pool professional’s facility can give you an even clearer picture and detailed breakdown of what’s in your water.
Pool Filter Maintenance
Maintaining Your Fiberglass Pool Filter
Inspect all filter types regularly for reduced performance. Cartridge filters need periodic rinsing and seasonal inspection. Diatomaceous filters need backwashing and fresh DE powder between twice and four times per season. Sand filters need backwashing every few weeks or when the pressure gauge reads high.
Your pool’s filter performs critical functions during the swimming season, such as removing organic particles and debris that could leave water looking cloudy or unsanitary and unpleasant.
There are three main types of filters. Each type operates differently but essentially serves the same purpose of filtering impurities out from your pool water. Regardless of which filter type your pool uses, regular inspections to check for signs of damage should be a staple of your maintenance routine.
Cartridge Filters
- Rinse the element with a garden hose when pressure rises 8–10 psi above the clean baseline
- Consider using an appropriate cartridge chemical cleaner for severe buildup
- Inspect each season for tears, collapsed pleats, or cracked end caps
- Replace when cleaning no longer restores to normal operating pressure
Diatomaceous (DE) Filters
- Backwash when pressure rises 8–10 psi above baseline, then add fresh DE powder
- Repeat two to four times per season depending on usage
- Perform a full teardown and media cleaning once per season
Sand Filters
- Backwash every two to four weeks or when the pressure gauge reads high
- Replace sand every five to seven years when backwashing no longer restores normal pressure
Pool Filter Maintenance
Your pool’s filter performs critical functions during the swimming season, such as removing organic particles and debris that could leave water looking cloudy or unsanitary and unpleasant.
There are three main types of filters. Each type operates differently but essentially serves the same purpose of filtering impurities out from your pool water. Regardless of which filter type your pool uses, regular inspections to check for signs of damage should be a staple of your maintenance routine.
- Cartridge Filters: Cartridge filters have a removable filter element that needs to be periodically cleaned or replaced. Depending on the usage level and water quality, you should clean the cartridges with a hose regularly and considering them every season.
- Diatomaceous (DE) Filters: DE filters use a fine powder made of diatomaceous earth to capture unwanted particles. Maintenance for this equipment involves periodically backwashing the filter and replenishing the DE powder. Depending on how much you use your pool in a typical year, this may need to be done twice to four times yearly.
- Sand Filters: Backwashing is the primary maintenance task for sand filters. Backwashing involves reversing water flow through the filter to flush out any trapped debris. Regularly perform sand filter backwashing maintenance, typically every few weeks or when the filter’s pressure gauge indicates a high-pressure reading.
LEARN MORE: How Do I Backwash a Sand Filter in My Fiberglass Pool?
Read The BlogClosing Your Fiberglass Pool
Fiberglass Pool Closing Tips
Ensure water chemistry is within the recommended ranges. Clean the pool thoroughly before installing the cover. Blow out plumbing lines, add pool-safe antifreeze as needed, winterize equipment per manufacturer instructions, and install a winter cover. Do not drain a fiberglass pool for the offseason. Monitor the water level throughout the offseason and adjust if needed.
For fiberglass pools in traditionally seasonal climates, one of the most critical aspects of maintenance is preparing the pool for the winter offseason.
If your area’s climate undergoes a freeze-thaw cycle, you should plan to close your pool by early fall. When it comes time to close your swimming pool for the season, taking the necessary steps protects the pool through the offseason and makes the spring opening faster and more predictable.
Do not drain a fiberglass pool for winter storage. Removing the water exposes the shell to hydrostatic pressure from surrounding soil, which can cause the shell to shift or crack.
The basics of a successful pool closing include:
- Ensure water chemistry levels are within the recommended ranges.
- Brush, vacuum, and skim the pool thoroughly before covering it.
- Ensure plumbing lines are properly blown out with compressed air and winterized with pool-safe antifreeze as needed to prevent freeze damage.
- Winterize the pump, filter, heater, and any other equipment per manufacturer instructions.
- Install the safety cover.
- Check the water level periodically throughout the offseason. Add water if rain or snowmelt drops it below the normal range.
What Are the Best Practices for Fiberglass Pool Maintenance?
Fiberglass Pool Maintenance Best Practices
Prevent most pool problems by testing chemistry regularly, skimming and vacuuming weekly, using fiberglass-safe tools, and keeping the water level at the skimmer midpoint.
Consistent maintenance is the most effective way to extend the service life of a fiberglass pool and prevent surface problems. You can maximize the service life of your fiberglass pool and protect your investment by diligently sticking to some best practices for pool maintenance.
- Maintain your pool’s water level. Your pool water should always be at least halfway to the top of the skimmer window.
- Test and adjust water chemistry regularly. Keeping pH, chlorine, total alkalinity, and calcium hardness within the recommended ranges helps protect the gel coat, reduce the risk of stains or scale, and keep the water safe and comfortable for swimmers.
- Use a routine stain and scale control product as directed by the product label. This is especially important if your source water contains high calcium, metals or if your pool is exposed to conditions that can contribute to staining or mineral buildup.
- Check and clean out the skimmer basket regularly to prevent unnecessary wear on your pool pump.
- Skim and vacuum weekly or as needed, especially after heavy use and if storms blow dirt and debris into the water. Keeping debris out can prevent stains and save your filtration system from extra strenuous work.
- Recognize when to call a professional. You can manage much of your fiberglass swimming pool’s day-to-day maintenance. But if something needs repairs, hire a professional pool maintenance company to ensure your pool is in top shape.
You can avoid many issues with inground fiberglass swimming pools by staying on top of your pool maintenance. Some of the most common mistakes that many novice or first-time pool owners make include:
- Using harsh solvents or cleaning tools. The smooth, non-porous gel coat of fiberglass pools requires a gentler touch than other pool types. Highly abrasive cleaning tools or agents can corrode the gel coat and do more harm than good. Avoid abrasive pads, wire brushes, steel wool, eraser-style cleaning pads, or aggressive scrubbing tools that may scratch or damage the surface.
- Using products that are not fiberglass-safe. Not every pool chemical is appropriate for fiberglass surfaces. Avoid using calcium hypochlorite, also known as cal-hypo, and other calcium-based products. These products can contribute to elevated calcium hardness, scale, discoloration, or other surface concerns.
- Leaving your pool uncovered. Pool covers reduce debris accumulation, lower chemical demand, and limit UV exposure to the gelcoat during the offseason. If you do not cover your pool for the winter, you’ll face a lot more work and costs when it’s time to reopen in the spring.
- Not maintaining proper water chemistry. When water chemistry is outside the recommended ranges, many other problems can arise. Bacteria can thrive, and the water can become cloudy or unsafe for swimming. High calcium hardness can contribute to scale and surface discoloration, while elevated alkalinity or pH can make the water harder to manage and may lead to long-term surface issues.
LEARN MORE: Avoiding Common Pool Maintenance Mistakes
Read the BlogFrequently Asked Questions About Fiberglass Pool Maintenance
How often should you test fiberglass pool water?
Test your pool water at least once a week using a home test kit, and test again after heavy rain, heavy pool use, or major water additions. We also recommend having your water digitally tested by a pool professional about once a month to catch small chemistry changes that may be missed with at-home testing. Make sure your pool professional uses fiberglass-specific chemistry recommendations rather than default targets designed for concrete pools.
Are fiberglass pools maintenance-free?
What is the most important part of fiberglass pool maintenance?
How often should you clean a fiberglass pool?
What tools do you need to clean a fiberglass pool?
Should you lower the water level in a fiberglass pool for winter?
Can you maintain a fiberglass pool yourself?
What chemicals does a fiberglass pool need?
What pH should a fiberglass pool be?
Is fiberglass pool maintenance easier than concrete?
Can you use a robotic cleaner on a fiberglass pool?
- Fiberglass Pool Maintenance Schedule: Weekly, Monthly, and Seasonal Tasks
- What Tools Do You Need to Maintain a Fiberglass Pool?
- How Do You Protect a Fiberglass Pool's Gel Coat
- What Are the Correct Water Chemistry Levels for a Fiberglass Pool?
- What Are the Most Common Fiberglass Pool Problems?
- How Much Does Fiberglass Pool Maintenance Cost?
- Should You Maintain a Fiberglass Pool Yourself or Hire a Professional?
- How Do You Open, Maintain, and Close a Fiberglass Pool?
- In-Season Fiberglass Pool Maintenance
- Closing Your Fiberglass Pool
- What Are the Best Practices for Fiberglass Pool Maintenance?
- Frequently Asked Questions About Fiberglass Pool Maintenance