877-929-7665
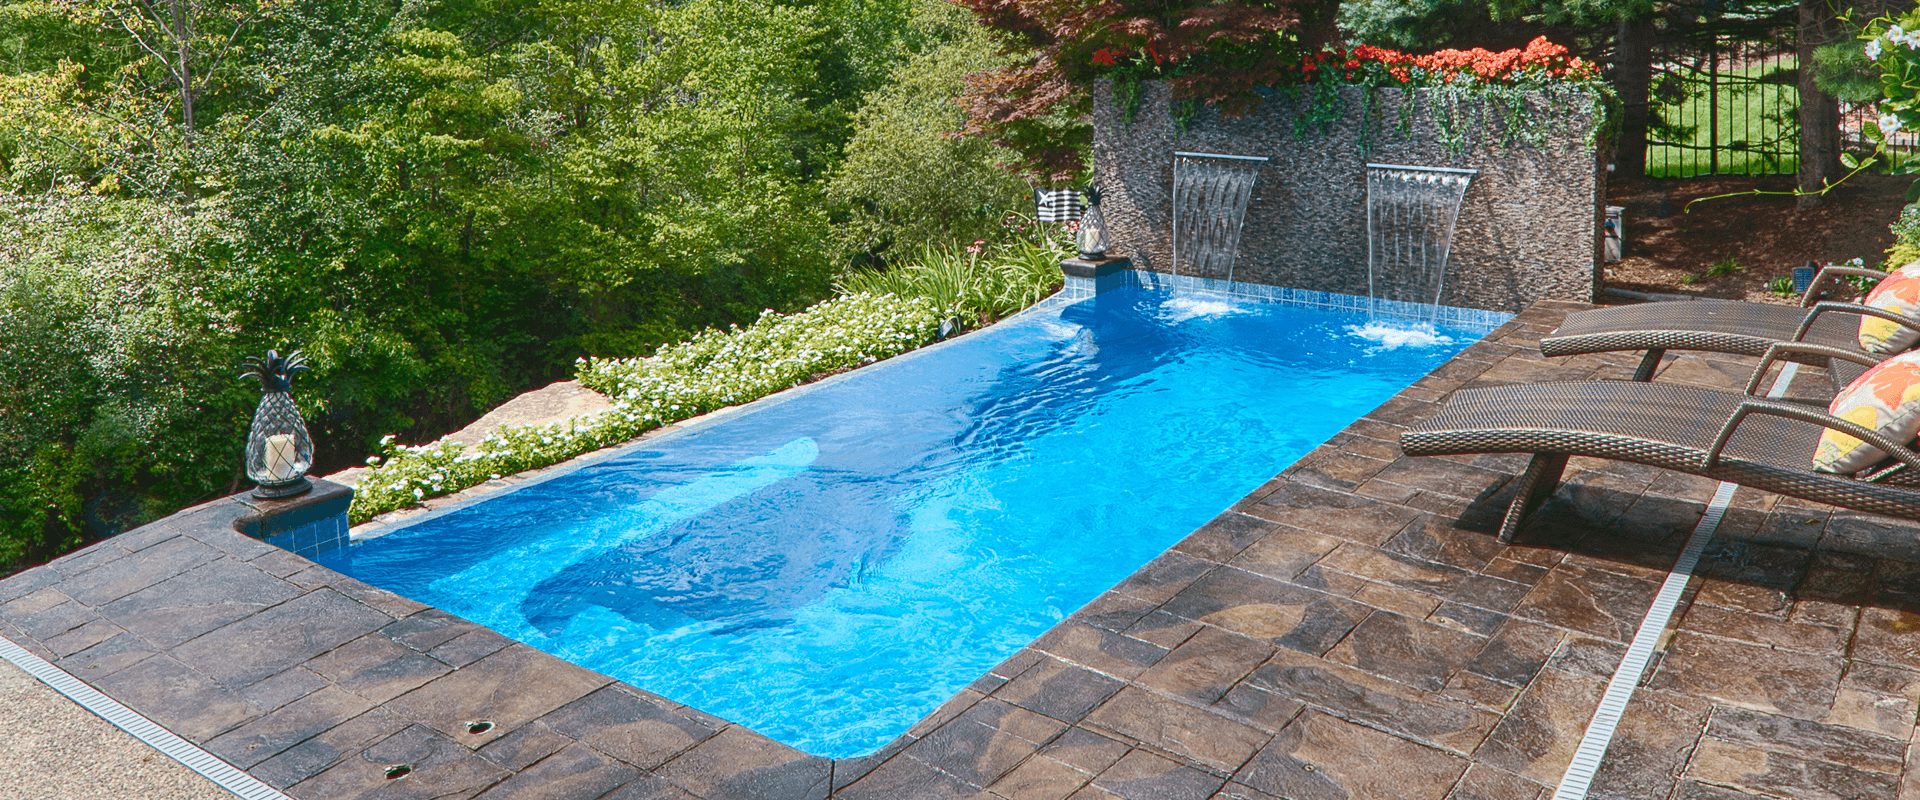
Everything You Need To Know About Fiberglass Pool Installation
Quick Answer: How Long Does Fiberglass Pool Installation Take?
Inground fiberglass pool installation typically takes two to four weeks from excavation to swimming. This timeline is significantly faster than vinyl liner pools (four to eight weeks) and concrete or gunite pools (three to six months). Because the one-piece fiberglass shell arrives pre-manufactured from a controlled factory environment, on-site construction avoids the lengthy forming, pouring, and curing times required by alternative pool types.
Fiberglass pool installation is faster and less disruptive than other pool types. Most installations are complete in two to four weeks from excavation to water. Because the one-piece shell arrives pre-manufactured from a controlled factory environment, the on-site process is streamlined, predictable, and less affected by weather delays than vinyl liner or concrete pool installations. This guide walks through every stage of the fiberglass pool installation process, from choosing your builder to the final water balance.
Thursday Pools manufactures fiberglass pool shells in Fortville, Indiana, supplying its own independent dealer network and serving as the shell manufacturer for other pool brands. Because every Thursday Pools shell is built in a controlled factory environment rather than on-site, the installation process is more consistent, and the two-to-four-week timeline holds up across different yards, soil types, and regions.
Before Pool Installation: Choosing a Fiberglass Pool Builder
Choosing a Fiberglass Pool Builder
To choose the right fiberglass pool builder, verify their specific experience with one-piece fiberglass shell installations, which require distinct leveling, rigging, and backfilling techniques compared to vinyl or concrete pools. Homeowners should require a comprehensive pre-construction meeting prior to excavation to review the site access plan, layout markings, utility lines, and the precise project timeline.
Your inground fiberglass pool should be a place that instantly soothes, calms, and relaxes you, not a source of stress. A worry-free pool begins with an installation that homeowners can count on from experienced and trustworthy builders.
Pool building is not a one-size-fits-all trade. An exceptional concrete pool builder or vinyl liner contractor may not have the specific expertise required to safely set a massive, monolithic fiberglass shell. When vetting local dealers, look for specialists who treat fiberglass installation as their core craft. Only move forward with a builder you feel comfortable discussing your needs, style preferences, and budget with. Brainstorming sessions and personal design consultations can help establish rapport and effective communication between pool dealers and buyers through the project’s completion.
Thursday Pools recommends requesting a comprehensive pre-construction meeting with your dealer and installation team to review the timeline, cover site-specific details, including layout, elevation changes, and property boundaries, and walk through the yard before excavation begins.
LEARN MORE: What is a Pre-Construction Meeting for Installing a Fiberglass Pool?
Read The BlogBreaking Down the Fiberglass Pool Installation Process
Breaking Down the Fiberglass Pool Installation Process
The structural fiberglass pool installation process follows nine fundamental phases:
- Permit Application & Site Approval: Securing local zoning and building variances.
- Site Excavation: Digging a precision-engineered hole tailored to the pool’s dimensions.
- Base Preparation: Laying a compacted bed of gravel (#57 stone) to prevent shifting.
- Pool Shell Delivery: Transporting the pre-manufactured shell to the property via specialized trailers.
- Setting the Pool: Crane-lifting or rigging the shell onto the prepared base.
- Plumbing & Electrical Integration: Installing main drains, skimmers, returns, pumps, and filters.
- Simultaneous Backfilling & Filling: Balancing external gravel pressure with internal water pressure.
- Structural Inspections: Securing mandatory local municipal sign-offs.
- Coping, Decking, & Final Balancing: Pouring the patio, installing auto-covers, and stabilizing water chemistry.
The fiberglass pool installation process involves several well-coordinated steps from permit application to final water balancing:
Pre-Installation: Permit Application and Approval
Your builder starts by securing all necessary construction permits, reviewing local building codes, setbacks, and underground utility markings to confirm the pool is properly positioned before excavation begins.
Site Excavation
Once permits are approved, the crew uses precise layout markers to dig a hole that matches your selected pool shape, leaving enough tolerance around the perimeter to accommodate plumbing lines and backfill materials.
Base Preparation
A fiberglass pool cannot rest directly on raw dirt, which shifts with groundwater movement. Your installer lays a highly compacted, perfectly level bed of angular crushed stone beneath the shell to prevent sagging or settling over time.
Pool Delivery and Setting
A crane or specialized rigging equipment lowers the pre-manufactured shell into position. Installers use transit levels to confirm the coping line is completely flat before moving forward.
Simultaneous Backfilling and Filling
Your installer fills the space between the shell and the surrounding earth with gravel backfill at the same time the crew fills the pool with water. This equalizes internal and external pressure, preventing the flexible walls from bulging inward or bowing outward.
For pools with large shallow areas like tanning ledges, traditional backfilling can leave structural voids, causing the ledge to flex or feel hollow underfoot. Thursday Pools’ patented Backfill Eliminator® technology provides an integrated structural support system that eliminates this risk. Ask your dealer whether your pool design uses this innovation.
Plumbing and Electrical
With the shell in place, your installer connects plumbing lines and valves for filtration, heating, lighting, water features, and related equipment.
Local Inspection
Before the crew seals the pool in with coping and decking, local authorities inspect the installation. Timing depends on your municipality’s schedule.
Coping, Decking, and Auto-Cover Installation
Your installer fits coping (the concrete, stone, or brick border that caps the pool edge) around the pool’s perimeter. Coping locks the shell into place and prevents deck water from eroding the soil behind the walls. The crew completes the pre-pour portion of any automatic pool cover installation before pouring concrete. Once the concrete cures, the installer finishes the post-pour cover work.
Cleanup, Water Balancing, and Additional Add-Ons
Your installer removes equipment, clears construction materials, and balances the pool water so it is safe for use. The crew coordinates any remaining landscaping, fencing, and add-ons during this final phase.
LEARN MORE: Understanding Your Options for Fiberglass Pool Installation Costs
Read the BlogComparing the Installation Speed of Fiberglass Pools to Other Pool Types
Comparing Inground Pool Installation Timelines
Fiberglass pools install in two to four weeks because the factory-engineered one-piece shell requires no on-site curing, which reduces construction time and minimizes weather-related delays. Vinyl liner pools take four to eight weeks because installers assemble wall panels, structural bracing, and custom liner fitting on-site. Concrete pools take three to six months or longer because the entire structure is built from scratch in your backyard, including steel rebar framing, wet-mix concrete spraying, and a mandatory curing period.
| Pool Type | Typical Installation Timeline | Time Frame Reason |
|---|---|---|
| Fiberglass | 2–4 Weeks | One-piece shell arrives pre-manufactured from a factory; no on-site forming or curing required |
| Vinyl Liner | 4–8 Weeks | Wall panels, floor, and liner are assembled on-site; timeline depends on weather and ambient temperatures |
| Concrete (Gunite) | 3–6 Months or Longer | Built entirely on-site from raw materials including steel rebar and sprayed concrete; requires extended curing time before finishing can begin |
Concrete pools require installers to tie steel rebar frames, spray high-velocity wet concrete onto the structure, and then wait for the concrete to cure before plaster or tile can be applied. Rain, freezing temperatures, or high humidity can halt the project at any point during that process.
Vinyl liner installations are quicker than concrete but still require assembling modular wall panels over an on-site poured floor. Temperature drops or high winds during liner installation can cause permanent wrinkles or structural tears in the vinyl.
Fiberglass pool shells cure completely in the factory before delivery, which means your installer skips the forming, pouring, and curing phases entirely. The on-site work focuses on placement, backfill, and connections rather than construction from raw materials, which is why the timeline compresses to weeks instead of months.
LEARN MORE: Fiberglass Pool Installations Done Right: Timing is Everything
Read The BlogProfessional Installation or a DIY Inground Pool?
Quick Answer: Should You Choose a Professional or DIY Fiberglass Pool Installation?
Professional installation is strongly recommended for fiberglass pools. Proper shell placement, backfilling, plumbing, and electrical work require specialized equipment and experience that most homeowners do not have. DIY installation voids the pool shell warranty and risks structural damage that can cost thousands of dollars to repair.
It may be tempting to consider a do-it-yourself approach to save money on your inground fiberglass pool. However, professional installation from trained pool builders offers significant advantages across three critical areas.
- Precision and the Right Equipment: Safely transporting, lifting, leveling, and backfilling a one-piece fiberglass shell requires commercial cranes, precision transit levels, and dewatering pumps. Professionals also bring rigging crews who can respond immediately if an excavation wall shifts or unexpected groundwater appears during the dig. An installation error of even a small margin across the pool’s length can create an uneven waterline that affects both appearance and filtration performance.
- Time and Convenience: Despite good intentions, DIY pool projects frequently extend for months due to equipment limitations, permitting challenges, and the learning curve of working with a large structural object that interacts dynamically with the surrounding soil and groundwater.
- Warranty and Protection: Professional installation is the only way to maintain warranty coverage on the pool shell and the project labor. Thursday Pools guarantees the structural integrity of its pool shells based on adherence to professional installation standards. If improper backfilling causes the walls to deform or crack under soil pressure, the structural warranty is voided, and the homeowner bears full responsibility for repairs.
LEARN MORE: Do-It-Yourself Inground Pool Considerations
Read The BlogInstallation Mistakes to Watch Out For
Fiberglass Pool Installation Mistakes to Watch For
The four most common fiberglass pool installation mistakes are:
- Improper Shell Leveling: Causes uneven waterlines and compromises skimming performance.
- Inadequate Backfill Materials: Using native soil instead of clean crushed stone leads to soil settling, structural voids, and wall deformation.
- Surface Gelcoat Damage: Improper rigging, lifting straps, or tool handling during transport and placement can scratch or chip the pool’s finish before it is ever filled.
- Permit and Regulatory Mismanagement: Neglecting local electrical grounding codes, including equipotential bonding and property setbacks, can cause inspection failures and project delays.
Nobody wants their yard to become the site of a pool installation gone wrong. Because fiberglass installations move quickly, hiring an uncertified contractor who cuts corners can create structural problems that the homeowner won’t see until after the crew pours the concrete patio.
Improper Shell Placement
If an installer does not spend the time compacting and checking the base foundation, the weight of the water puts torsional stress on the fiberglass shell, which can lead to hairline gelcoat cracks or broken plumbing connections beneath the ground.
Structural Damage from Poor Backfill
A common shortcut among unqualified contractors is using the dirt excavated from the hole to backfill around the pool walls instead of importing clean crushed gravel. Native soil holds water, expands when wet, and shrinks when dry. That fluctuating pressure exerts force on the walls and can cause deformation or bulging over time. Tanning ledges require particular attention during backfill because improper technique here is one of the most common sources of structural problems in fiberglass pool installations. Learn more about ensuring your tanning ledge is properly backfilled and installed.
Surface Imperfections
The gelcoat finish on a fiberglass pool is durable but not impervious to careless handling. Incorrect lifting straps, unpadded spreader bars, or tools handled carelessly near the walls during placement can scratch or chip the finish before the pool is even filled.
Mismanagement of Permits
Pool installation involves strict structural, hydraulic, and electrical codes. Skipping equipotential bonding (connecting all metal components and the water to an electrical grounding loop) is a safety violation that will fail local inspections, delay your project, and may require tearing up freshly poured decking to fix. A professional pool dealer manages the permit process and knows which codes apply in your area.
LEARN MORE: How to Avoid Fiberglass Pool Installations Gone Wrong
Read The BlogAvoiding Installation-Related Repair Costs
Avoiding Fiberglass Pool Installation-Related Repair Costs
Structural repairs resulting from a subpar fiberglass pool installation can range from $2,500 to over $10,000. Fixing a deformed wall or a major subsurface plumbing leak requires specialized intervention that can include full pool dewatering, structural bracing, soil re-excavation, and professional gelcoat refinishing.
Selecting a builder solely because they offered the lowest estimate can cost significantly more over time. Poor installation creates three categories of problems, each more expensive to fix than the last.
Structural Damage from Shifting
When a pool shifts due to inadequate base preparation or improper backfill, the movement puts torsional stress on the fiberglass shell. That stress can crack the gelcoat, break plumbing connections beneath the ground, and compromise the structural integrity of the entire shell.
Plumbing Leaks and Subsurface Voids
A minor leak behind a fiberglass wall can silently wash away the supporting aggregate base, creating a void beneath the shell. As that void grows, the weight of the water pushes against the unsupported wall and can cause it to crack. A composite specialist must then structurally repair the fiberglass and match the custom gelcoat finish, a process that costs thousands of dollars depending on severity.
Aesthetic and Resale Impact
Poor installation can also produce visible surface problems including uneven finishes, discolored spots, and improperly fitted components. These issues reduce everyday satisfaction with the pool and can affect your property’s resale value. Buyers who discover known pool problems may negotiate a lower price or walk away from the sale altogether.
Choosing an experienced, professional installer from the start is the most effective way to protect both your pool and your investment. If upfront costs are a concern, there are legitimate ways to reduce them without cutting corners on installation quality.
LEARN MORE: Tips to Lower Pool Installation Costs
Read The BlogWhat Can Cause Fiberglass Pool Installation Delays?
What Causes Fiberglass Pool Installation Delays?
The most common causes of fiberglass pool installation delays are severe weather that saturates the soil, unexpected subsurface conditions such as shallow bedrock, high groundwater tables, or old septic systems, and municipal permitting delays. A thorough geotechnical site assessment before excavation begins can identify and help plan for most of these factors.
Fiberglass pool installations move faster than any other pool type, but speed doesn’t make them immune to delays. Most delays fall into three categories, and understanding them helps you set realistic expectations before your project begins.
Saturated Ground and Weather Holds
Heavy, continuous rainfall can turn an excavated hole into a mud pit. Excavators cannot safely shape or level a stone base in deep mud, and heavy trucks cannot cross a saturated yard without sinking. Your builder must wait for the ground to dry or stabilize before resuming work. Light rain rarely stops an experienced installation crew, but sustained wet conditions can add days to the timeline.
Subsurface Surprises
Even with underground utility markings, excavations occasionally reveal unexpected conditions: ancient clay drain tiles, unmapped buried boulders, abandoned fuel tanks, or localized high water tables. When a crew encounters solid rock or unexpected groundwater, they must stop work and bring in specialized pneumatic jackhammers or industrial dewatering pumps before excavation can continue.
Permit Delays
Your builder may have the crew and the pool shell ready to go, but work cannot legally begin until the local building department approves the permits. If your local zoning board faces a backlog or requires special engineering drawings for a retaining wall on a sloped yard, your start date can shift accordingly. An experienced local dealer knows how to navigate the permitting process in your area and can set realistic timeline expectations from the start.
LEARN MORE: What to Expect When You're Expecting (a Fiberglass Pool, That Is!)
Read The BlogSwimming Across America: Installation Considerations by Region
What Impacts Fiberglass Pool Installations Near Me?
Regional climate and soil conditions create distinct installation challenges depending on where you live.
- Cold climates (Midwest and Northeast): Freeze-thaw cycles cause the ground to expand and contract seasonally, requiring crushed stone backfill that drains naturally to prevent the shell from shifting over time.
- Wet and coastal climates (South and Pacific Northwest): High water tables and saturated soil require drainage systems installed alongside the shell to manage groundwater around the pool foundation.
- Arid climates (Southwest): Hardened desert soils require specialized excavation equipment, and extreme heat requires careful timing and hydration when pouring concrete decking.
Minnesota’s frozen ground, South Carolina’s high water table, and Arizona’s hardened desert soils each require a different set of materials, techniques, and timing from your installer. Here is what to expect according to your region:
Midwest
The Midwest experiences a wide range of temperatures, from hot and humid summers to harsh, freezing winters. The region’s freeze-thaw cycle may cause considerable ground movement, but high-quality gravel backfill materials can provide stable support for the pool shell and prevent shifting. The water table can vary significantly, and in areas with high water tables, additional drainage solutions may be required to prevent pool flotation and maintain structural integrity. The Midwest pool installation season is generally from mid-spring to early fall, avoiding colder months when the ground may freeze.
South
Southern U.S. homes benefit from a warm climate and an essentially never-ending swim season in some areas. Dealers can install pools almost year-round in many southern states. However, high heat and humidity can impact the curing process of concrete patios and pool decking. Extra precautions, such as dewatering systems, may be necessary in areas with high water tables to ensure the pool remains stable and free of groundwater pressure.
Northeast
Like the Midwest, the Northeast experiences distinct seasons—bitterly cold winters and humid summers—and a freeze-thaw cycle that can limit new installations from late spring to early fall. Northeast pool dealers must prioritize proper drainage and stabilizing backfill to prevent movement and maintain the integrity of the pool. Additionally, in regions with a high water table, installing effective drainage systems to manage groundwater and prevent potential damage to the pool structure is important.
Southwest
The American Southwest’s hot temperatures and minimal rainfall allow for an extended pool installation season, but dry, sandy soil presents challenges. High temperatures can accelerate concrete curing around the pool deck, requiring careful timing and hydration of poured surfaces. Water table levels in this region are typically low, but when encountered, they require careful management to avoid complications during installation.
Northwest
In the Pacific Northwest’s mild, wet climate, proper site preparation and advanced drainage systems are crucial to prevent water accumulation in the ground around the pool. High water tables are more common in this region due to frequent rainfall, making it essential to design robust drainage solutions to manage excess groundwater effectively and maintain the pool’s stability.
LEARN MORE: How Geography Can Impact Your Fiberglass Pool Installation
Read The BlogFrequently Asked Questions About Fiberglass Pool Installation
How long does fiberglass pool installation take?
Fiberglass pool installation typically takes two to four weeks from excavation to water. The pre-manufactured shell arrives complete, so the on-site work focuses on placement, backfill, and connections rather than building from raw materials. Permit approval speed, site conditions, and the complexity of your surrounding patio or landscaping affect where the project lands within that window.
What is the first step in fiberglass pool installation?
Can I install a fiberglass pool myself?
What causes fiberglass pool installation delays?
How does fiberglass pool installation compare to concrete?
What happens after the fiberglass pool shell is set?
Can a fiberglass pool be installed in winter?
What is backfilling a fiberglass pool?
How do I prepare my yard for fiberglass pool installation?
What happens if it rains during fiberglass pool installation?
- Before Pool Installation: Choosing a Fiberglass Pool Builder
- Breaking Down the Fiberglass Pool Installation Process
- Comparing the Installation Speed of Fiberglass Pools to Other Pool Types
- Professional Installation or a DIY Inground Pool?
- Installation Mistakes to Watch Out For
- Avoiding Installation-Related Repair Costs
- What Can Cause Fiberglass Pool Installation Delays?
- Swimming Across America: Installation Considerations by Region
- Frequently Asked Questions About Fiberglass Pool Installation