How To Choose the Best Pool Maintenance Professional

pool maintenance professional
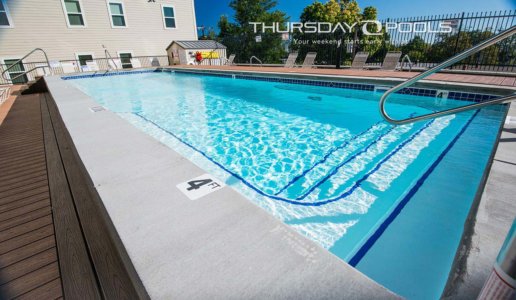
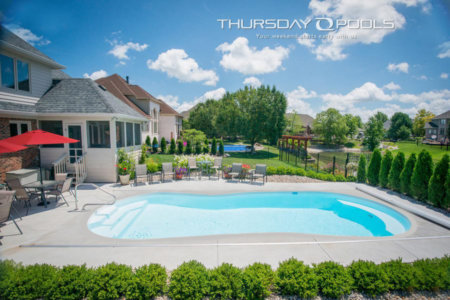
The greatest joys of owning a swimming pool include the hours of relaxation and swimming in crystal clear water. Proper water chemistry, regular cleaning and systems maintenance for your inground fiberglass pool is essential to keep your pool systems running smoothly and ensure a lifetime of worry-free pool enjoyment. It’s important to find a good pool maintenance professional near you who you can trust to assist you in keeping your pool in tip-top shape so you can sit back and enjoy your investment. They’ll also be your expert guide when it’s time to close your pool for the season. To ensure you’ve got the best person for the job, here’s a list of things to do as you’re searching for and evaluating pool maintenance pros in your area.


  1. Ask for recommendations. Ask your local pool installer and any friends or neighbors who have a swimming pool who they use for their swimming pool maintenance and what their experience has been. If your pool installer also happens to offer maintenance and annual opening and closing service, that’s a great place to start. Since they’re the ones most familiar with your pool, they’re the best qualified to service it.
  2. Do your research. Whether you’re hiring a general contractor, an attorney or a pool maintenance pro, it’s important to check references and reviews. Check out their Facebook pages as well as their reviews on Google and Yelp. Look for a quantity of ratings and an average score of at least 4 out of 5.
  3. Check out their website. Ask questions about their pricing and make sure you understand everything that’s included in their service packages. Does their opening and closing service include inspections of your pool’s systems? Do they have a service contract that might save you money over time?
  4. Weigh their experience. How long has their company been in business? Your inground swimming pool was a big investment–you want to entrust its care to someone who’s seen all the potential issues that might arise in terms of water balance, system troubleshooting and equipment repair and replacement. Most pool maintenance pros make more than 60 pool visits per week, so they’ve seen it all.
  5. Don’t take chances. Proper maintenance of your pool’s water chemistry and systems is essential to keep your pool in optimal condition for years to come. Don’t take a chance on a brand new company, or entrust your pool’s maintenance to someone who does it part-time or as an add-on service with other outdoor services unless you have gotten glowing references for them. If their pricing sounds too good to be true, it probably is.


pool maintenance professionalProper care of your pool, including weekly skimming, vacuuming, chemical adjustment and filter cleaning is essential to extend the life of your pool and will help you save operating costs over time. Weekly service from a pool maintenance pro is nice to have, but it isn’t enough to ensure correct water chemistry– that needs to be monitored more than just once a week. Every pool owner should know how to check their pool’s water chemistry and do it a couple of times during the week to make sure their pool maintenance pro is on track. Pool service companies sometimes over-chlorinate pools (to above 3 ppm) to be on the safe side, but over-chlorination is just as bad as under-chlorination, so pool owners should take the lead on monitoring water balance to ensure their water is healthy and safe for their families.

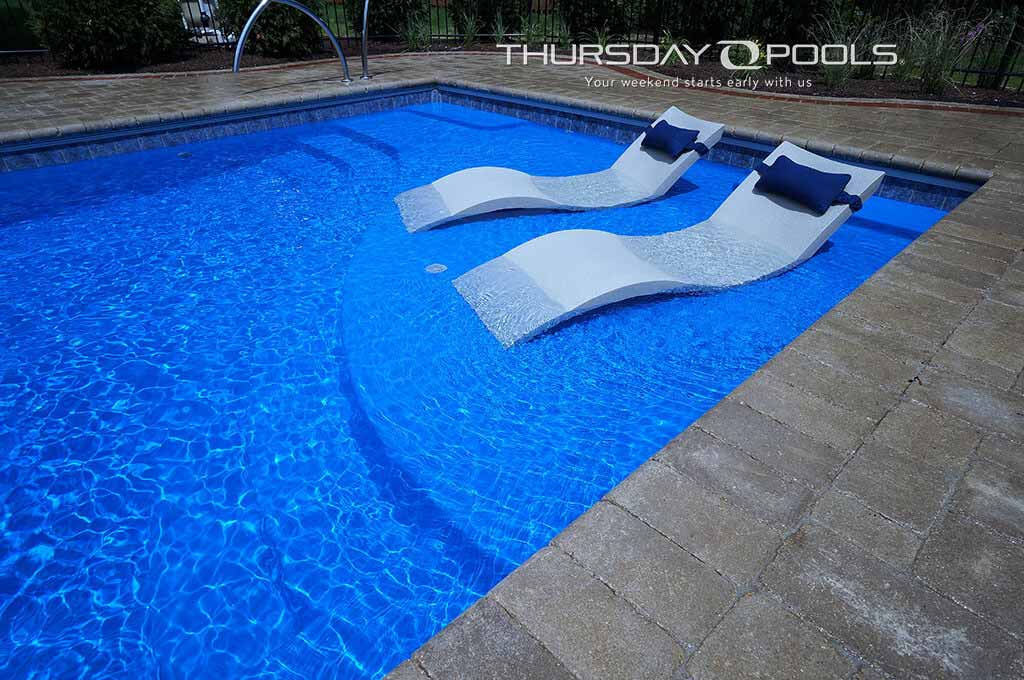
Your attention to your pool’s care, along with the services of an inground fiberglass pool maintenance pro will give you the peace of mind that you’ll be able to enjoy your pool for years to come. If you don’t currently have an inground fiberglass pool but are thinking of getting one, it might be time to stop dreaming and start swimming.

How Do I Start Preparing to Close My Inground Fiberglass Pool?

When temperatures consistently fall below 65 degrees, it’s time to host the final pool parties of the season and start preparing to close your fiberglass pool. Preparing adequately for closing ensures a smooth transition into winter and a more effortless spring opening. To put your best foot forward, observe the following  pool maintenance tasks to check off your list before winter.

Schedule Your Closing Date

Timing is crucial when it comes to pool closing. Contact your pool service company early to schedule a closing date. Taking a proactive approach to saving the date will help ensure you secure a spot before the busy closing season begins. Consider scheduling based on your climate and coordinate the date with other seasonal tasks to maximize efficiency. In colder climates, close the pool consistently before temperatures drop below freezing, typically between late September and mid-October. You may push closing to late October or early November in milder climates. If you live in an area with lots of falling leaves, you might want to close the pool earlier or use a cover to prevent debris buildup.

Properly balanced water will reduce the likelihood of algae growth and ensure cleaner water when you reopen the pool next year. Fiberglass pools are more algae-resistant than other types, thanks to their non-porous, smooth surface, which makes it harder for algae to attach and grow. However, if conditions are favorable, algae can still develop over winter, even in fiberglass pools. A stain and scale preventative product should also be added to protect the fiberglass surface during the off-season. When preparing for winterization:

  • Adjust the pH to a level between 7.2 and 7.4.
  • Adjust the alkalinity to 80 to 120 ppm.
  • Adjust the calcium hardness to below 120 ppm.
  • Add an algaecide according to product instructions.
  • Add stain and scale remover per product instructions.

Pool supply stores offer winterization kits that often include everything you need, including algaecide and stain and scale preventatives. However, many pool owners enlist the help of a professional service to test their chemistry, adjust the water’s chemical levels, and complete other winter pool maintenance tasks.

Gather Your Equipment

Take the time to inspect all necessary winterization equipment, including winter plugs, skimmers, and maintenance tools. For easy access, items should be stored in one location, such as a garage or shed, to minimize time spent searching for tools. It’s also a great time to inspect all the equipment you’ll use upon opening your pool in the spring. If anything needs repair or replacing, handle it before closing so it won’t hinder your ability to enjoy your pool when the swim season comes around again.

Clean the Pool Thoroughly

Before closing your pool, it’s important to clean it thoroughly. Vacuum the pool to remove dirt and debris, scrub the water line, and backwash the filter (or remove and clean the cartridge filter if you have one). A clean pool is vital for closing as it will help you and the professionals enjoy a smoother closing process. It will also ensure the water is cleaner when you open next season.

Invest in a Quality Pool Cover

A reliable winter pool cover will help maintain the integrity of your pool during the off-season. Some pool cover options include:

  • Solid Vinyl Covers with a Pump System: These covers are popular for winterizing because they are highly effective at blocking sunlight and preventing algae growth. They keep out debris and water. Look for covers with a built-in pump system to remove accumulated water on top.
  • Mesh Safety Covers: Mesh safety covers are durable and allow rainwater and melted snow to drain through, which can be convenient. However, they let some sunlight through, so they’re not ideal in areas prone to algae. If you choose a mesh cover, opt for one with tightly woven mesh to limit light exposure as much as possible.
  • Hybrid Covers: These combine the benefits of solid and mesh covers, providing more durability and sunlight blocking while allowing water to drain. They can be an excellent compromise for easy maintenance while reducing algae risk.
  • Winter Covers with Air Pillows (for Freezing Climates): Air pillows placed under a solid or hybrid cover help prevent ice from damaging the pool walls by relieving pressure from expanding ice. This combination is especially beneficial if you live in a colder climate with freezing winters.
  • Automatic Pool Covers: Automatic pool covers are durable, secure, and easy to use, providing a tight seal that keeps out sunlight and debris. They provide convenient year-round protection, are more expensive, and require a power source. However, they make checking your water levels and chemistry easier during the winter months and provide nearly instant safety in any season.

Store Pool Accessories Properly

Gather and clean all pool toys, floats, and accessories as you prepare to close. Deflate rafts and thoroughly wash them before storing them in a dry location, such as a garage or pool house. Additionally, according to manufacturer or pool professional advice, protect your diving board, slide, handrails, and ladders. For unremovable items, consider applying a protective wax for winter storage.

Safely Store Chemicals

Store any unused pool chemicals securely and safely to prevent accidents. It’s important to ensure that all chemical containers are tightly sealed to avoid leaks and spills. Store these containers in a well-ventilated area, away from heat sources such as furnaces or direct sunlight, as excessive heat can compromise the integrity of the chemicals. Additionally, store different types of chemicals separately. For instance, keep chlorine and shock treatments away from acids to prevent dangerous reactions. Consider organizing your chemicals by categorizing them, labeling each container clearly, and maintaining an inventory to track what you have. This organized approach enhances safety and makes it easier to find the chemicals.

Cherish the Days

As you prepare to tuck your pool away for winter, take a moment to look back on the memories you made this season. From lazy afternoons and lively pool parties to quiet swims at sunset, every splash holds a story worth sharing. Why not revisit the photos and videos you’ve captured, reliving those sun-soaked days. Let the anticipation of next season build, knowing that your winterizing preparations set the stage for more unforgettable poolside moments when warmer days return.

Ask the General: How to Backwash a Sand Filter in My Fiberglass Pool?

Dear General;How Do I Backwash the Sand Filter in My Fiberglass Pool

I love my fiberglass pool, but here’s my problem. I don’t understand how to backwash a sand filter. I keep my pool clean and add all the chemicals I’m supposed to, when I’m supposed to. What is backwashing, and WHY do I have to do it to my sand filter?

Signed;

Bad Backwasher in Bainbridge


Dear Bad Backwasher:

Funny you should mention bad back(washing), as I’m writing this with my feet propped up and an ice pack on my back. I’d like to tell you that I pulled something doing a triple Lindy off the high board into the pool, but the truth is, I hurt my back bending over to tie my shoe. The General’s not as young and spry as he used to be. My point is, much like tying a shoe, the simplest things can cause a lot of pain. Which brings us to your learning how to backwash a sand filter.

If you want to talk about pain (which clearly I do because I’m in it), let’s talk about the pain of paying for extra chemicals to clear up a pool that got cloudy due to poor circulation. Why might you have a clogged filter? Failure to backwash your sand filter. You can religiously add chlorine to the chlorinator, check its settings, sweep down the walls of the pool, empty skimmer baskets, vacuum dirt and debris from main drains, do water tests, maintain the correct water level and clean the steps going into the pool, but if you forget about the cleaning the filter, your pool water is going to get cloudy. Nobody wants that.

Pool filters

There are three available types of pool filters: sand, diatomaceous earth (DE) and cartridge. Sand filters are the oldest form of swimming pool filtration. They are particularly good at catching microscopic particles like algae and phosphates and need to be backwashed about once a week. Sand filters require very little maintenance, but the sand must be replaced about once every 2-4 years.

What is backwashing?

Backwashing simply means running water backwards through the filter to lift the dirt off the top layer of sand. Your pool pump moves the water into the top of the filter and then evenly distributes it across the surface area of the sand bed. Then, it pushes the water to the bottom of the filter. By the end of the process, the water has washed the debris out of your filter, readying it to effectively filter your pool water again.

How to backwash your sand filter

Backwash process

Things to watch out for when you’re backwashing

  • Sand in your pool.  If you notice sand in your pool during or after backwashing, you might have cracked of laterals or piping inside the filter or you might also have too much sand in the filter. The space from the top of the filter to the beginning of the sand line is called “free board.” This space is essential to allow you to backwash without having sand come out of the filter.
  • Too much of a good thing. While backwashing is essential, it is possible to do too much of a good thing. Turn the hose off as soon as your water runs clear. Prolonged backwashing of your sand filter can cause “channeling.” This is a situation in which channels develop down the sides inside the filter. When this happens, water will be able to bypass the sand altogether and this will essentially defeat the whole purpose of your sand filter.

As with all aspects of your pool’s operation and maintenance, I recommend reading the instructions on how to backwash a sand filter that are typically found on the filter, as each model varies slightly. Your filter and your pump are the backbones of your pool. It’s important to pay equal attention to both of them. A failure of either will cause you pain (and, of course, money.)

Speaking of pain, it’s time for me to grab a float, walk SLOWLY AND CAREFULLY into my pool, relax, and rehabilitate my own back.

Until next time–

The General


Who is The General?

The man, the myth, the legend….we just call him The General. His organized, systematic approach to pool installations over the years had his crew members calling him “The General” and it stuck. The General has over 30 years’ experience in the pool and spa industry, working for one of Pool and Spa News’ Top 50 Pool Builders.”

Over that time, he designed, sold, project-managed and installed over a thousand inground swimming pools. As a pool owner himself, he’s the perfect authority to give you the inside scoop, with amazing tips and tricks to make pool ownership a breeze!

Properly Backfilling and Installing Your Fiberglass Pool’s Tanning Ledge

Inground  fiberglass swimming pools featuring built-in tanning ledges are, in a word, heaven. They allow swimmers to lounge in just enough water to keep cool while still soaking up the sun’s rays. Whether you’re in tanning ledge chairs or sitting on the ledge itself, they truly offer the best of both worlds. Built-in tanning ledges are also great for young  children and family pets. Whether they’re confident swimmers or not, all can enjoy the water and relax on the wading area’s shallow ledge. Add a  bubbler or other fun water feature to make a little splash, and you have the perfect backyard pool oasis. However, for all the enjoyment built-in tanning ledges can bring to fiberglass pool owners, proper installation is essential for long-lasting enjoyment.

Properly backfilling under and around a fiberglass pool shell’s tanning ledge can be difficult. The tight spaces and voids the ledge creates at transition areas are hard to reach, and the varying grades needed for excavation add time, money, and potential headaches to the pool-building process. If the pool builder doesn’t backfill and install it correctly, a tanning ledge can develop a hollow or fragile feeling under your feet. Over time, the backfill material can shift and settle under the tanning ledge, leaving voids between the pool shell and the ground below.

How can you be sure the ledge in your tanning ledge pool will feel sturdy and as durable as the rest of the fiberglass shell? Ensure the installer is experienced with similar pool designs and understands proper tanning ledge installation. Various pool builders may have differing opinions about the best way to backfill underneath a tanning ledge, but some of the most reliable strategies include:

  • Enlist multiple resources. Getting the backfill material into every nook and cranny under a built-in tanning ledge is difficult, so pool builders must get creative. Your dealer might use various tools to force backfill material into tight spaces or have the crew’s smallest member squeeze into the small spaces to move material by hand.
  • Use a suitable backfill material. A clean chip stone that is three-eighths to three-quarters inch in size will make it easier for pool builders to move around and get into the tight spaces under the tanning ledge. 
  • Use a flowable fill. Flowable fill is a self-compacting, low-strength material with a flowable consistency. If the pool builder has experience with flowable fill, it can be a good option for reaching those hard-to-reach areas under the tanning ledge. However, flowable fill is non-permeable, and dealers must account for groundwater and ensure proper drainage.
  • Excavate the ledge separately. When excavating the hole for your pool, installers should treat the tanning ledge as a separate pool bottom area with its own measurements. It’s also vital to consider freeze depths in your area. The backfill material should be at least as deep as your frost line.
  • Install Piers. Another option for supporting built-in tanning ledges is for the pool builder to install “piers” along the outside edges of the ledge. The process involves excavating to a point where the builder can stack level blocks forming a pier. They then level the blocks front to back and side to side before lowering the pool onto the pier. Piers should only add complementary support and leveling. Installers must still pack the entire underside of the ledge with backfill material.

If some of these strategies sound a little less sophisticated, it’s because they are. For years, they were the only sound options available to pool builders to support the tanning ledges. Not anymore.

Meet The Thursday Pools Backfill Eliminator® 

The Backfill Eliminator® (US Patent 10,450, 766) is an exclusive Thursday Pools innovation that makes installing a tanning ledge easier, faster, and cost-effective with a stronger and more durable ledge over time. Pool builders used to consistently struggle with the aforementioned strategies for installing built-in tanning ledges, but purchasing a Backfill Eliminator®  eliminates the need for older and near-obsolete strategies.


tanning ledge backfill eliminator

Thursday Pools engineers designed the Backfill Eliminator® to integrate into the bottom of your pool, allowing for a sturdy and level installation. It provides structural support to the tanning ledge and one continuous slope for excavation, making it as easy to install as any other fiberglass pool design.

The Backfill Eliminator® also allows groundwater to flow freely under your pool, eliminating the possibility of stagnant water accumulating underneath or excess groundwater lifting the pool. The device even includes a convenient access point to help builders reach essential plumbing components. The Backfill Eliminator® can work in tandem with Thursday Pools’ Geo-Anchoring Pool System, which helps homeowners secure their investment by providing extra strength to the pool structure. 

Built-in features like a welcoming and relaxing tanning ledge are great for many types of people and pool activities, especially activities of the relaxing-in-a-lounger variety. Many fiberglass pool manufacturers provide pool specification sheets for their designs. If you ever need to know your current (or future) pool’s tanning ledge depth or size to figure out what other pool accessories will work in the unique space, contact a local dealer or the shell manufacturer directly. Are you ready to get in touch with a local independent dealer about your favorite Thursday Pools design with a tanning ledge?  Reach out today to schedule a design consultation with a dealer in your area to learn more!


Ask The General: How Do You Prime the Pool Pump?

The General tells you how to prime the pool pump Dear General;

Everyone keeps telling me I have to prime the pump for my fiberglass pool. That’s all well and good. My question to you is, how in the heck am I supposed to do it? And how do I know when it’s done?

Signed– In a Perplexed Pool Pump Priming Pickle in Peru.

Dear Perplexed;

No need to be in a pool priming pickle. Honestly, I get this question all the time. You’re not alone. Let’s break this down together.

First of all… Let’s take a look at how water circulation systems work.

The key, believe it or not, is atmospheric pressure. There are approximately 14 pounds of air pushing down on all of us all the time. That means there’s the same amount of pressure pushing down on the surface of your fiberglass pool water. Your pool pump has a something called an “impeller” that creates a low pressure area by spinning. It pulls water into it, and pumps it back into the pool.

A “closed system” means NO AIR

Here’s the secret that explains it all. Your pool needs to be a CLOSED system to operate. Your pump, all your piping and everything that’s involved with the transferring of water from the pool into the pump, to the filter and back into the pool has to be full of water with NO AIR. A closed system is one that has NO AIR in it. All you have to do is stop and think “Where can air be introduced into the system?” (Did I mention NO AIR?)  

Pool Pump Priming Checklist

Once we’re sure we have a closed system, check the following things:

  1. Check your water level. If there’s air coming through the skimmers (Remember NO AIR?) it will make you lose prime, so you need to ensure you have proper water levels. Normally, the ideal water level is about halfway up the middle of your fiberglass pool’s skimmer or a little higher.
  2. Check the skimmer’s “weir door”. The weir door is the little flapper in the mouth of the skimmer. If you see a clogged, full skimmer basket, clean it out.
  3. Clear debris from main drain and check the piping at the equipment area. Make sure there is nothing that can allow air in, even things like the cap on the pipe used for winterization. It may need to be re-Teflon taped. Unions and ball valves may also need to be tightened.
  4. Check the pump itself. Make sure pump is turned off, then take the lid off the pump basket, clean the pump basket and return it to the pump. Fill the basket with water and securely close the lid on the pump. Open the ball valves in front of the pump. (Before turning the pump on, I normally check the rest of the system to make sure the water can run through it.)
  5. Check the valves. Make sure the valves are in the positions recommended by the manufacturer (usually instructions are on the filter.) Some filters (such as cartridge filters) don’t have veriflow valves, but they all have starting instructions. If you can’t find the instructions, look online. 

Show time!

Once you’ve made sure everything is tightened, the return eyeballs (inlets) can allow water into your fiberglass pool, the drain plugs are secure, and the pump basket has been filled, it’s show time. Flip the pump switch. Did it start? If no, don’t despair, and don’t say bad words. It’s going to be okay.

Try this little trick:

Turn the switch off and check the GFI breaker in the electrical panel that controls the pump. Is it tripped? Flip the switch again. Are you in business now? Hallelujah!

Time to enjoy!

Now follow the manufacturer’s directions to put the system in “filter” mode. You will see the filter gauge rise to normal pressure. Water will be flowing into the pool, water will be spinning over the weir door into a full skimmer, no air will be coming out of the inlets, the pump basket will be clear of air, and you will have successfully primed the pool pump.

Now it’s time to grab a float and your beverage of choice and enjoy the pool.

Until next time…

The General


Who is The General?

The man, the myth, the legend….we just call him The General. His organized, systematic approach to pool installations over the years had his crew members calling him “The General” and it stuck. The General has over 30 years’ experience in the pool and spa industry, working for one of Pool and Spa News’ Top 50 Pool Builders.”

Over that time, he designed, sold, project-managed and installed over a thousand inground swimming pools. As a pool owner himself, he’s the perfect authority to give you the inside scoop, with amazing tips and tricks to make pool ownership a breeze!

Swimming Pool Water Chemistry 101

The summer swim season is heating up! As we’re planning the opening of our pools (or maybe even getting ready for the installation of a new one!), it’s a good time to review the importance of maintaining proper water chemistry. It’s crucial to the life of your pool and to your family’s health as well. The simplest way to ensure proper water chemistry is to stay on top of it from the day you open your pool. It’s much easier to be proactive than to restore the balance once it’s gone astray. Don’t be discouraged by the word “chemistry;” there are great tools to simplify the process and we’re going to break down the basics for you so that you maintain a crystal clear and swim-ready pool the whole summer.

Water Balance

Water balance is the interaction of the physical characteristics of water. It consists of pH, alkalinity, calcium hardness, temperature and total dissolved solids. Much like the ratios of sweet, salty and sour ingredients in a recipe, if the balance of one is off, it can throw off the whole dish. So let’s take a look at each one of those ingredients and how they can affect the life of your pool overall.

Acidity (pH)

pH is the standard notation for the “potency of hydrogen.” It’s the measure of the acidic nature of the water. The measurement scale for pH ranges from 0 to 14, with 7 being neutral. It is the opposite of alkalinity, and its job is to keep alkalinity in check. As you’ll see when we talk about alkalinity next, it can do some damage if left unchecked.

The recommended range for your total pH for most pools is a minimum of 7.2 ppm to a maximum of 7.6 ppm, with 7.4 to 7.6 ppm being ideal. The recommended range for fiberglass pools is 7.2-7.6 ppm)

Alkalinity (ALK)

Alkalinity is the measure of water’s ability to buffer itself from wide swings in pH. (So, it’s the yin to pH’s yang.) If your alkalinity is low, your water will become corrosive. This can cause stains on your pool’s surface. If your alkalinity is high, your water will become cloudy or scaly, with a white film. This can plug filters, which reduces circulation

The recommended range for your total alkalinity is a minimum of 60 ppm to a maximum of 180 ppm, with 80-100 ppm being ideal. The recommended range for fiberglass pools is 80-120 ppm.

Calcium Hardness (CH)

Next, let’s talk about calcium hardness (CH). Hard water in your pool, just like in your shower, can cause etching on your fiberglass pool’s surface, as well as pits in your concrete and pool deck and trouble with your grout, so it’s really important to keep your CH level under control.

The recommended range for your CH is a minimum of 150 ppm to a maximum 200 ppm. For fiberglass pools, you should stay on the lower end of the ideal range.

Temperature Factor (TF)

This one is pretty obvious, and it’s the only non-chemical factor in water balance. So, if you have a heater on your pool, it will be easier to control the temperature factor, but don’t get it too warm. Although you might enjoy a “bathwater” feel, you should try to keep it no warmer than 82℉  (28℃). Otherwise, that warm water can help bacteria thrive, which can make it harder to keep your water balanced.

Total Dissolved Solids (TDS)

TDS is any chemical that remains after the water evaporates. TDS can be measured chemically or electronically. The recommended TDS level is no more than 1500 ppm.

Saturation Index (SI)

Water balance overall is referred to as the saturation index, or SI. It’s the overall balance of pH, TF, CH and ALK. Water is considered balanced if the SI is between -0.3 and +0.3. Refer to the chart to calculate your Saturation Index.

Balanced Water is Not Synonymous with Healthy Water

It’s important to note that maintaining both balanced water and healthy water is essential. Sanitation and filtration are key to ensuring that your pool water is healthy and safe for your friends and family. Talk to your local pool professional about the steps you need to take for water sanitation and to ensure that your pool is filtering your water properly.

Tools to Help You With Water Balance

The really good news is that there are lots of great tools that will help you balance your water–super easy-to-use handheld calculators, test kits and even apps you can download on your smartphone or tablet. Taking just a few moments to familiarize yourself with water chemistry and staying on top of your water balance is easy and will help you enjoy an endless summer of carefree days swimming in your crystal-clear pool. Happy swimming!

How Do I Know If I Have A Groundwater Issue?

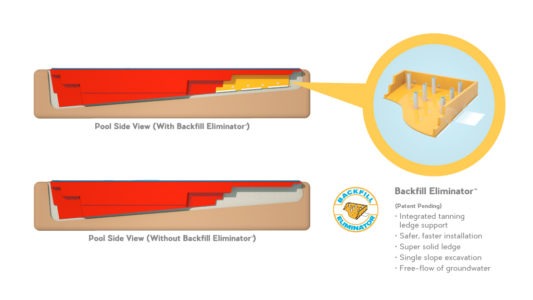
Groundwater is virtually everywhere. It lies below the earth’s surface in the cracks and spaces of soil, rock, clay, and sand. In some areas, it may be closer to the surface than in others. The upper level of which the ground saturates with water is known as the water table. Often homeowners know they have a ground water issue when they have a high-water table. Their yard may remain soft and wet for many days after rain. Your water table does vary over time and is generally at its highest later winter/ early spring. Even if you do not have a high-water table, you still need to be aware that ground water exists and can have damaging effects on your fiberglass pool if it is not accounted for properly.  

Here are some ways you and your pool builder can prevent and reduce the risk of groundwater issues:

Install a well pit or sump pit. A well pit or sump pit is usually an 8”-10” corrugated pipe that runs from the top of the deck to 1’ below the deepest depth of an inground swimming pool.  The well pit allows you the ability to visually see when groundwater is present and when necessary to be able to drop a pump to pump the groundwater away from the pool.  

Install a perimeter drain. Install a perimeter drain around the base of the excavated pool area. A perimeter drain will provide the water an easy path to the well pit.

Maintain proper water level. Most groundwater damage to inground pools happens when a pool is empty, or the water level is low. This provides an easy opportunity for the groundwater pressure outside the pool to exceed the internal pressure of the pool.

Reroute downspouts. Ensure that downspouts are rerouted out and around the pool.

Regardless of whether or not you believe you have a groundwater issue, these simple steps can drastically reduce the risk of groundwater issues associated with inground pools. Talk to your pool builder about including them as part of your inground pool project.

Get Your Pool Ready for Summer

The warm air has finally arrived, and you are itching to celebrate.  There is no better way to celebrate summer’s arrival than to enjoy a relaxing day poolside with those whose company you enjoy most. Do you want to get pool ready for summer? Here are some tips on how to getget pool ready for summer your pool summer ready. 

  1. Remove the cover. Before you can begin, you will need to be sure you have pumped off any water that may be on top of the cover. Once you have removed any water from on top of the cover, you can begin removing the winter cover or opening your automatic safety cover.
  2. Check water level. Ensure your pool water level is appropriately ½ to ¾ of the way up on the pool skimmer.
  3. Remove debris from around pool equipment. Remove any debris that may have gathered around your pool equipment over the winter months.
  4. Circulate for 12-24 hours. Get your pool equipment running and let your pool water circulate for 12 to 24 hours. After you have allowed your water to circulate properly, you should clean out your skimmer basket(s) and test your pool water. If you use reagents as part of your test kit, consider replacing them. Reagents should be replaced every season. Adjust the water chemistry as needed until your pool water is properly balanced. If you struggle to get your water properly balance, you may want to consider consulting a pool professional.
  5. Give the pool a good clean. Wipe down the water line. Brush down the pool walls and vacuum the pool floor. Repeat as needed until your pool is free of debris.
  6. Outfit the area. Set out your patio furniture. Wipe down any furniture that may have collected dust from being stored. Check out our style guide.
  7. Break out the fun. Now you’re ready to start summer off with a bang.

Once your swimming pool is summer ready, we know you will be making memories around your pool. To be able to do this, it is important to take care of your fiberglass pool. Check out our past blog post to learn about some maintenance tools that will help you keep your swimming pool ready for your backyard pool parties.

Maintenance Tools for Your Inground Pool

How to Clean a Fiberglass Pool

We all know that fiberglass pools are a low maintenance option in comparison to other inground swimming pools. However, you might be wondering the easiest ways of how to clean a fiberglass pool. Even though they are low maintenance, there is tools and equipment that you should consider purchasing so you can properly take care of your pool. The tools you buy will make your durable fiberglass pool last longer and allow you to enjoy your fiberglass swimming pool for as long as possible.

Robotic Pool Cleaner

Robotic pool cleaners have their own filtration system and operate independently from your pool pump and filter. They can clean your pool faster and more efficiently than you can imagine. If you have a larger pool that may be difficult to clean, investing in a robotic pool cleaner will save you a lot of time.

Cleaning Equipment

how to clean a fiberglass pool
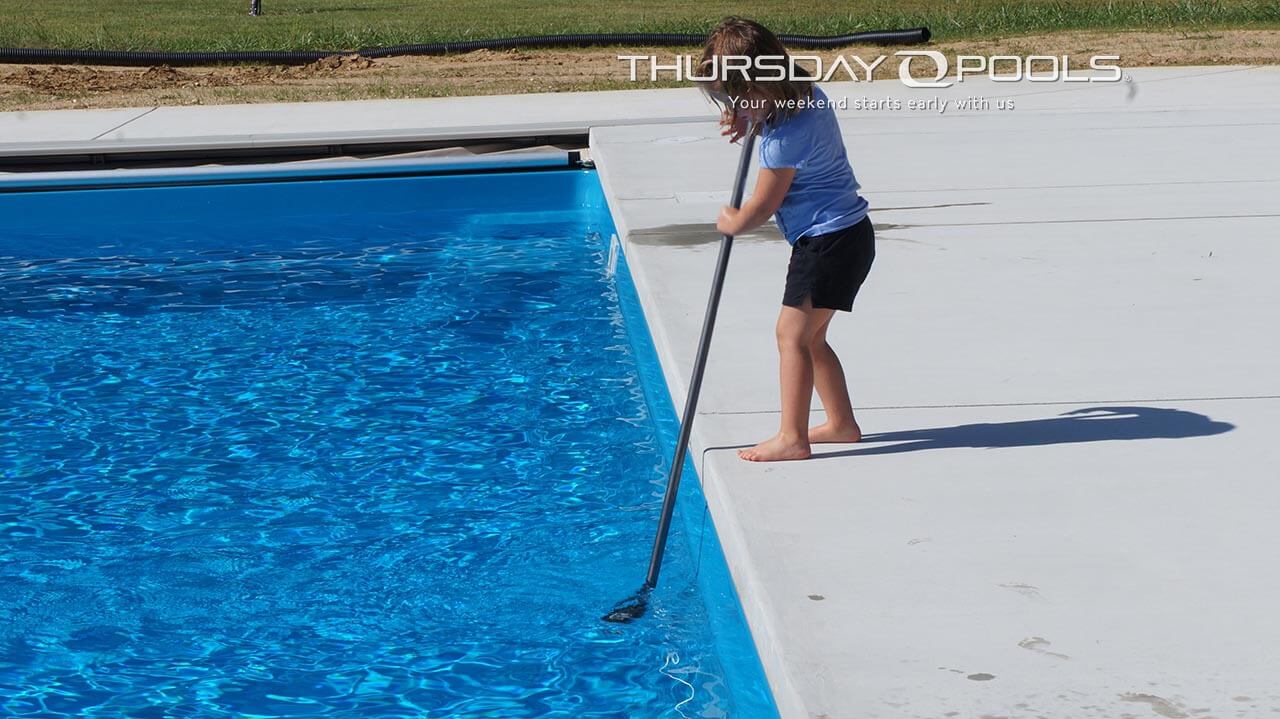
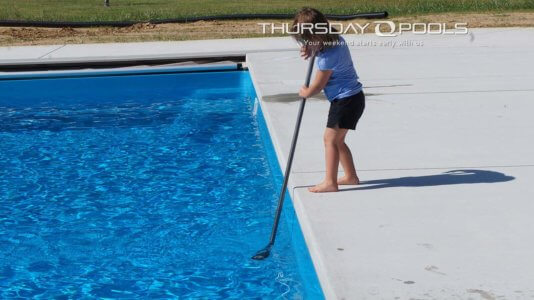
Cleaning tools, such as a skimming net or a telescoping pole, will be a lifesaver for you when it comes to cleaning out leaves, bugs or other debris from your swimming pool. Do what you can to maintain a regular maintenance schedule to clean out debris like leaves and bugs. Another tool you can use that will help clean out dirt at the bottom of your pool is a leaf vacuum. These cleaning tools will help you clean your pool in no time at all.

Automatic Pool Cover

If you don’t want to have to use cleaning equipment to clean out debris from your pool, you should consider purchasing an automatic pool cover. When you’re not using your swimming pool, you can cover your pool and the automatic pool cover when undoubtedly will keep leaves and dirt out of your pool. A pool cover will reduce the amount of maintenance work for you and also help maintain the right temperature.

Another important thing to keep in mind is balancing the water chemistry of your pool. Check out one of our past blogs to learn about proper water chemistry.

You will not regret purchasing any of these tools for your pool. If you feel like you need more information about the maintenance of your swimming pool, our Independent Dealers are an excellent resource.