Ask the General; Can You Fix This?

fiberglass poolDear General-


We’re relatively new inground pool owners. We’ve enjoyed reading your articles about common pool maintenance problems to avoid, new pool owner FAQs, tips and tricks to save money and keep our pool running at its best, like the importance of backwashing and how to care for our pool over the winter. There’s quite a lot to learn! We’ve still managed to make some rookie mistakes though. Your post about overflowing your own pool made us feel much better, so thanks for that! However, we are curious what the Thursday Pools warranty policy is. Also, do you have any other stories to share that will help us feel better about being swimming pool novices? We could use a chuckle today.

Signed-

Embarrassed in Elmore


Dear Embarrassed–

Believe me, you have absolutely no reason to feel badly. We all do the best we can, and some lessons are just learned the hard way.  However, since you’ve asked for a chuckle today, I’m happy to oblige. I do have a few stories up my sleeve from my years in the fiberglass pool biz.

We all have been told at one time or another by friends, teachers, and parents that there are no silly questions, just silly answers. In some circumstances, I believe there are both. To say a question or an answer is silly, can be embarrassing, and hurtful to whoever said it or asked it. Most of the time, we are not instructed completely, or the terminology used is completely foreign to us. I personally have that problem when talking to my grandson about computers. He is talking RAM, operating systems, and a whole myriad things that I have no idea what he is explaining to me.

Unfortunately, sometimes we just don’t completely communicate things we are familiar with to those who don’t. I also sometimes mistakenly think that new customers understand how things work. These are some of the things that people actually do that are our fault for not being specific when giving advice. On the other hand, people say and do some pretty funny things. Here are a few of my favorites:


SIMPLY SHOCKING.

I once had a new homeowner call me with a water problem. He said the water just didn’t sparkle and looked a little cloudy. I asked when the water had last been tested. He said they’d gone to the pool shop and were told to put some bags of shock into the pool. They did that, and it didn’t help. They were then advised to put two more bags in, but the water didn’t improve. I stopped by to troubleshoot thinking that there may be an issue with their filtration equipment. What did I find? The bags of shock laying on the bottom of the pool unopened. We fished them out with their dip net, OPENED THEM and poured the chemicals into the water. The customers’ response was, “We wondered how long it would take for those bags to dissolve!”


RECYCLING IS NOT ALWAYS A GOOD THING.

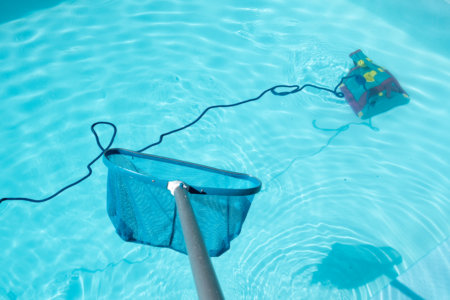
One customer was determined to save on water costs. So, he decided to put the backwash hose into the pool when he was backwashing to save water. Guess what? When you’re using the same hose to pull dirt of the pool that you would use to put water into the pool, you’re going to PUT DIRTY WATER IN YOUR POOL.


SERIOUSLY BLUE.

Another customer loved the idea of having beautiful blue water when he looked out his window. He did not seem to understand that the beautiful blue color in a fiberglass pool comes from the color of the pool’s walls–not the water itself. He asked me if he could add blue food coloring to his water to achieve this effect. I said, “Well, unless you want your entire family to look like Smurf’s, I would not recommend it.”


NO “FEESHES” ALLOWED.

Once, while I was traveling, we stayed at a motel with a pool. They had a sign posted at the pool that warned, “Do not put fish in the pool.” Confused by this, I asked the maintenance guy if they were having trouble with people putting fish in the water. And he said “no,” but someone told him that the health department would shut down the pool if they found fish in it. He didn’t know why. I asked, “Is it possible they said feces, not fish?” And he said, “Oh yeah. That makes a lot more sense.”


OVERINFLATED.

One customer called me, very upset because he was having trouble with the tubes for his winter cover. Even though he had filled them, they were not holding his cover in place and were not inflating properly. (The word “inflating” was my first clue to his troubles.) After a minute or two on the phone, I realized he was trying to fill the WATER tubes with AIR. His reply was, “Well, I inflated every other darn thing my wife bought all summer–I figured I needed to inflate those too!”


LANDSCAPING THE POOL.

thursday pools warranty
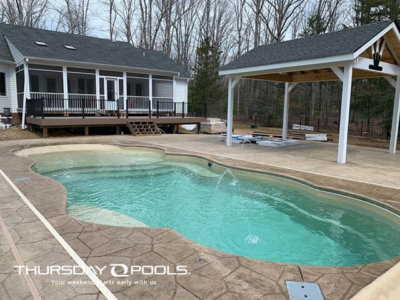
I got a call for a renovation bid from a gentleman who had bought a house with an existing pool. He let me know that the pool wasn’t working properly and wanted an estimate to get it black into swimming shape. I asked him if he could send a photo of the pool. When I saw the photo, my answer to his request for an estimate was, “A lot.”

Maybe when someone told the previous owner to landscape his pool, he didn’t understand that they meant AROUND the pool, not IN IT. It might have been time for the guy to get a new pool. So, the next time you’re worried that you’re not doing a good job with your pool maintenance, take a look at this picture, and I’m sure you’ll feel better right away.

Thanks for asking. I enjoyed this topic, and trust me, I can and will share more in the future.
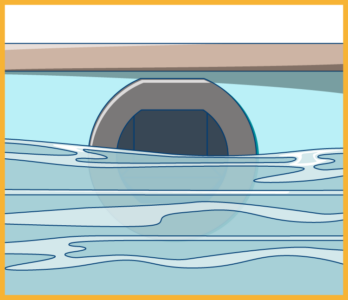
Until next time-

The General

DIY or Pool Maintenance Pro? Caring for Your Pool Takes a Little of Both

When it comes to taking care of your home or your car, there are certain maintenance jobs you can do yourself and other jobs for which you’d be better off hiring a pro. Also, there are regular maintenance tasks that you might choose to outsource because you feel your time is better spent doing other things. For example, you might choose to keep up with regular house cleaning but bring in the pros for window and gutter cleaning. And while you can keep your car clean and filled with gas, you’ll probably need a maintenance pro when your car’s engine needs work. The same is true when it comes to your pool.

pool maintenance

Inground pool owners know that proper pool maintenance is key to the longevity of their pools. They should also know that bringing in some help from a qualified pool maintenance pro near them is a smart way to go, whether it’s for regular weekly pool maintenance or bigger jobs, like annual openings and closings or pool equipment repair.

Whether you’re a do-it-yourself type or a big believer in delegation, as a pool owner YOU are ultimately responsible for the care of your fiberglass pool and no one will care more about your investment than you. Here are some things to think about when you’re considering whether to do it yourself or bring a pool maintenance pro on board.

  1. Read and learn. Be sure to take the time to read your pool manufacturer’s owner’s manual along with any equipment manuals that may come along with your pool project.  Many pool service companies offer “pool schools” and other opportunities for education. Take advantage of every opportunity you can to learn more about pool maintenance until it becomes second nature. Become as much of an expert as you can be on your pool and water chemistry. It can save you time and money down the line.
  2. Get real. Quick dip test strips are fine to get a big picture result on your water balance, but you need a real test kit for ongoing water chemistry testing and you need to understand how to use it. Get yourself a real water testing kit, such as Taylor 2000 Complete and learn how to interpret your water testing results.
  3. Get on a schedule. As a pool owner, you should be ready to spend just a little bit of time on the maintenance of your pool daily. Yes. That says daily. The water in your pool is changing constantly with heat, rain, evaporation and use. Even if you’ve brought on the services of a pool maintenance pro, you’ll need to keep on top of your water chemistry daily to ensure your water quality doesn’t sway too far from acceptable levels between regular weekly services.
  4. Keep it clean. As a pool owner, you should be willing to become knowledgeable enough to take on routine maintenance such as removing debris from skimmer baskets, cleaning the scum line, preparing your pool for closing, performing water chemistry testing and adjusting chemicals to achieve a balanced pool. Tasks like vacuuming the pool can be made easier with a robotic pool cleaner. If you’re comfortable with these regular “housekeeping” chores, your pool maintenance pro can keep an eye on bigger picture items with weekly service and alert you to any issues they might anticipate.
  5. Bring in the pros. Even veteran pool owners know that there are times, other than regular weekly service, when they need to bring in pool maintenance pros. Pool openings and winterizations need to be done properly to ensure your pool starts the season off right and finishes in good shape for next year. Also, electrical issues, missing, broken or cracked drain covers, equipment malfunctions and automatic pool cover system installations and repairs are best left to those who are experienced in working on them and have the proper tools to service them to keep the warranties in force.


Failure to properly care for your pool, in particular, failing to maintain good water chemistry, can result in damage any pool’s surface, whether it’s fiberglass, vinyl or gunite, and shorten the life expectancy of equipment. The best way to ensure that your pool will be in great shape for years to come is to take a two-pronged approach of learning as much as you can about pool maintenance and enlisting the help of a pool maintenance pro near you to bridge the gap between what you can and can’t do yourself. Then, the only thing left to do is sit back, enjoy your crystal clear water and take a swim!

Ask the General: Where do I start with Winter Pool Maintenance?

winter pool maintenance

Dear General-

Given that the stores here in the Midwest have giant bags of Halloween candy for sale in every aisle and Christmas trees in the window, I have to imagine that I’m supposed to be closing my pool. However, they’re predicting a mild winter this year! Can’t I just take my chances on the weather and keep it open a bit longer?

-In Denial in Danville


Dear Denial-

I’ve been around the block a few times, and here’s what I’ve learned. You can’t fool Mother Nature. Here in the Midwest, it’s 87℉ one day and 43℉ the next. Meanwhile, it’s snowing in North Dakota with hurricanes in Florida and tornado warnings all across the southern states. So let’s just say it isn’t exactly pool weather. We can’t control any of that, but what we can do is protect our investment, regardless of where we live, to make sure our pools weather the winter and are swim-ready in the spring. So let’s take a look at the best winter pool maintenance strategies, regardless of where you live.

  • Moderate Climates: If you’re a lucky duck who lives in the Sun Belt or anywhere you’re able to swim outside year-round, you just have to keep up your regular routine. I’m talking about water chemistry, backwashing your filters and keeping your pool and cover clean. Because you don’t have the cyclical maintenance that those of us in the cooler climes do, you need to create an annual checklist for yourself to inspect the systems and safety of your pool. Consider having a pool maintenance pro near you visit on a regular basis over the winter months if you tend to swim less when the temps dip down, so your pool maintenance doesn’t fall into the “out of sight, out of mind” category.
  • Semi-Cold Climates: This is where it gets tricky. You’ve left your pool open in previous years and it’s been fine, but no two winters are alike. They say that as long as water is running, the piping probably won’t freeze. That’s like saying, “If you speed down a deserted road, there probably won’t be a cop to give you a ticket.” You’re just taking a calculated risk. I’ve seen smaller lines freeze and crack on pool equipment over the years. The only way to be 100 percent sure your pool will weather the winter is to have it properly closed. Check with your local pool maintenance pro and see what other people in your area are doing. Ultimately, the decision is up to you.
  • Cold Climates: If you’ve read my prior pool maintenance posts about how to avoid pool maintenance mistakes, you understand the importance of correctly closing your pool. Hear my words: It’s mid-October. If you haven’t closed your pool yet, now is the time. You should start preparing to close your pool in early fall and have it fully winterized before trick-or-treat time rolls around.

And here’s a cautionary tale for you: I once had a customer who decided he would leave his pool open all winter. I told him straight up that he was asking for trouble. He said he could afford to run the heater all winter and the forecast called for a mild winter, so he was going to take a chance. December was okay (even though he couldn’t see the pool water for all the steam coming off of it). But January was another story. An ice storm took the power out while he was out of town and everything started to freeze including about a half-inch of his pool water. Guess who got an emergency phone call when he got back? We had to break through ice to winterize that pool. It was the most brutal pool closing I ever did. Fortunately, his pool survived, but the moral of the story is this: The General is always right. I’m kidding. Obviously, the moral is to winterize your pool correctly, every fall, whether you’re in denial or not. It’s just not worth the risk. Winter pool maintenance is important.

winter pool maintenanceOnce your pool is winterized, it’s very easy to take care of until you reopen it in spring. Depending on where you live and what your pool maintenance pro recommends, you might need a mid-winter boost of chlorine, especially if the weather stays mild. Other than that, just replace any leaky water tubes on your winter cover (if you don’t have an automatic safety cover), keep water and debris off the cover as best you can, and take a peek out the window every once in a while to make sure all is well. Enjoy the holiday season, spend some time with the family and ask Santa to bring you some new pool toys. Spring will be here before you know it.

Now, with my pool closed and the winter pool maintenance taken care of, it’s time to relax and watch some college football. Who’s got the popcorn?

Until next time –

The General


Who is The General?

The man, the myth, the legend….we just call him The General. His organized, systematic approach to pool installations over the years had his crew members calling him “The General” and it stuck. The General has over 30 years’ experience in the pool and spa industry, working for one of Pool and Spa News’ “Top 50 Pool Builders.”

Over that time, he designed, sold, project-managed and installed over a thousand inground swimming pools. As a pool owner himself, he’s the perfect authority to give you the inside scoop, with amazing tips and tricks to make pool ownership a breeze!

How to Close a Pool For Winter

HOW TO CLOSE A POOL FOR WINTER

closing poolThis too, shall pass. For those of us who live for the juxtaposition of the warm sun and luxurious cool pool water while living in a state with four seasons, waiting out the winter is a necessary evil. And making sure you are ready to enjoy your pool as soon as possible means closing your pool properly for the winter. If you live in a state with a freeze/thaw cycle, you may be wondering, “What does a pool closing include?” Some questions to consider when learning how to close a pool for winter may include:

  • How do you know when to close the pool for the winter (i.e. what month do you close a pool?
  • Why is winter water level maintenance important? 
  • How far down do you drain your pool for winter? How low should pool water be in winter? How high should pool water be in winter? And can you winterize the pool without draining?
  • What to put in the pool before closing? What chemicals do you need to close a pool for the winter? Do you need antifreeze to close the pool for winter? Should you shock the pool before closing?
  • What are the steps for closing a pool? How do you winterize a pool step by step? 


Let’s get to answering those questions!

How do you know when to close the pool for the winter? 

What month you close a pool for the winter depends on where you live and whether you have a pool heater or not. Many homeowners keep their pools open from Memorial Day to Labor Day, but if you have a pool heater, you could swim from April to October. You don’t want to close your pool too soon either because closing too early will increase the risk of algae growth. Fiberglass pools are naturally algae resistant, but vinyl liner and gunite pools are more prone to algae growth. So whether you will be swimming in your pool or not, for the health of the water you will be swimming in next season, make sure the water temperature is consistently below 65 degrees before stopping your filtration system and closing your pool.

Why is winter water level maintenance important? 

All inground pools have a common enemy. It’s called groundwater. Groundwater can wreak havoc on every type of pool if you allow its level to rise too close to the water level in your pool. In the winter months, while you’re busy watching football and baking Christmas cookies, you need to be sure that your water level underneath your winter cover doesn’t get out of whack with the groundwater around your pool, or you might be in for a world of hurt (and expense) when you pull that cover off in the spring. Here’s what might happen, based on the type of pool you have:

Vinyl Liner Pools: On a vinyl pool, if the water level inside the pool becomes lower than the water on the outside, the result is something we refer to as “floating the liner” which is not a good thing. It means that the liner is wrinkled and damaged beyond repair. A pool maintenance pro will have to drain the pool completely and replace the liner.

Fiberglass Pools: If the pressure of groundwater exceeds the pressure of the water inside your pool, your fiberglass pool shell might shift, crack, or float. Proper winterization and balancing inner vs outer water levels are the keys to protecting against these issues. Having additional add-ons to secure your fiberglass pool, like the Geo-Anchoring Pool System, can grant you additional support, as well. 

Gunite Pools: Groundwater pressure can cause cracks in gunite pools over the winter as well, resulting in the need for resurfacing. Ceramic tile along the waterline can also be adversely affected. The worst possible issue is flooding. If groundwater is not managed properly, a gunite pool can actually float.

How far down do you drain your pool for winter? 

Lowering your pool water can really cause some problems when Old Man Winter kicks it into high gear and Frosty the Snowman starts dancing across your pool cover. Every pool company has its own opinions and you’ll find conflicting information out there on the world wide web about the proper water level for winterization. 

When water freezes, it expands. The pressure of that expansion can crack your skimmer. Many pool professionals choose a Gizzmo, designed to absorb the pressure from ice expansion to prevent it from destroying the skimmer. It can be used in both above and inground pools

The Gizzmo has a plug on the top of it that is left open while air is blown from the pump area through the lines, clearing them of water. Most pool maintenance pros will then pour a gallon of antifreeze through the opening and into the piping to ensure the lines won’t freeze. Once the plug is screwed on tightly, water can’t get back into the piping.

We believe your best bet is to maintain your water level to just below the midway point of your skimmer. Doing so means you’re most likely to keep your water level in balance with groundwater throughout the freezing weather. One of the benefits of an automatic pool safety cover over a standard winter cover is the ease of being able to take a peek periodically at your water level.

What to put in the pool before closing 

If you live in a part of the country where winter temperatures are freezing or below freezing, you’ll need non-toxic antifreeze to protect your plumbing. Just like the summer, you should make sure your pool chemistry is balanced before winterizing.

Chemicals for winterizing your pool:

    • Shock. If your water chemistry is balanced before you close your pool there is no need to shock the pool at closing. During the winter months, your chlorine demand is much lower (if not zero) requiring little to no chlorine in your pool.  Generally the residual chlorine in your pool left over from the standard season is enough to combat algae growth through the fall if you do not close the pool until after the average temperatures are below 65 degrees.
    • Stain and scale treatment. If needed, add stain and scale treatment a day before closing. Adjusting the pool pH to 7.2-7.8 will prevent staining, scaling and algae growth, so you may need a pH increaser or reducer.
    • Winter algaecide. Winter algaecide is generally put in the pool at the time of closing.
  • Non-toxic antifreeze. This chemical is not actually put in the pool water. It’s used in the plumbing lines to prevent cracking and bursting.


What are the steps for closing a pool?

Whether you choose to do some (or all) of it yourself, or hire a pool professional to winterize your inground pool, there are certain steps you’ll want to take to ensure a happy opening in the spring.

Step 1: Clean your pool.

Remove all debris, brush the pool’s walls and vacuum.  


Step 2: Balance water chemistry.

Test the water and adjust with the proper chemicals to reach the following levels:

  • CHLORINE RESIDUAL – 1.0 TO 3.0 PPM
  • PH LEVEL – 7.2 TO 7.6
  • TOTAL ALKALINITY – 80 TO 120 PPM
  • CALCIUM HARDNESS – 150 TO 200 PPM (Note: if you own a fiberglass pool, be sure to avoid using Calcium Hypochlorite.)
  • CYANURIC ACID (CHLORINE STABILIZER) – 30 TO 50 PPM
  • METALS – 0 PPM
  • TDS – LESS THAN 1500 PPM (Note: if you have a salt system, maximum should be 1000 PPM above safe salt level)
  • SALT – 2700 TO 3400 PPM (Note: this is only necessary if using a salt generator)
  • LANGELIER SATURATION INDEX (-0.3 to +0.3). IDEAL IS 0. (Note: if you have a salt system, your saturation index should be between -0.2 and 0.2 to account for the additional corrosive characteristics of salt)


Step 3: Remove and store equipment/accessories.

Remove solar blankets and ladders from the pool, and store in a clean, dry area for winter. You’ll also want to remove and store skimmer baskets, wall fittings, floating lights, etc. 


Step 4: Achieve proper water level.

Using the filter pump or a submersible pump, you may need to lower the water level. Check your pool manufacturer’s manual or consult your pool dealer.


Step 5: Drain water from equipment.

Drain water from your pump, filter, heater and chlorinator by removing the drain plugs.  All water must be drained or blown out of your equipment so it doesn’t freeze, expand, and crack the equipment. If you have an inground pool, blow out the lines starting at the skimmer and then plug the lines at the pool using expansion plugs. As an additional safety measure, you may also use non-toxic antifreeze in the lines following manufacturer’s instructions.

Step 6: Cover the pool.

A winter safety cover that fits tightly is needed. You may have a mesh safety cover or solid (non-perforated) cover. Mesh will allow water to seep into the pool, and a non-perforated cover will require you to use a cover pump to remove rain water and snow melt. 


Knowing how to close a pool for winter doesn’t mean you need to do it yourself. It’s good to know what goes into closing a pool for winter so you can be sure that it’s being done correctly. Always follow manufacturer’s instructions as not doing so may result in problems and a voided warranty.

How to Avoid Common Pool Maintenance Mistakes

Whether you’re a new pool owner or have owned one for years, proper pool maintenance ensures your inground pool remains a sparkling oasis, extends its lifespan, and minimizes costly repairs. If you’re a fiberglass pool owner, you probably have heard that fiberglass pools are the lower maintenance option among pool types. However, lower maintenance does not mean no maintenance. The following tips can help you avoid the common mistakes people make when caring for their inground pool.

Video 1


Tip 1: Mind your Water Balance 

Failure to regularly monitor your pool’s water balance is probably the most common (and costly) mistake. Clear water does not inherently mean balanced water. Water can appear crystal clear while individual factors are in range but still out of balance. Unbalanced water can cause permanent damage to the inground pool shell. 

Test your water frequently. You’ll get the best accuracy with a high-quality test kit instead of test strips. Alternatively, you can take your water sample to a pool supply store for testing. It’s important to note that temperature affects water balance, so don’t leave your water sample in a hot car while you run errands. Take the sample directly to the store after collecting the water.  

We recommend using the Langelier Saturation Index (LSI) to balance your pool’s water chemistry. You can more easily do this via The Orenda Calculator™ on your smartphone or computer. See also our “water balance cheat sheet” for guidance on properly maintaining your fiberglass pool’s water chemistry. For Thursday Pools’ fiberglass pools, pair these resources with our owner’s manual, which provides information, including our recommended water chemistry levels for comparison, what pool maintenance chemicals to avoid, and more.


Tip 2: Backwash Regularly

Many pool owners start the season off by backwashing their filters once per week. As the season progresses, they often aren’t as dedicated to it. Your filter plays an essential role in the continued enjoyment of your pool, and proper backwashing can reduce your pool maintenance costs in the long run. Some reasons you should backwash regularly include the following.

  • Efficiency: A clean filter is more effective at trapping debris. A clogged filter can’t perform efficiently, putting more strain on your pool pump and reducing its lifespan.
  • Water Quality: Regular backwashing helps maintain clear and sanitary pool water. A dirty filter can harbor bacteria and allow more contaminants to circulate into the pool.
  • Prevent Damage: Over time, excessive pressure from a dirty filter can cause damage to the pool’s filtration system. Regular backwashing helps prevent such issues.

It’s important to follow the specific guidelines provided by your filter’s manufacturer, as different types of filters (such as sand, DE, or cartridge) might have different needs and procedures for backwashing.

Backwashing too frequently can damage the filter, so use your pressure gauge reading to know when to backwash. Typically, you should backwash when the pressure gauge on the filter reaches 8-10 PSI (pounds per square inch) over the normal operating pressure. The standard operating pressure varies by filter, so knowing your baseline pressure when the filter is clean is essential.


Tip 3: Keep Up Your Water Level 

Maintaining the water level at the midpoint of the skimmer opening allows your pool’s systems to operate correctly. The skimmer is designed to pull debris from the pool’s surface before it sinks to the bottom of the pool, becoming harder to remove. If the water level is too high, the skimmer door may not work correctly, reducing its efficiency at collecting surface debris. If the water is too low, the skimmer may suck in air, which can lead to airlocks or damage the pool pump by causing it to run dry.

The proper water level also provides balanced circulation. The pool pump must pull water through the skimmer for filtration and chemical treatment. Maintaining the correct level helps ensure that the water circulates properly, distributes chemicals evenly, and keeps the temperature consistent throughout.

While you’d have to go lower than the skimmer, in fiberglass pools, a water level that drops too low can cause the fiberglass wall panels to warp or bulge from ground pressure. In extreme cases, if a fiberglass pool is emptied or the water level is significantly reduced, there is a risk that the pool can begin to “float” or shift out of position. This is due to groundwater pressure pushing against the relatively lightweight fiberglass structure, which can lead to major structural damage. 


Tip 4: Pay Attention to What You Put in Your Pool

Maintaining an inground pool involves using specific chemicals and tools that are compatible with its construction to ensure longevity and preserve the quality of the pool surface. Here’s a breakdown of what’s generally recommended and what should be avoided for fiberglass pools:

Good Chemicals for Fiberglass Pools

  1. pH Balancers: Keeping the pH level between 7.2 and 7.6 is crucial. To maintain this balance, use pH increasers (soda ash) or decreasers (muriatic acid or sodium bisulfate) are acceptable.
  1. Alkalinity Increasers: Baking soda (sodium bicarbonate) is commonly used to maintain total alkalinity, which should be kept between 80 and 120 ppm (parts per million) to stabilize pH levels.
  1. Calcium Hardness Increasers: Fiberglass pools require less calcium than concrete pools. The ideal range is around 150 to 200 ppm. Use calcium chloride sparingly to adjust levels when needed
  1. Chlorine: Keep total chlorine at 1 to 3 ppm. When your water is balanced to LSI, you will need less chlorine. High chlorine levels can damage the gelcoat finish over time.
  1. Non-Copper Algaecides: Avoid algaecides that contain copper, as they can stain the fiberglass. Look for polyquat algaecides, which are safe for fiberglass.

Harmful Chemicals for Fiberglass Pools

  1. Completely avoid Calcium Hypochlorite (Cal Hypo), as it can cause scaling and damage to the gelcoat.
  1. Avoid “shocking” the pool with high doses of chlorine, especially if not diluted properly, as it can lead to discoloration and damage to the fiberglass surface. 
  1. Copper-based algaecides can stain fiberglass surfaces, leading to blue-green stains that are difficult to remove.

Good Tools for Fiberglass Pools

  1. Soft-Bristle Brushes: Use soft nylon brushes to clean the pool’s sides and bottom. Fiberglass surfaces are relatively delicate, and using soft brushes will prevent scratches.
  1. Manual or Automatic Cleaners: Ensure that any automatic pool cleaner is suitable for fiberglass pools, typically those that do not require connection to the pool’s filtration system and operate gently.

Tools to Avoid in Fiberglass Pools

  1. Never use wire brushes or abrasive tools, as they can scratch and damage the gelcoat finish.
  1. Some heavy-duty vacuums designed for concrete pools can be too abrasive for fiberglass surfaces.

When maintaining a fiberglass pool, following the manufacturer’s specific recommendations for chemicals and cleaning tools is crucial.


Final Thoughts

Keep a regular pool maintenance schedule. As with many things in life, consistency is vital. Developing a regular, thorough, and routine maintenance schedule helps keep your pool in tip-top shape. Above all, the most significant maintenance mistake is not doing maintenance.

How To Choose the Best Pool Maintenance Professional

pool maintenance professionalThe greatest joys of owning a swimming pool include the hours of relaxation and swimming in crystal clear water. Proper water chemistry, regular cleaning and systems maintenance for your inground fiberglass pool is essential to keep your pool systems running smoothly and ensure a lifetime of worry-free pool enjoyment. It’s important to find a good pool maintenance professional near you who you can trust to assist you in keeping your pool in tip-top shape so you can sit back and enjoy your investment. They’ll also be your expert guide when it’s time to close your pool for the season. To ensure you’ve got the best person for the job, here’s a list of things to do as you’re searching for and evaluating pool maintenance pros in your area.


  1. Ask for recommendations. Ask your local pool installer and any friends or neighbors who have a swimming pool who they use for their swimming pool maintenance and what their experience has been. If your pool installer also happens to offer maintenance and annual opening and closing service, that’s a great place to start. Since they’re the ones most familiar with your pool, they’re the best qualified to service it.
  2. Do your research. Whether you’re hiring a general contractor, an attorney or a pool maintenance pro, it’s important to check references and reviews. Check out their Facebook pages as well as their reviews on Google and Yelp. Look for a quantity of ratings and an average score of at least 4 out of 5.
  3. Check out their website. Ask questions about their pricing and make sure you understand everything that’s included in their service packages. Does their opening and closing service include inspections of your pool’s systems? Do they have a service contract that might save you money over time?
  4. Weigh their experience. How long has their company been in business? Your inground swimming pool was a big investment–you want to entrust its care to someone who’s seen all the potential issues that might arise in terms of water balance, system troubleshooting and equipment repair and replacement. Most pool maintenance pros make more than 60 pool visits per week, so they’ve seen it all.
  5. Don’t take chances. Proper maintenance of your pool’s water chemistry and systems is essential to keep your pool in optimal condition for years to come. Don’t take a chance on a brand new company, or entrust your pool’s maintenance to someone who does it part-time or as an add-on service with other outdoor services unless you have gotten glowing references for them. If their pricing sounds too good to be true, it probably is.


pool maintenance professionalProper care of your pool, including weekly skimming, vacuuming, chemical adjustment and filter cleaning is essential to extend the life of your pool and will help you save operating costs over time. Weekly service from a pool maintenance pro is nice to have, but it isn’t enough to ensure correct water chemistry– that needs to be monitored more than just once a week. Every pool owner should know how to check their pool’s water chemistry and do it a couple of times during the week to make sure their pool maintenance pro is on track. Pool service companies sometimes over-chlorinate pools (to above 3 ppm) to be on the safe side, but over-chlorination is just as bad as under-chlorination, so pool owners should take the lead on monitoring water balance to ensure their water is healthy and safe for their families.

Your attention to your pool’s care, along with the services of an inground fiberglass pool maintenance pro will give you the peace of mind that you’ll be able to enjoy your pool for years to come. If you don’t currently have an inground fiberglass pool but are thinking of getting one, it might be time to stop dreaming and start swimming.

Ask the General: How Do I Start Preparing to Close my Inground Fiberglass Pool?

Dear General;Preparing to close my inground fiberglass pool

Help! I looked out the window this morning and a single, orange maple leaf was floating in my pool. That has to mean that swim season is coming to an end, which is truly a bummer. However, I know that there’s still a little bit of swim time left, so I’m going to make the most of it! In the meantime, what should I be doing to start getting ready to close my pool? (Even if I’m in denial that I really have to do it.)

Signed; Wistful in Wisconsin


Dear Wistful;

I feel your pain. For those of us who live in a seasonal climate, there unfortunately comes a time when we have to winterize our pools for the year. I have always thought of fall as the time we start counting the days until we can open the pool again. We usually close our pool in mid-September and open it back up in mid-April. I’d like to keep it open longer, but my neighbor has a huge maple tree and it’s a lot easier to get the leaves and helicopters (as my kids used to call them) off the cover than it is to clean them out of the pool.

As the swim season here in the Midwest winds to a close, here’s a list of things you can do now to make sure your pool closing goes smoothly and you’re ready to make a splash as early as you can next year.

  1. Save the date. As soon as the season nears its end, schedule a closing date with your service company (and, as an extra tip, get your winter coat cleaned while you’re at it– you’ll thank me later.) Much like waiting until February 13th to order roses for your sweetie, if you wait until the week you want to close your pool to schedule a closing, you might be out of luck.
  2. Balance your H2O. Be sure to have your water chemistry balanced. All pool stores have winterization kits available, but if you’d rather leave it to the pros, have your pool service company come out and test your water prior to closing. Balanced water at the end of the season means a better chance of pulling off the cover to find clean water next year.
  3. Get your gear ready. Start now to round up all of the winter plugs, skimmers, maintenance equipment and other gizmos your pool service company will need to winterize your pool. Hopefully, you’ve stored them all in one location so you don’t have to tear the pool house apart to find them.
  4. Close it clean. It’s really important to close a clean pool. Vacuum up all the dirt and debris, clean the water line and backwash the filter prior to closing your pool. If you have a cartridge filter, your service tech will remove it.
  5. Cover it up. I strongly recommend automatic pool covers. They add a huge level of convenience in all seasons and give you the peace of mind that your pool will be tightly sealed, safe and clean. If you don’t have an automatic pool cover, consider getting one installed prior to closing the pool.
  6. Pick up your toys. As you deflate your rafts and gather all the other toys you have collected over the summer, give them a good cleaning and store them in an orderly fashion. While you’re at it, round up your lawn chairs, tables and umbrellas and give them a good cleaning too. Ask your pool store about advice on proper protection for diving boards, slides, handrails and ladders. My slide can’t be removed, so I wax it for protection over the winter. I do remove my diving board and I store it with the handrails, ladder, safety rope and all the other pool toys. Store all of your accessories is in a clean, dry spot in your pool house or garage.
  7. Keep chemicals safe. Leftover chemicals must be stored with with their lids tightly sealed in a well-ventilated space away from furnaces and other sources of heat. Certain chemicals must be stored away from other chemicals too, so consult your pool service professional to make sure you’ve got everything tucked away safely for next year.

preparing to close inground fiberglass poolIf your kids are like mine used to be, they’re looking forward to Halloween, Thanksgiving, winter break, and Santa Claus right now. But come early March, they’ll be marking off the days on the calendar until swim season starts again. However, summer isn’t quite over yet, so stop reading this and go enjoy your pool while you can.

Until next time –

The General


Who is The General?

The man, the myth, the legend….we just call him The General. His organized, systematic approach to pool installations over the years had his crew members calling him “The General” and it stuck. The General has over 30 years’ experience in the pool and spa industry, working for one of Pool and Spa News’Top 50 Pool Builders.”

Over that time, he designed, sold, project-managed and installed over a thousand inground swimming pools. As a pool owner himself, he’s the perfect authority to give you the inside scoop, with amazing tips and tricks to make pool ownership a breeze!

Ask the General: How to Backwash a Sand Filter in My Fiberglass Pool?

Dear General;How Do I Backwash the Sand Filter in My Fiberglass Pool

I love my fiberglass pool, but here’s my problem. I don’t understand how to backwash a sand filter. I keep my pool clean and add all the chemicals I’m supposed to, when I’m supposed to. What is backwashing, and WHY do I have to do it to my sand filter?

Signed;

Bad Backwasher in Bainbridge


Dear Bad Backwasher:

Funny you should mention bad back(washing), as I’m writing this with my feet propped up and an ice pack on my back. I’d like to tell you that I pulled something doing a triple Lindy off the high board into the pool, but the truth is, I hurt my back bending over to tie my shoe. The General’s not as young and spry as he used to be. My point is, much like tying a shoe, the simplest things can cause a lot of pain. Which brings us to your learning how to backwash a sand filter.

If you want to talk about pain (which clearly I do because I’m in it), let’s talk about the pain of paying for extra chemicals to clear up a pool that got cloudy due to poor circulation. Why might you have a clogged filter? Failure to backwash your sand filter. You can religiously add chlorine to the chlorinator, check its settings, sweep down the walls of the pool, empty skimmer baskets, vacuum dirt and debris from main drains, do water tests, maintain the correct water level and clean the steps going into the pool, but if you forget about the cleaning the filter, your pool water is going to get cloudy. Nobody wants that.

Pool filters

There are three available types of pool filters: sand, diatomaceous earth (DE) and cartridge. Sand filters are the oldest form of swimming pool filtration. They are particularly good at catching microscopic particles like algae and phosphates and need to be backwashed about once a week. Sand filters require very little maintenance, but the sand must be replaced about once every 2-4 years.

What is backwashing?

Backwashing simply means running water backwards through the filter to lift the dirt off the top layer of sand. Your pool pump moves the water into the top of the filter and then evenly distributes it across the surface area of the sand bed. Then, it pushes the water to the bottom of the filter. By the end of the process, the water has washed the debris out of your filter, readying it to effectively filter your pool water again.

How to backwash your sand filter

Backwash process

Things to watch out for when you’re backwashing

  • Sand in your pool.  If you notice sand in your pool during or after backwashing, you might have cracked of laterals or piping inside the filter or you might also have too much sand in the filter. The space from the top of the filter to the beginning of the sand line is called “free board.” This space is essential to allow you to backwash without having sand come out of the filter.
  • Too much of a good thing. While backwashing is essential, it is possible to do too much of a good thing. Turn the hose off as soon as your water runs clear. Prolonged backwashing of your sand filter can cause “channeling.” This is a situation in which channels develop down the sides inside the filter. When this happens, water will be able to bypass the sand altogether and this will essentially defeat the whole purpose of your sand filter.

As with all aspects of your pool’s operation and maintenance, I recommend reading the instructions on how to backwash a sand filter that are typically found on the filter, as each model varies slightly. Your filter and your pump are the backbones of your pool. It’s important to pay equal attention to both of them. A failure of either will cause you pain (and, of course, money.)

Speaking of pain, it’s time for me to grab a float, walk SLOWLY AND CAREFULLY into my pool, relax, and rehabilitate my own back.

Until next time–

The General


Who is The General?

The man, the myth, the legend….we just call him The General. His organized, systematic approach to pool installations over the years had his crew members calling him “The General” and it stuck. The General has over 30 years’ experience in the pool and spa industry, working for one of Pool and Spa News’ Top 50 Pool Builders.”

Over that time, he designed, sold, project-managed and installed over a thousand inground swimming pools. As a pool owner himself, he’s the perfect authority to give you the inside scoop, with amazing tips and tricks to make pool ownership a breeze!

Ensuring Your Tanning Ledge is Properly Backfilled and Installed


Inground fiberglass swimming pools with built-in tanning ledges are heaven. They allow swimmers to lounge in just enough water to keep cool while still soaking up the sun’s rays. They really do offer the best of both worlds, and tanning ledges have rapidly become one of the most sought-after features in the fiberglass pool industry. Built-in tanning ledges are also great for kids and pets. Whether they’re swimmers or not, they can enjoy the water and relax on the shallow ledge. Add a bubbler to make a little splash, and you have the perfect backyard pool oasis.

However, for all the enjoyment built-in tanning ledges can bring to fiberglass pool owners, they’ve typically presented a challenge for pool builders. Properly backfilling underneath tanning ledges can be difficult. The tight spaces and voids they create at the transition areas are hard to reach, and the varying grades needed for excavation add time, money and headaches to the pool building process. And if it’s not properly backfilled and installed, a tanning ledge can have a hollow feel under your feet. Over time, the backfill can shift and settle under the tanning ledge and leave voids.

How can you be sure that your built-in tanning ledge will feel as sturdy and be as durable as the rest of your inground fiberglass pool? By making sure it’s properly installed. Pool builders have differing opinions about the best way to backfill underneath a tanning ledge. Some of the tanning ledge backfill strategies include:

  1. Getting creative. Getting the backfill material into all of the nooks and crannies under the built-in tanning ledge is difficult, so pool builders will need to get creative. They might use various tools to try to move the backfill material into the tight spaces. They will typically employ the smallest guy on the team to squeeze into the small spaces and move the stone around.
  2. Using the appropriate backfill material. A clean chip stone that is ½ inch in size or smaller will make it easier for your pool installers to move around and get into the tight spaces under the tanning ledge. While a larger stone can be used to backfill under a tanning ledge in a fiberglass pool, larger stones are harder to move around under the ledge.
  3. Excavating out the tanning ledge. When excavating the pool, it’s best for your pool installers to treat the tanning ledge as a separate pool bottom area with its own measurements for the excavation, diagonal and rectangle. It’s also important to consider freeze depths in your area; your chip stone material should be as deep as your frost line.
  4. Using a pier installation. Another option for supporting built-in tanning ledges is for your pool builder to install “piers” along the outside edges of the tanning ledge. This is done by excavating to a point where the pool installers can stack level blocks to form a pier, leveling the blocks front to back and side to side. They then lower the pool onto the pier. Asphalt shingles or any other non-biodegradable material can be used to shim up or fine tune the height. Piers should only be used for added support and leveling– the entire ledge must still be packed with backfill material.
  5. Using flowable fill. Flowable fill is a self-compacting, low-strength material with a flowable consistency. If your pool installers are familiar and experienced with flowable fill, it’s an option for those hard-to-reach areas under the tanning ledge. However, flowable fill is non-permeable and you must account for groundwater and ensure proper drainage.

If all of these strategies sound a little less sophisticated, even primitive, to you, it’s because they are. For years, these were the only options that pool builders had available to them to give support to the tanning ledges their customers were clamoring for. Not anymore.


The Thursday Pools Backfill Eliminator® 

The Backfill Eliminator is an exclusive Thursday Pools innovation that makes installing tanning ledge backfill eliminatora tanning ledge easier, faster and more economical and results in a stronger and more durable tanning ledge over time. While pool installers have struggled with the aforementioned methods of installing built-in tanning ledges for years, they no longer have to use any of these old strategies if you purchase a Thursday Pools Backfill Eliminator with your new inground fiberglass pool.

The Thursday Pools Backfill Eliminator is a specially fabricated structure that’s integrated into the bottom of your pool, allowing for sturdy and level installation. It provides lifetime structural support to the tanning ledge and one continuous slope for excavation, making it as easy to install as any other fiberglass pool.

The Backfill Eliminator’s structure also allows groundwater to flow freely under your pool, eliminating the possibility of stagnant water accumulating underneath or excess groundwater lifting the pool. And to make it even easier for installers, there’s an access point to reach plumbing during the installation process. The Backfill Eliminator works in tandem with Thursday Pools’ Geo-Anchoring Pool System which allows you to secure your investment by providing extra strength to the pool structure.

So, if the fiberglass pool of your dreams includes a built-in tanning ledge, consider a Thursday Pools fiberglass pool with a Backfill Eliminator. If you do, you can be sure that your inground fiberglass pool will bring you a lifetime of memories, fun and enjoyment.

Ask The General: How Do You Prime the Pool Pump?

The General tells you how to prime the pool pump Dear General;

Everyone keeps telling me I have to prime the pump for my fiberglass pool. That’s all well and good. My question to you is, how in the heck am I supposed to do it? And how do I know when it’s done?

Signed– In a Perplexed Pool Pump Priming Pickle in Peru.

Dear Perplexed;

No need to be in a pool priming pickle. Honestly, I get this question all the time. You’re not alone. Let’s break this down together.

First of all… Let’s take a look at how water circulation systems work.

The key, believe it or not, is atmospheric pressure. There are approximately 14 pounds of air pushing down on all of us all the time. That means there’s the same amount of pressure pushing down on the surface of your fiberglass pool water. Your pool pump has a something called an “impeller” that creates a low pressure area by spinning. It pulls water into it, and pumps it back into the pool.

A “closed system” means NO AIR

Here’s the secret that explains it all. Your pool needs to be a CLOSED system to operate. Your pump, all your piping and everything that’s involved with the transferring of water from the pool into the pump, to the filter and back into the pool has to be full of water with NO AIR. A closed system is one that has NO AIR in it. All you have to do is stop and think “Where can air be introduced into the system?” (Did I mention NO AIR?)  

Pool Pump Priming Checklist

Once we’re sure we have a closed system, check the following things:

  1. Check your water level. If there’s air coming through the skimmers (Remember NO AIR?) it will make you lose prime, so you need to ensure you have proper water levels. Normally, the ideal water level is about halfway up the middle of your fiberglass pool’s skimmer or a little higher.
  2. Check the skimmer’s “weir door”. The weir door is the little flapper in the mouth of the skimmer. If you see a clogged, full skimmer basket, clean it out.
  3. Clear debris from main drain and check the piping at the equipment area. Make sure there is nothing that can allow air in, even things like the cap on the pipe used for winterization. It may need to be re-Teflon taped. Unions and ball valves may also need to be tightened.
  4. Check the pump itself. Make sure pump is turned off, then take the lid off the pump basket, clean the pump basket and return it to the pump. Fill the basket with water and securely close the lid on the pump. Open the ball valves in front of the pump. (Before turning the pump on, I normally check the rest of the system to make sure the water can run through it.)
  5. Check the valves. Make sure the valves are in the positions recommended by the manufacturer (usually instructions are on the filter.) Some filters (such as cartridge filters) don’t have veriflow valves, but they all have starting instructions. If you can’t find the instructions, look online. 

Show time!

Once you’ve made sure everything is tightened, the return eyeballs (inlets) can allow water into your fiberglass pool, the drain plugs are secure, and the pump basket has been filled, it’s show time. Flip the pump switch. Did it start? If no, don’t despair, and don’t say bad words. It’s going to be okay.

Try this little trick:

Turn the switch off and check the GFI breaker in the electrical panel that controls the pump. Is it tripped? Flip the switch again. Are you in business now? Hallelujah!

Time to enjoy!

Now follow the manufacturer’s directions to put the system in “filter” mode. You will see the filter gauge rise to normal pressure. Water will be flowing into the pool, water will be spinning over the weir door into a full skimmer, no air will be coming out of the inlets, the pump basket will be clear of air, and you will have successfully primed the pool pump.

Now it’s time to grab a float and your beverage of choice and enjoy the pool.

Until next time…

The General


Who is The General?

The man, the myth, the legend….we just call him The General. His organized, systematic approach to pool installations over the years had his crew members calling him “The General” and it stuck. The General has over 30 years’ experience in the pool and spa industry, working for one of Pool and Spa News’ Top 50 Pool Builders.”

Over that time, he designed, sold, project-managed and installed over a thousand inground swimming pools. As a pool owner himself, he’s the perfect authority to give you the inside scoop, with amazing tips and tricks to make pool ownership a breeze!