Close your pool right in the fall to have a great spring!
They say all good things must come to an end. In the Midwest, that’s a sad but true reality for inground pool season. It’s nearing time to close the pool. To ensure a quick and easy spring fiberglass pool opening, close it properly in the fall. So, here’s a list of five fantastic tips to close your fiberglass pool right.
Balance your water chemistry. We recommend having your water tested by a professional. If your pool maintenance schedule is a little out of whack because you’ve been in it less since school started, achieving a properly balanced pool can take a couple of days, so don’t wait until the day before closing to check levels. While test strips are good for a quick dip test, you should have a professional do a complete water analysis. A complete water analysis will check all important chemistry levels including, but not limited to, total alkalinity, pH, free chlorine, total chlorine, calcium hardness, salt, stabilizer, metals and total dissolved solids. Remember, clean and sparkling pool water does not always mean that your pool water is properly balanced. Looks can be deceiving. Some of the prettiest pool water can be the most destructive.
Wipe down the scum line (or tile line.) Body oils, suntan lotions, and airborne contaminants can sometimes build up on the pool surface along the water line. These can easily be wiped away. Microfiber cloths work great. If necessary, you can use a mild detergent, fiberglass or vinyl cleaner. Remember to never use abrasive cleaners, automatic dish detergent, steel wool, metal scrapers, or other brushes or tools because they can cause permanent damage to your beautiful gel coat finish.
Give it a final clean. A few days before your closing, give your pool a final clean. Skim off any debris floating on the top and vacuum any debris or leaves that may have settled on the bottom of the pool. This is also an excellent time to rinse off your pool deck and automatic safety cover tracks.
Add your winterizing chemicals. The day before your pool pros are scheduled to come, add in your winterization chemicals. They’ll need several hours to circulate before your pump is shut off. Clean out your skimmer basket and remove any remaining debris that may be in the pool.
Tidy up. Take the time now to organize and properly store your chemicals. Give your deck furniture and cushions a good cleaning (or you might want to leave them out for any warm and sunny days still to come). Sort through the pool toys, noodles and floats. Toss any that you plan to replace next year and tuck the rest away.
That’s it! Once you’ve zipped through this list, you’ll be prepared for your pool pros to come and finish the job so you can look forward to an easy spring opening.
This too, shall pass. For those of us who live for the juxtaposition of the warm sun and luxurious cool pool water while living in a state with four seasons, waiting out the winter is a necessary evil. And making sure you are ready to enjoy your pool as soon as possible means closing your pool properly for the winter. If you live in a state with a freeze/thaw cycle, you may be wondering, “What does a pool closing include?” Some questions to consider when learning how to close a pool for winter may include:
How do you know when to close the pool for the winter (i.e. what month do you close a pool?
Why is winter water level maintenance important?
How far down do you drain your pool for winter? How low should pool water be in winter? How high should pool water be in winter? And can you winterize the pool without draining?
What to put in the pool before closing? What chemicals do you need to close a pool for the winter? Do you need antifreeze to close the pool for winter? Should you shock the pool before closing?
What are the steps for closing a pool? How do you winterize a pool step by step?
Let’s get to answering those questions!
How do you know when to close the pool for the winter?
What month you close a pool for the winter depends on where you live and whether you have a pool heater or not. Many homeowners keep their pools open from Memorial Day to Labor Day, but if you have a pool heater, you could swim from April to October. You don’t want to close your pool too soon either because closing too early will increase the risk of algae growth. Fiberglass pools are naturally algae resistant, but vinyl liner and gunite pools are more prone to algae growth. So whether you will be swimming in your pool or not, for the health of the water you will be swimming in next season, make sure the water temperature is consistently below 65 degrees before stopping your filtration system and closing your pool.
Why is winter water level maintenance important?
All inground pools have a common enemy. It’s called groundwater. Groundwater can wreak havoc on every type of pool if you allow its level to rise too close to the water level in your pool. In the winter months, while you’re busy watching football and baking Christmas cookies, you need to be sure that your water level underneath your winter cover doesn’t get out of whack with the groundwater around your pool, or you might be in for a world of hurt (and expense) when you pull that cover off in the spring. Here’s what might happen, based on the type of pool you have:
Vinyl Liner Pools: On a vinyl pool, if the water level inside the pool becomes lower than the water on the outside, the result is something we refer to as “floating the liner” which is not a good thing. It means that the liner is wrinkled and damaged beyond repair. A pool maintenance pro will have to drain the pool completely andreplace the liner.
Fiberglass Pools: If the pressure of groundwater exceeds the pressure of the water inside your pool, yourfiberglass poolshell might shift, crack, or float. Proper winterization and balancing inner vs outer water levels are the keys to protecting against these issues. Having additional add-ons to secure your fiberglass pool, like the Geo-Anchoring Pool System, can grant you additional support, as well.
Gunite Pools: Groundwater pressure can cause cracks in gunite pools over the winter as well, resulting in the need for resurfacing. Ceramic tile along the waterline can also be adversely affected. The worst possible issue is flooding. If groundwater is not managed properly, a gunite pool can actually float.
How far down do you drain your pool for winter?
Lowering your pool water can really cause some problems when Old Man Winter kicks it into high gear and Frosty the Snowman starts dancing across your pool cover. Every pool company has its own opinions and you’ll find conflicting information out there on the world wide web about the proper water level for winterization.
When water freezes, it expands. The pressure of that expansion can crack your skimmer. Many pool professionals choose a Gizzmo, designed to absorb the pressure from ice expansion to prevent it from destroying the skimmer. It can be used in both above andinground pools.
The Gizzmo has a plug on the top of it that is left open while air is blown from the pump area through the lines, clearing them of water. Most pool maintenance pros will then pour a gallon of antifreeze through the opening and into the piping to ensure the lines won’t freeze. Once the plug is screwed on tightly, water can’t get back into the piping.
We believe your best bet is to maintain your water level to just below the midway point of your skimmer. Doing so means you’re most likely to keep your water level in balance with groundwater throughout the freezing weather. One of the benefits of anautomatic pool safety coverover a standard winter cover is the ease of being able to take a peek periodically at your water level.
What to put in the pool before closing
If you live in a part of the country where winter temperatures are freezing or below freezing, you’ll need non-toxic antifreeze to protect your plumbing. Just like the summer, you should make sure your pool chemistry is balanced before winterizing.
Chemicals for winterizing your pool:
Shock. If your water chemistry is balanced before you close your pool there is no need to shock the pool at closing. During the winter months, your chlorine demand is much lower (if not zero) requiring little to no chlorine in your pool. Generally the residual chlorine in your pool left over from the standard season is enough to combat algae growth through the fall if you do not close the pool until after the average temperatures are below 65 degrees.
Stain and scale treatment. If needed, add stain and scale treatment a day before closing. Adjusting the pool pH to 7.2-7.4 will prevent staining, scaling and algae growth, so you may need a pH increaser or reducer.
Winter algaecide. Winter algaecide is generally put in the pool at the time of closing.
Non-toxic antifreeze. This chemical is not actually put in the pool water. It’s used in the plumbing lines to prevent cracking and bursting.
What are the steps for closing a pool?
Whether you choose to do some (or all) of it yourself, or hire a pool professional to winterize your inground pool, there are certain steps you’ll want to take to ensure a happy opening in the spring.
Step 1: Clean your pool.
Remove all debris, brush the pool’s walls and vacuum.
Step 2: Balance water chemistry.
Test the water and adjust with the proper chemicals to reach the following levels:
CHLORINE RESIDUAL – 1.0 TO 3.0 PPM
PH LEVEL – 7.2 TO 7.4
TOTAL ALKALINITY – 80 TO 120 PPM
CALCIUM HARDNESS – Less than 120 PPM (Note: if you own a fiberglass pool, be sure to avoid using Calcium Hypochlorite.)
CYANURIC ACID (CHLORINE STABILIZER) – 30 TO 50 PPM
METALS – 0 PPM
TDS – LESS THAN 1500 PPM (Note: if you have a salt system, maximum should be 1000 PPM above safe salt level)
SALT – 2700 TO 3400 PPM (Note: this is only necessary if using a salt generator)
LANGELIER SATURATION INDEX (-0.3 to +0.3). IDEAL IS 0. (Note: if you have a salt system, your saturation index should be between -0.2 and 0.2 to account for the additional corrosive characteristics of salt)
Step 3: Remove and store equipment/accessories.
Remove solar blankets and ladders from the pool, and store in a clean, dry area for winter. You’ll also want to remove and store skimmer baskets, wall fittings, floating lights, etc.
Step 4: Achieve proper water level.
Using the filter pump or a submersible pump, you may need to lower the water level. Check your pool manufacturer’s manual or consult your pool dealer.
Step 5: Drain water from equipment.
Drain water from your pump, filter, heater and chlorinator by removing the drain plugs. All water must be drained or blown out of your equipment so it doesn’t freeze, expand, and crack the equipment. If you have an inground pool, blow out the lines starting at the skimmer and then plug the lines at the pool using expansion plugs. As an additional safety measure, you may also use non-toxic antifreeze in the lines following manufacturer’s instructions.
Step 6: Cover the pool.
A winter safety cover that fits tightly is needed. You may have a mesh safety cover or solid (non-perforated) cover. Mesh will allow water to seep into the pool, and a non-perforated cover will require you to use a cover pump to remove rain water and snow melt.
Knowing how to close a pool for winter doesn’t mean you need to do it yourself. It’s good to know what goes into closing a pool for winter so you can be sure that it’s being done correctly. Always follow manufacturer’s instructions as not doing so may result in problems and a voided warranty.
Whether you’re a new pool owner or have owned one for years, proper pool maintenance ensures your inground pool remains a sparkling oasis, extends its lifespan, and minimizes costly repairs. If you’re a fiberglass pool owner, you probably have heard that fiberglass pools are the lower maintenance option among pool types. However, lower maintenance does not mean no maintenance. The following tips can help you avoid the common mistakes people make when caring for their inground pool.
Video 1
Whether you’re a new or seasoned pool owner, proper pool maintenance ensures your inground pool remains a sparkling oasis, extends its lifespan, and minimizes costly repairs. Fiberglass pools feature the lightest regular maintenance demands among all pool types, but “low maintenance” does not mean “no maintenance.” Taking a proactive approach and following a few simple tips can help you avoid common—and costly—pool maintenance mistakes.
Tip 1: Balance Your Water with Fiberglass in Mind
Failing to monitor water chemistry appropriately is one of the most frequent and frustrating mistakes pool owners make. Your pool water may look crystal clear, but that doesn’t mean its chemistry is in proper balance. Poor water chemistry balance can silently cause scaling, chalking, and permanent damage to your fiberglass pool’s surface.
To achieve water chemistry balance, fiberglass pool owners must focus on the factors that matter most:
Maintain pH between 7.2 and 7.4.
Keep calcium hardness less than 120 ppm. If calcium hardness reaches more than 120 ppm, use a chelating stain and scale control product.
Chlorine should stay between 1 and 3 ppm.
Use a stain and scale control product consistently.
Rather than relying solely on the Langelier Saturation Index (LSI), originally intended for concrete pools, proper fiberglass pool care depends on tight control of a few core values. By carefully managing calcium levels and avoiding high pH, especially in salt pools, you’ll help preserve the beauty of your gelcoat finish for the long term.
Use a high-quality test kit for the best results, or have your water tested professionally. Just be sure to take in water samples for testing promptly—exposure to heat, or a delay with the water sitting in a car for a few hours, can alter results.
For the most information and recommendations, refer to Thursday Pools’ Fiberglass Pool Care Guide and Owner’s Manual, which outline more details, target ranges, and chemicals to avoid.
Tip 2: Backwash Regularly
Many pool owners begin each swim season backwashing filters once per week, but frequency often fades as the summer progresses. Your filter plays an essential role in the continued enjoyment of your pool. Proper backwashing can reduce pool maintenance costs in the long run and encourage a healthy pool experience.
Efficiency: A clean filter is more effective at trapping debris. A clogged filter cannot perform efficiently, putting more strain on your pool pump and reducing the equipment’s service lifespan.
Water Quality: Frequent backwashing helps maintain clear and sanitary pool water. A dirty filter can harbor bacteria and allow more contaminants to circulate through the pool.
Damage Prevention: Regular backwashing helps prevent issues from dirty filters or excessive pressure that can cause long-term damage to the pool’s filtration system.
A clean, efficient filtration system improves overall water quality and helps keep your pool water looking and feeling great.
Tip 3: Keep Up Your Water Level
Maintaining the water level at the midpoint of the skimmer opening allows your pool’s systems to operate correctly. The skimmer pulls debris from the pool’s surface before it sinks to the bottom of the pool, where it becomes harder to remove. If the water level is too high, the skimmer door may not work correctly, reducing its efficiency at collecting surface debris. If the water is too low, the skimmer may suck in air, which can lead to airlocks or damage the pool pump by causing it to run dry.
A proper water level also promotes balanced circulation. The pool pump must pull water through the skimmer for filtration and chemical treatment. Maintaining the correct water level helps ensure water circulates, distributes chemicals evenly, and keeps the temperature consistent.
With fiberglass pools, maintaining a proper water level is also critical to prevent structural stress. Extremely low water levels can lead to wall bulging or floating due to groundwater pressure, which is why most manufacturers’ warranties are void if owners allow the water level to drop below the skimmer.
Protect your pool’s structure by consistently checking and maintaining your water level.
Tip 4: Be Selective About the Pool Chemicals You Use
Not all pool chemicals and tools are safe for fiberglass pools. Mistakenly using the wrong products can lead to staining, discoloration, and surface damage.
Good Chemicals for Fiberglass Pools
pH Balancers: Keeping the pH level between 7.2 and 7.4 is crucial. To maintain this balance, use pH increasers (soda ash) or decreasers (muriatic acid or sodium bisulfate).
Alkalinity Increasers: Baking soda (sodium bicarbonate) can help keep total alkalinity between 80 and 120 ppm to stabilize pH levels.
Non-Copper Algaecides: Look for polyquat algaecides, which are a safe alternative for fiberglass pools.
Most Chlorine Types: Keep total chlorine at 1 to 3 ppm. When your water’s chemistry is in LSI balance, you will need less chlorine. High chlorine levels (more than 5 ppm) can damage the gelcoat finish.
Harmful Chemicals for Fiberglass Pools
Calcium Hypochlorite: Completely avoid calcium hypochlorite, which is a form of chlorine that contains calcium, as well as calcium increasers and other products that contain calcium.
High-Strength Chlorine: Avoid “shocking” the pool with high doses of chlorine, which can lead to discoloration and damage to the fiberglass surface.
Copper-Based Algaecides: Avoid algaecides that contain copper, as they can damage fiberglass surfaces with blue-green stains that are difficult to remove.
Good Tools for Fiberglass Pools
Soft-Bristle Brushes: Use soft nylon brushes to clean the pool’s sides and bottom. Fiberglass surfaces are relatively delicate, and using soft brushes will prevent scratches.
Manual or Automatic Cleaners: Ensure your automatic pool cleaner is suitable for fiberglass pools.
Tools to Avoid with Fiberglass Pools
Wire Brushes: Never use wire brushes or abrasive tools, which can scratch and damage the gelcoat finish.
Heavy-Duty Vacuums: Some heavy-duty vacuums designed for concrete pools can be too abrasive for fiberglass surfaces.
Above all, the most significant pool maintenance mistake is not doing the necessary pool maintenance. Consistency is critical, so be sure to develop a regular and thorough schedule to keep your pool in great shape.
Looking for more information on fiberglass pool maintenance and mistakes to avoid? Explore Thursday Pools’ Ultimate Fiberglass Pool Maintenance Guide for a thorough look at everything you need to know.
Frequently Asked Questions About Avoiding Fiberglass Pool Maintenance Mistakes
How often should I test my fiberglass pool water?
Test at least once a week during swim season, and more often if your pool sees heavy use or weather shifts. In the off-season, monthly checks help prevent chemistry surprises. Consistent testing and chemical adjustments helps prevent “invisible” damage like chalki
What happens if I let my fiberglass pool water level get too low?
Low water levels can cause air to enter the skimmer, damage the pump, and even stress the pool structure. Always keep the water halfway up the skimmer opening to protect your pool.
Can I use the same chemicals in a fiberglass pool that I would use in a concrete pool?
Not always. Avoid calcium-based chlorine (like cal-hypo), calcium increasers, and copper-based algaecides. These can cause staining or surface damage in fiberglass pools. Instead, use liquid chlorine, non-copper algaecides, and fiberglass-safe balancers.
How often should I backwash my pool filter?
Backwash when your filter’s pressure gauge reads 8–10 psi higher than its clean baseline, which is often about once per week during heavy use. Regular backwashing keeps your system efficient, your water clear, and your pump from unnecessary strain.
What cleaning tools are safe for fiberglass pools?
Use soft nylon brushes, microfiber cloths, and pool cleaners designed for fiberglass. Avoid wire brushes, stiff bristles, or heavy-duty vacuums that can scratch or damage the gelcoat surface.
The greatest joys of owning a swimming pool include the hours of relaxation and swimming in crystal clear water. Proper water chemistry, regular cleaning and systems maintenance for your inground fiberglass pool is essential to keep your pool systems running smoothly and ensure a lifetime of worry-free pool enjoyment. It’s important to find a good pool maintenance professional near you who you can trust to assist you in keeping your pool in tip-top shape so you can sit back and enjoy your investment. They’ll also be your expert guide when it’s time to close your pool for the season. To ensure you’ve got the best person for the job, here’s a list of things to do as you’re searching for and evaluating pool maintenance pros in your area.
Ask for recommendations. Ask your local pool installer and any friends or neighbors who have a swimming pool who they use for their swimming pool maintenance and what their experience has been. If your pool installer also happens to offer maintenance and annual opening and closing service, that’s a great place to start. Since they’re the ones most familiar with your pool, they’re the best qualified to service it.
Do your research. Whether you’re hiring a general contractor, an attorney or a pool maintenance pro, it’s important to check references and reviews. Check out their Facebook pages as well as their reviews on Google and Yelp. Look for a quantity of ratings and an average score of at least 4 out of 5.
Check out their website. Ask questions about their pricing and make sure you understand everything that’s included in their service packages. Does their opening and closing service include inspections of your pool’s systems? Do they have a service contract that might save you money over time?
Weigh their experience. How long has their company been in business? Your inground swimming pool was a big investment–you want to entrust its care to someone who’s seen all the potential issues that might arise in terms of water balance, system troubleshooting and equipment repair and replacement. Most pool maintenance pros make more than 60 pool visits per week, so they’ve seen it all.
Don’t take chances. Proper maintenance of your pool’s water chemistry and systems is essential to keep your pool in optimal condition for years to come. Don’t take a chance on a brand new company, or entrust your pool’s maintenance to someone who does it part-time or as an add-on service with other outdoor services unless you have gotten glowing references for them. If their pricing sounds too good to be true, it probably is.
Proper care of your pool, including weekly skimming, vacuuming, chemical adjustment and filter cleaning is essential to extend the life of your pool and will help you save operating costs over time. Weekly service from a pool maintenance pro is nice to have, but it isn’t enough to ensure correct water chemistry– that needs to be monitored more than just once a week. Every pool owner should know how to check their pool’s water chemistry and do it a couple of times during the week to make sure their pool maintenance pro is on track. Pool service companies sometimes over-chlorinate pools (to above 3 ppm) to be on the safe side, but over-chlorination is just as bad as under-chlorination, so pool owners should take the lead on monitoring water balance to ensure their water is healthy and safe for their families.
Your attention to your pool’s care, along with the services of an inground fiberglass pool maintenance pro will give you the peace of mind that you’ll be able to enjoy your pool for years to come. If you don’t currently have an inground fiberglass pool but are thinking of getting one, it might be time to stop dreaming and start swimming.
When temperatures consistently fall below 65 degrees, it’s time to host the final pool parties of the season and start preparing to close your fiberglass pool. Preparing adequately for closing ensures a smooth transition into winter and a more effortless spring opening. To put your best foot forward, observe the following pool maintenance tasks to check off your list before winter.
Schedule Your Closing Date
Timing is crucial when it comes to pool closing. Contact your pool service company early to schedule a closing date. Taking a proactive approach to saving the date will help ensure you secure a spot before the busy closing season begins. Consider scheduling based on your climate and coordinate the date with other seasonal tasks to maximize efficiency. In colder climates, close the pool consistently before temperatures drop below freezing, typically between late September and mid-October. You may push closing to late October or early November in milder climates. If you live in an area with lots of falling leaves, you might want to close the pool earlier or use a cover to prevent debris buildup.
Properly balanced water will reduce the likelihood of algae growth and ensure cleaner water when you reopen the pool next year. Fiberglass pools are more algae-resistant than other types, thanks to their non-porous, smooth surface, which makes it harder for algae to attach and grow. However, if conditions are favorable, algae can still develop over winter, even in fiberglass pools. A stain and scale preventative product should also be added to protect the fiberglass surface during the off-season. When preparing for winterization:
Adjust the pH to a level between 7.2 and 7.4.
Adjust the alkalinity to 80 to 120 ppm.
Adjust the calcium hardness to below 120 ppm.
Add an algaecide according to product instructions.
Add stain and scale remover per product instructions.
Pool supply stores offer winterization kits that often include everything you need, including algaecide and stain and scale preventatives. However, many pool owners enlist the help of a professional service to test their chemistry, adjust the water’s chemical levels, and complete other winter pool maintenance tasks.
Gather Your Equipment
Take the time to inspect all necessary winterization equipment, including winter plugs, skimmers, and maintenance tools. For easy access, items should be stored in one location, such as a garage or shed, to minimize time spent searching for tools. It’s also a great time to inspect all the equipment you’ll use upon opening your pool in the spring. If anything needs repair or replacing, handle it before closing so it won’t hinder your ability to enjoy your pool when the swim season comes around again.
Clean the Pool Thoroughly
Before closing your pool, it’s important to clean it thoroughly. Vacuum the pool to remove dirt and debris, scrub the water line, and backwash the filter (or remove and clean the cartridge filter if you have one). A clean pool is vital for closing as it will help you and the professionals enjoy a smoother closing process. It will also ensure the water is cleaner when you open next season.
Invest in a Quality Pool Cover
A reliable winter pool cover will help maintain the integrity of your pool during the off-season. Some pool cover options include:
Solid Vinyl Covers with a Pump System: These covers are popular for winterizing because they are highly effective at blocking sunlight and preventing algae growth. They keep out debris and water. Look for covers with a built-in pump system to remove accumulated water on top.
Mesh Safety Covers: Mesh safety covers are durable and allow rainwater and melted snow to drain through, which can be convenient. However, they let some sunlight through, so they’re not ideal in areas prone to algae. If you choose a mesh cover, opt for one with tightly woven mesh to limit light exposure as much as possible.
Hybrid Covers: These combine the benefits of solid and mesh covers, providing more durability and sunlight blocking while allowing water to drain. They can be an excellent compromise for easy maintenance while reducing algae risk.
Winter Covers with Air Pillows (for Freezing Climates): Air pillows placed under a solid or hybrid cover help prevent ice from damaging the pool walls by relieving pressure from expanding ice. This combination is especially beneficial if you live in a colder climate with freezing winters.
Automatic Pool Covers: Automatic pool covers are durable, secure, and easy to use, providing a tight seal that keeps out sunlight and debris. They provide convenient year-round protection, are more expensive, and require a power source. However, they make checking your water levels and chemistry easier during the winter months and provide nearly instant safety in any season.
Store Pool Accessories Properly
Gather and clean all pool toys, floats, and accessories as you prepare to close. Deflate rafts and thoroughly wash them before storing them in a dry location, such as a garage or pool house. Additionally, according to manufacturer or pool professional advice, protect your diving board, slide, handrails, and ladders. For unremovable items, consider applying a protective wax for winter storage.
Safely Store Chemicals
Store any unused pool chemicals securely and safely to prevent accidents. It’s important to ensure that all chemical containers are tightly sealed to avoid leaks and spills. Store these containers in a well-ventilated area, away from heat sources such as furnaces or direct sunlight, as excessive heat can compromise the integrity of the chemicals. Additionally, store different types of chemicals separately. For instance, keep chlorine and shock treatments away from acids to prevent dangerous reactions. Consider organizing your chemicals by categorizing them, labeling each container clearly, and maintaining an inventory to track what you have. This organized approach enhances safety and makes it easier to find the chemicals.
Cherish the Days
As you prepare to tuck your pool away for winter, take a moment to look back on the memories you made this season. From lazy afternoons and lively pool parties to quiet swims at sunset, every splash holds a story worth sharing. Why not revisit the photos and videos you’ve captured, reliving those sun-soaked days. Let the anticipation of next season build, knowing that your winterizing preparations set the stage for more unforgettable poolside moments when warmer days return.
Everyone keeps telling me I have to prime the pump for my fiberglass pool. That’s all well and good. My question to you is, how in the heck am I supposed to do it? And how do I know when it’s done?
Signed– In a Perplexed Pool Pump Priming Pickle in Peru.
Dear Perplexed;
No need to be in a pool priming pickle. Honestly, I get this question all the time. You’re not alone. Let’s break this down together.
First of all… Let’s take a look at how water circulation systems work.
The key, believe it or not, is atmospheric pressure. There are approximately 14 pounds of air pushing down on all of us all the time. That means there’s the same amount of pressure pushing down on the surface of your fiberglass pool water. Your pool pump has a something called an “impeller” that creates a low pressure area by spinning. It pulls water into it, and pumps it back into the pool.
A “closed system” means NO AIR
Here’s the secret that explains it all. Your pool needs to be a CLOSED system to operate. Your pump, all your piping and everything that’s involved with the transferring of water from the pool into the pump, to the filter and back into the pool has to be full of water with NO AIR. A closed system is one that has NO AIR in it. All you have to do is stop and think “Where can air be introduced into the system?” (Did I mention NO AIR?)
Pool Pump Priming Checklist
Once we’re sure we have a closed system, check the following things:
Check your water level. If there’s air coming through the skimmers (Remember NO AIR?) it will make you lose prime, so you need to ensure you have proper water levels. Normally, the ideal water level is about halfway up the middle of your fiberglass pool’s skimmer or a little higher.
Check the skimmer’s “weir door”. The weir door is the little flapper in the mouth of the skimmer. If you see a clogged, full skimmer basket, clean it out.
Clear debris from main drain and check the piping at the equipment area. Make sure there is nothing that can allow air in, even things like the cap on the pipe used for winterization. It may need to be re-Teflon taped. Unions and ball valves may also need to be tightened.
Check the pump itself. Make sure pump is turned off, then take the lid off the pump basket, clean the pump basket and return it to the pump. Fill the basket with water and securely close the lid on the pump. Open the ball valves in front of the pump. (Before turning the pump on, I normally check the rest of the system to make sure the water can run through it.)
Check the valves. Make sure the valves are in the positions recommended by the manufacturer (usually instructions are on the filter.) Some filters (such as cartridge filters) don’t have veriflow valves, but they all have starting instructions. If you can’t find the instructions, look online.
Show time!
Once you’ve made sure everything is tightened, the return eyeballs (inlets) can allow water into your fiberglass pool, the drain plugs are secure, and the pump basket has been filled, it’s show time. Flip the pump switch. Did it start? If no, don’t despair, and don’t say bad words. It’s going to be okay.
Try this little trick:
Turn the switch off and check the GFI breaker in the electrical panel that controls the pump. Is it tripped? Flip the switch again. Are you in business now? Hallelujah!
Time to enjoy!
Now follow the manufacturer’s directions to put the system in “filter” mode. You will see the filter gauge rise to normal pressure. Water will be flowing into the pool, water will be spinning over the weir door into a full skimmer, no air will be coming out of the inlets, the pump basket will be clear of air, and you will have successfully primed the pool pump.
Now it’s time to grab a float and your beverage of choice and enjoy the pool.
Until next time…
The General
Who is The General?
The man, the myth, the legend….we just call him The General. His organized, systematic approach to pool installations over the years had his crew members calling him “The General” and it stuck. The General has over 30 years’ experience in the pool and spa industry, working for one of Pool and Spa News’ “Top 50 Pool Builders.”
Over that time, he designed, sold, project-managed and installed over a thousand inground swimming pools. As a pool owner himself, he’s the perfect authority to give you the inside scoop, with amazing tips and tricks to make pool ownership a breeze!
It gets cold in North America, even in our most tropical climates. Depending on where you live, nighttime cooling or winter weather can interfere with an enjoyable swim. That’s why before purchasing, buyers commonly ask, “can a fiberglass poolbe heated?” The answer is yes: like other inground pools, you can heat a fiberglass pool. In fact, they tend to heat faster and retain heat longer than other pool types. Let’s explore the options for heating a pool.
Gas Pool Heaters
Gas heaters are relatively more cost effective upfront, but can be expensive to operate. While gas pool heaters will heat your pool quickly and are durable in inclement weather, they wear out faster than other pool heating options. They are an ideal option if heating your pool as quickly as possible is an important feature.
Gas heaters run approximately $1,500 to $6,000 for a typical residential inground swimming pool on average, and installation typically costs another $500 to $1,500. Operating the heater may run around $200 to $400 per month, depending on how frequently you run it and the utility prices in your area.
Gas Heater Pros: heats up fast
Gas Heater Cons: more expensive to run and don’t last as long
Propane Pool Heaters
If your home doesn’t have a natural gas supply line and you still want a gas heater, a propane pool heater is an alternative. Propane works much like gas. It reliably and quickly heats the pool water and is relatively easy to hook up. Propane units can wear out quicker than other options and, like gas units, cost a little more to operate.
Like natural gas, propane pool heaters run between $1,500 and $6,000 and $500 to $1500 to install on average. Operating a propane heater typically costs around $200 to $850 per month, depending on the frequency of usage and propane prices in your area.
Propane Heater Pros: heats up fast and efficiently
Propane Heater Cons: more expensive to run and don’t last as long
Electric Heat Pump Pool Heaters
Heat pumps are becoming a popular option for pool owners as they are an energy-efficient means of heating a pool. They use a 220V electrical line to convert energy into heat. Heat pump pool heaters work most efficiently when the outside temperature remains above 45 to 50ºF.
A heat pump’s mid-range price is around $3,500, and installation costs between $500 and $1000 on average. However, they typically only cost about $120 to $200 per month to operate. Because electric heat pumps work off the ambient air temperature, they are slower to heat than a typical gas heater.
Heat Pump Pros: less expensive to operate, energy-efficient, a cleaner energy source
Heat Pump Cons: slower to heat, dependent on outdoor temperature, more expensive upfront
Electric Resistance Heaters
Like electric heat pumps, electric resistance heaters run on electricity. However, instead of relying on ambient air temperature, the pump passes water directly over a heating unit, resulting in efficient water heating despite the outdoor temperature.
Electric heaters cost an average of $500 to $5,000 plus installation costs around $500 to $1000. Operating costs depend on usage and utility prices but are typically higher than other heating options. Expect to spend roughly $175 to $600 per month on operating costs.
Electric Resistance Heater Pros: lower upfront costs, greener energy source, not dependent on outdoor air temperature
Electric Resistance Heater Cons: high operation costs, not as energy-efficient
Solar Pool Heaters
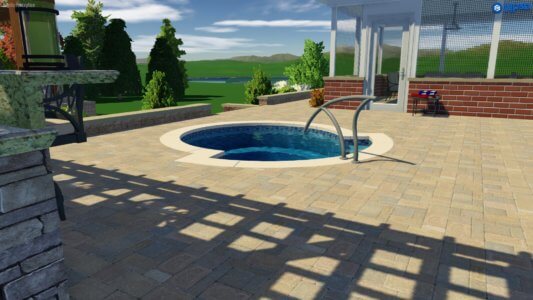
Through solar panels, solar pool heaters convert energy from the sun into heat for the pool. Solar pool heaters are good for the environment as they generate and utilize clean, renewable, and reliable energy, and they can potentially last up to 30 years with minimal maintenance. Solar heat helps eliminate carbon dioxide and nitrogen oxides emissions, a significant contributor to smog and global climate change.
Solar pool heaters are more expensive at a purchase cost of between $2,000 and $7,500 as an initial investment on average, plus an average of $500 to $2,000 for installation. They often pay for themselves over time because they have essentially no operating costs.
Solar Heater Pros: no operating costs, long-lasting, green energy source
Solar Heater Cons: higher initial cost, slower to heat, require year-round sunlight
Location Factors
Location can factor into your choice of pool heater in several ways. By connecting with an experienced local installer, you’ll have a guide regarding these potential location factors:
Tax Breaks – Your state or federal government may have added electric and solar heat pumps to the list of equipment that qualifies for special tax breaks. Talk to your dealer or tax advisor about these guidelines.
Cold Climate – If you live in a colder climate, a gas/propane heater may be the way to go for its robust and quick performance.
Remote Location – If you are in a remote area with limited access to the electric grid or municipal gas lines, propane or solar heaters may best suit your situation.
It’s important to note that these price ranges will vary depending on many factors, like geographic location, whether or not you have a pool cover, average temperatures, etc. Pool heater installation may require municipality approval and connection to existing power/fuel sources. You’ll want to match the heat source choice to your pool’s location, water volume, and temperature desires. It’s not unheard of to do a DIY pool heater installation, but we suggest checking local regulations and considering using a pool professional.
Everyone in your family loves your swimming pool, but don’t forget about your pets too! Pets enjoy the water as much as people do. Keep your pets in mind and think about making your swimming pool pet-friendly. There are simple things you should consider when you are looking to make sure you have a pet friendly pool.
Fiberglass swimming pools are the best type of pet friendly pool because they have no problem withstanding your pet’s’ paws. Fiberglass is a durable material that can withstand nails. Pets’ claws can tear or puncture vinyl liners. Concrete pools can be harsh on your pet’s joints and can harm their pads and nails. The smooth material of fiberglass pools will not be rough on your pet’s pads or break their nails.
When considering your options for keeping your pool’s water clean, you should know that chlorine is safe for dogs. The chlorine effects on dogs are similar to the chlorine’s effects on people. The most common issue that may arise is skin irritation. The best way to reduce the risk of skin irritation for your pet is to rinse them off after swimming in the pool. You may have to use more chlorine and chemicals to keep your water chemistry in check because of the pet dander.
To make it a pet friendly pool, consider purchasing one that includes a bench or a ledge. You know how when you’re swimming and you like to take a break once in awhile? Well, your pet would love to have somewhere to take rest too! That’s where a bench or ledge is great to have so your pet can sit back and relax with you while cooling off in the water. Swimming pools with benches or ledges also mean there are multiple points of entry and exits for your pets.
Lucky for you, we have plenty of fiberglass pool designsthat include benches. Our pools are perfect for the whole family, including your pets!
Congratulations on choosing to add a fiberglass inground pool to your backyard. You have made a wise investment in yourself and your family. Aside from the obvious health benefits, a swimming pool will bring you countless hours of stress free rest and quality family time. Memories made around a swimming pool last forever. At Thursday Pools we like to say we manufacture memories not just fiberglass pools. We are proud to build memory makers. Now, let’s see if we can help find the right Thursday pool for you to begin making memories.
The first thing you want to start with is size. Small, Medium, or Large? You can determine what size you need by asking yourself 3 basic questions:
What will fit in my backyard? Often setbacks, easements, and other restrictions will play a role in what size pool will work in your backyard.
How many people will be using this pool 90% of the time? And how will they be using it? Exercise, Fun, Relaxing, Lap Swimming??
What is my budget? Fiberglass pool pricing is very much affected by the size of the pool.
Once you have decided what size fiberglass pool fits your needs, you can move on to review the unique style and design features of each pool within that size category. I will review these features and benefits with you starting with our largest pools first. Feel free to skip through to whatever size category is right for you.
Large Rectangle Fiberglass Pools
We have a nice line up of large rectangle fiberglass pools. In this line, you will find the Goliath and Monolith fiberglass pool designs. These designs are perfect for those who like classic clean lines and want a fiberglass pool large enough to swim laps and regularly host their extended family and friends. I cover some great features of these large rectangle fiberglass pool designs below.
Large shallow end benches provide ample seating but are strategically placed as to not take up a lot of swim area. Benches are set at a depth of 18” from the top of the pool, placing water depth at approximately 12”-14” from the seat.
Deep end benches and swim outs provide a seat on the opposite end of the pool and a swim out for children and our furry family members. It is important to have multiple exit points for children and dogs as they can tire easily while treading water in the deeper end of these pools.
Each pool is outfitted with a courtesy ledge around the deep end edge.
Size and depth can easily accommodate a properly installed slide.
Dual corner entries provide flexibility in the backyard layout and design of your inground pool.
Type 1 Certified Diving Pool. With the correct diving board installation and use, this pool can provide for a safe dive.
The single corner entry provides a large flat bottom shallow end that is ideal for children and a hearty game of basketball. It also provides for a nice lane to swim laps.
The pool’s 15” warning slope separates the shallow end and deep end of the pool. This fiberglass pool should always have a safety line and float on the pool at all times to mark this separation.
This fiberglass pool also has deep-end bench seats and a courtesy ledge that extends around the deep end of the pool.
Easily accommodates an automatic cover system.
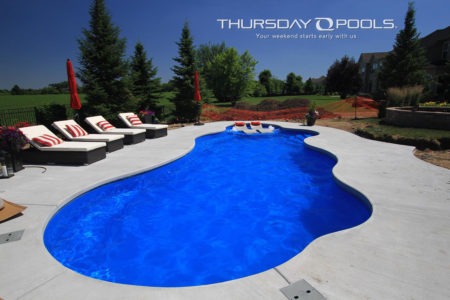
Large Free-Form Fiberglass Pools
In this category of large free-form fiberglass pools, we have our Wellspring Series. The Wellspring fiberglass inground pool design is a bountiful source of happiness for the young and old. The large sun shelf and beautifully crafted benches are carefully placed to create an artful display of elegance. This design is perfect for those who picture themselves lounging in luxury while sipping on a beverage and for those who want a cool spot where they can safely watch their toddler splash and play. Check out these wonderful features and benefits of this inground pool below.
The tanning shelf has a 12” depth leaving water depth at 6”-8”. This spot is perfect for a set of two ledge loungers and bubblers. It is also a perfect depth for toddlers to be able to splash and play in.
The wrap around benches follow the pool’s curves and provide adult seating in strategic places that allow for great conversations and comfort.
Its unique free-form design will grab attention and quickly make it the focal point of your backyard.
Its sheer size enables the pool to still have a large open swim area.
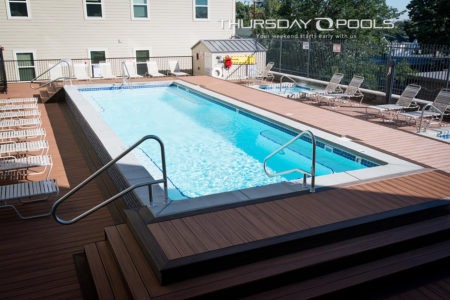
Medium Rectangle Fiberglass Pools
In our lineup of medium sized rectangle fiberglass pools, we have our Lil Bob, Spirit, and Infinity pool designs. These classy pool designs are perfect for folks who are constrained by space but still want to be able to entertain extended family and friends. These medium sized fiberglass pools can still pack a large pool party punch. Here are some great features that you will love about these three inground pool designs.
Features and Benefits of the Lil Bob, Spirit, and Infinity pool designs:
These 4’6” one-depth flat bottom pools make 100% of the pool usable space. (Very few people hang out in the deep-end of an inground pool and tread water, most always they migrate to the shallow end.) It also makes for a great depth for water sports like volleyball and basketball.
Elongated benches grace both sides of these pools providing plenty of lounging areas for entertaining family and friends. Each bench runs 12’ down the length of the pool.
Easily accommodate an automatic cover system.
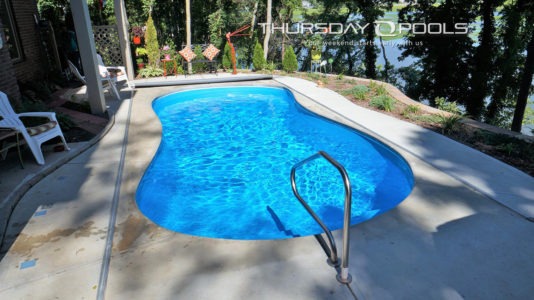
Medium Free-form Fiberglass Pools
Are you dreaming of something with a little more pizazz or character to its shape? Try these medium sized free-form fiberglass pools on for size: Titus, Pearl, Cathedral, and Oasis. Because these pools each have their own great design features I will break them out individually and share some of my favorite features of these beautiful inground pools.
Titus: The Titus is a classic figure eight shape. My favorite feature of this pool is what we refer to as the beverage bench in the deep-end of the pool. If you are looking for an inground pool with a little spunk that you can enjoy with a couple of friends and maybe do a little water aerobics, this may be the right inground pool for you. This pool is available in two sizes.
Pearl: This sea shell shaped jewel is an inground pool design that you won’t find anywhere else. It features the ultimate sun shelf and complete wrap around bench. This pool is perfect for adults looking to relax and unwind.
Cathedral: The roman shape of the Cathedral pool offers a timeless style without sacrificing swim area. The pool features beautiful benches on each end with a large open swim area.
Oasis: The Oasis design provides a less dramatic free-form shape that allows for plenty of open swim area but still delivers a nice cozy corner bench. This design is also available in two sizes.
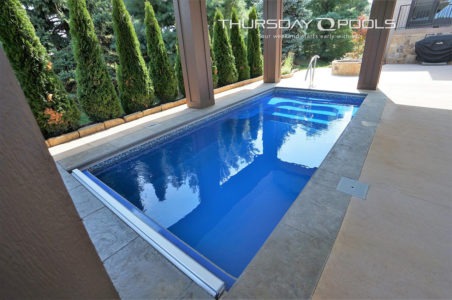
Small Fiberglass Pools
We have two pools that fall in this category, the Sea Turtle and the small Titus fiberglass pool. If you are looking for a pool for just the two or few of you, these designs are the perfect patio pool and may hit the mark.
The Sea Turtle is a rectangle 10’ x 20’ design. It features a large wrap around bench and flat bottom 4’6” depth. It can easily accommodate a Badu® Swim Jet System and an automatic cover system.
The Titus is a figure eight shaped fiberglass pool that is 12’ x 26’. It features a nice deep-end bench, perfect for the two of you.
Regardless of where you are at in your pool planning process, choosing the right inground pool design for your backyard could become overwhelming. Sometimes having too many choices makes it even more overwhelming. Begin your process by asking and answering the basic questions we mentioned at the beginning. Answering these questions may help eliminate a clear majority of the inground pool designs that you are considering. Once you have narrowed it down to two or three designs; review the 360 tours and product videos that we have of those pools. Lastly, be sure to consult your Independent Dealer for input, they will be a good resource and chances are they can offer you some feedback that perhaps you hadn’t even considered.
Thursday Pools strongly recommends that diving boards and slides not be installed or used with its pools, given the inherent dangers associated with diving boards and slides in residential pools. These dangers include brain, spinal cord, and other severe permanent injuries, and death. For that reason, Thursday Pools® does not manufacture or sell diving boards or slides. If, despite this warning and recommendation, the owner decides to install or use a diving board or slide, the owner assumes all risks inherent with a diving board or slide, and River Pools® further warns that diving boards and slides require minimum depths and distances and must be installed and used in strict compliance with the equipment manufacturer’s specifications and ANSI/NSPI, ANSI/APSP, and ANSI/APSP/ICC standards, as well as in compliance with all applicable laws, rules, and regulations. The owner is responsible for making sure the pool is appropriate for diving boards and slides and otherwise meets all standards and laws for diving pools, and the owner must consult the diving board or slide manufacturer and/or installer as to the appropriateness of the pool for the diving board or slide and that its installation, location and use meet all standards and laws for diving and slide pools.
Cookie Consent
We use cookies to improve your experience on our site. By using our site, you consent to cookies.
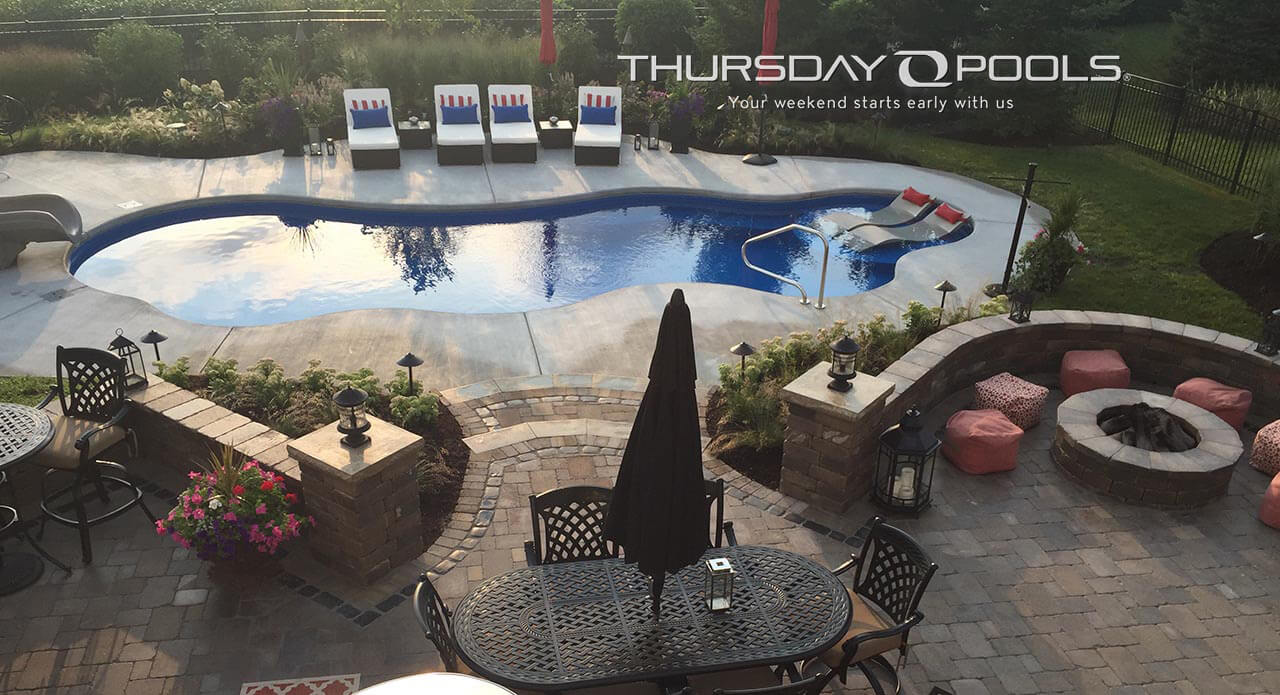
 They say all good things must come to an end. In the Midwest, that’s a sad but true reality for inground pool season. It’s nearing time to close the pool. To ensure a quick and easy spring fiberglass pool opening, close it properly in the fall. So, here’s a list of five fantastic tips to close your fiberglass pool right.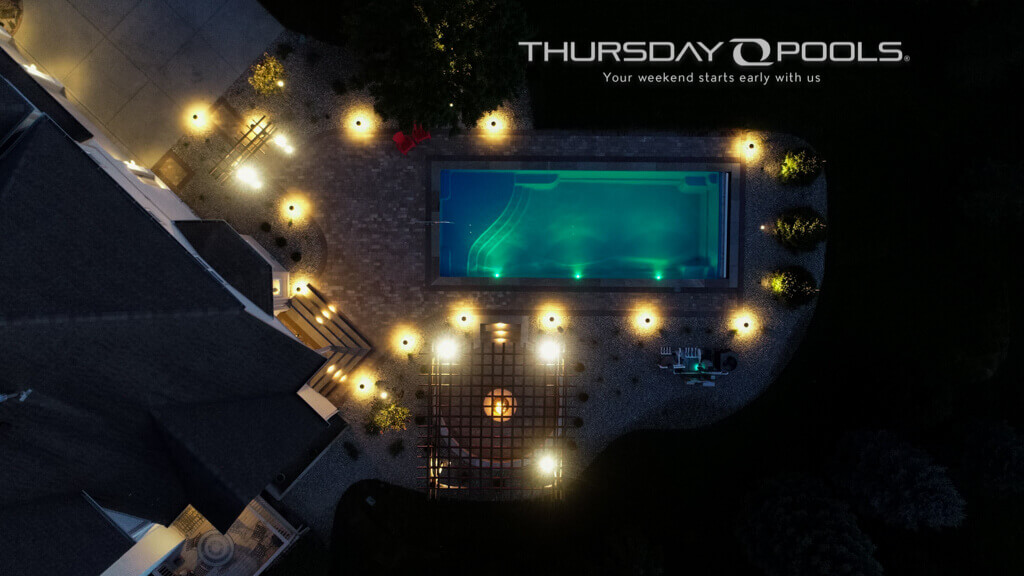
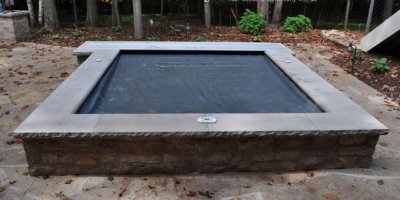 This too, shall pass. For those of us who live for the juxtaposition of the warm sun and luxurious cool pool water while living in a state with four seasons, waiting out the winter is a necessary evil. And making sure you are ready to enjoy your pool as soon as possible means closing your pool properly for the winter. If you live in a state with a freeze/thaw cycle, you may be wondering, “What does a pool closing include?” Some questions to consider when learning how to close a pool for winter may include: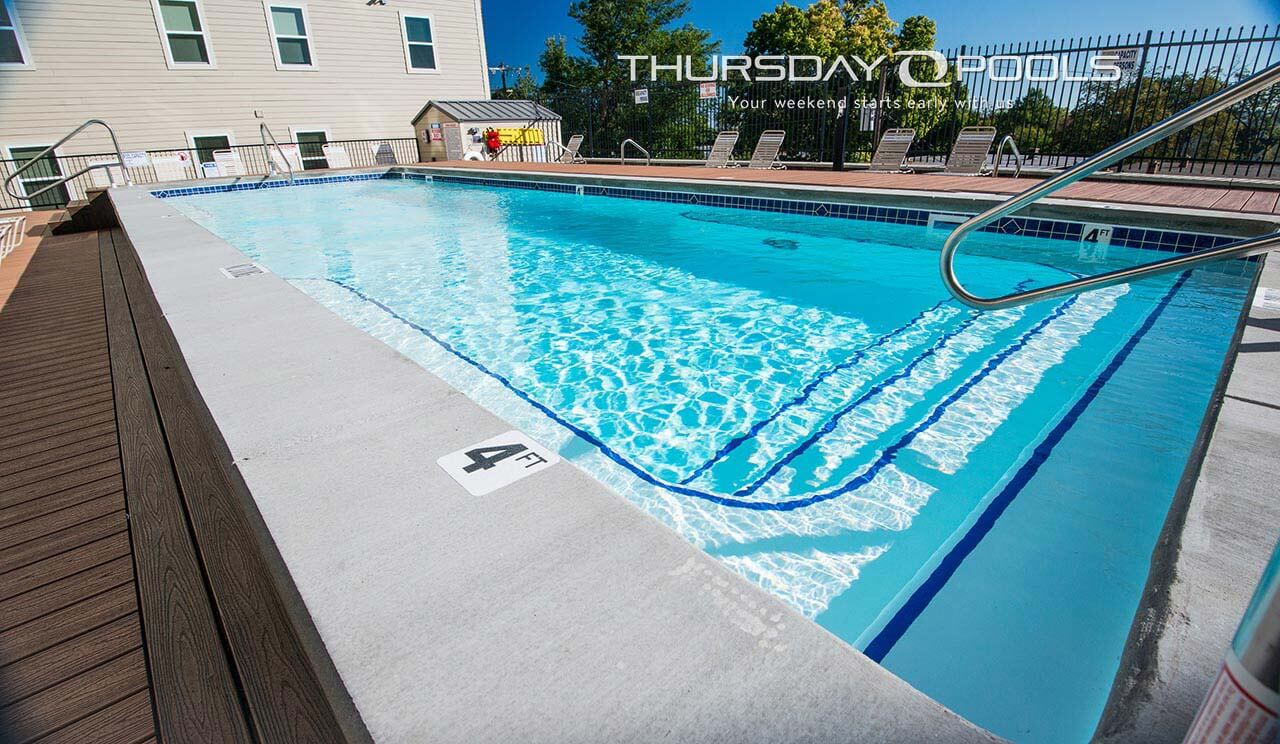
 The greatest joys of owning a swimming pool include the hours of relaxation and swimming in crystal clear water. Proper water chemistry, regular cleaning and systems


 Dear General;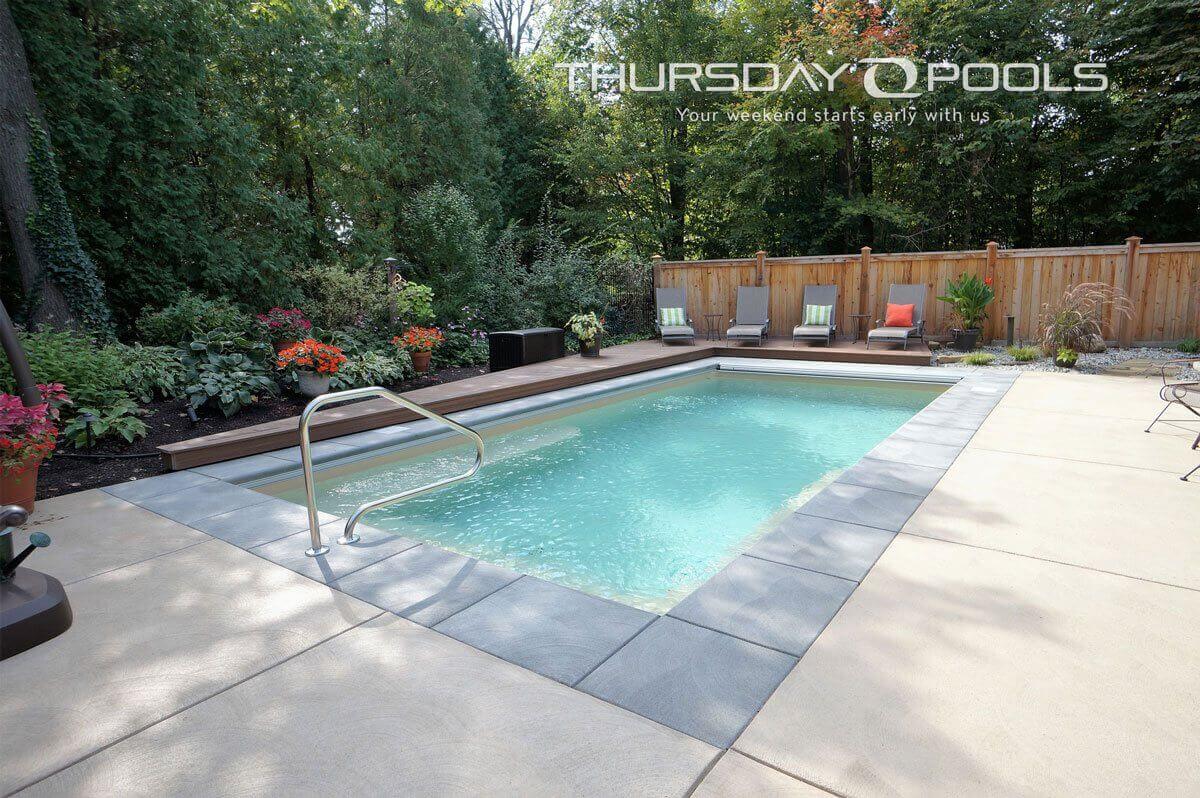
 Electric Heat Pump Pool Heaters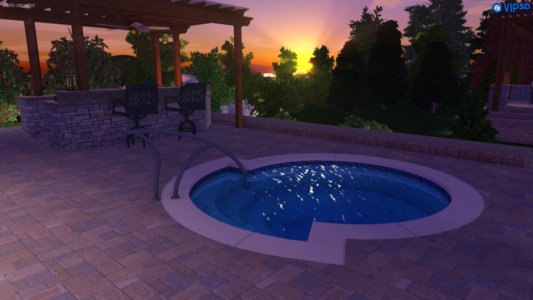
 Solar Pool Heaters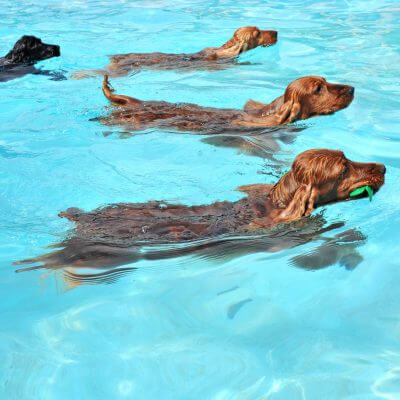

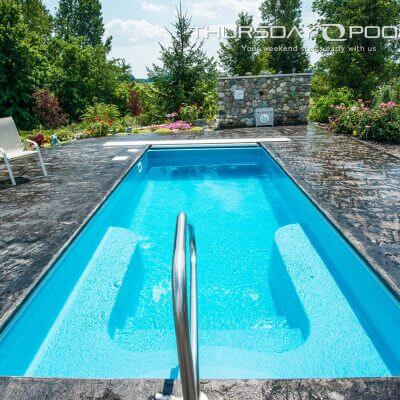
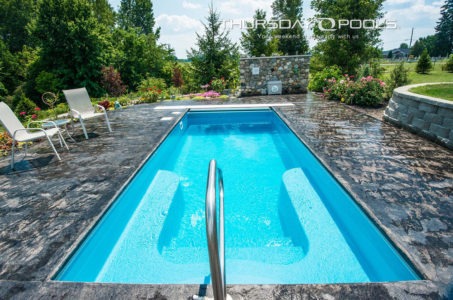
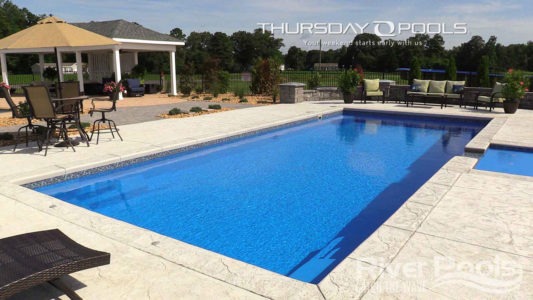 We have a nice line up of large rectangle fiberglass pools. In this line, you will find the
  In this category of large free-form fiberglass pools, we have our
  In our lineup of medium sized rectangle fiberglass pools, we have our
  Are you dreaming of something with a little more pizazz or character to its shape? Try these medium sized free-form fiberglass pools on for size:
  We have two pools that fall in this category, the