How Do I Backwash a Sand Filter in My Fiberglass Pool?

Fiberglass pools provide years of memories for pool owners. The crystal-clear water brings joy and relaxation. However, keeping your water clear involves more than just routine cleaning and chemical adjustments. According to independent pool dealers in our network, backwashing the sand filter is an often overlooked yet crucial pool maintenance step for those with this type of filtration system. Let’s explore the importance of backwashing, some frequently asked questions, and how it’s done.

About Pool Filters

There are three available types of pool filters: sand, diatomaceous earth (DE), and cartridge. Sand filters are a very common form of swimming pool filtration, and they are particularly good at catching microscopic particles like algae and phosphates. Sand filters require very little maintenance, but the sand may need replacing every two to four years or so.

What is backwashing?


Backwashing a sand filter is a maintenance procedure that cleans the filter and ensures it operates efficiently. Over time, as water pumps through the sand filter, debris and particles are trapped by the sand, removing them from the pool water. This process gradually accumulates dirt and debris in the filter, which can decrease efficiency and lead to cloudy pool water.

Backwashing reverses the water flow through the sand filter. Instead of dirty water coming in and clean water going out, clean water is pumped backward through the filter. This reverse flow lifts and flushes the trapped debris from the sand bed and the filter through a waste line or drain.

During backwashing, the sand within the filter loosens, allowing the trapped debris to be expelled. After backwashing, the filter is returned to its normal operation mode and ready to filter pool water again. This process is essential for maintaining the filter’s ability to clean the pool water effectively and should be performed regularly as part of the pool’s maintenance routine.

Why is backwashing important? 

Backwashing keeps your filter functioning properly and clear of debris. It also helps to keep your water clear. You can religiously add chlorine to the chlorinator, check its settings, sweep down the pool walls, empty skimmer baskets, vacuum dirt and debris from main drains, do water tests, maintain the correct water level, and clean the steps going into the pool. Regardless, your pool water will get cloudy if you forget to clean the filter. Nobody wants that.

What happens if I don’t backwash my sand filter?

If you don’t backwash your sand filter, you may notice your water getting cloudy or debris making its way to the surface of your pool water. As stated above, you can do all other essential maintenance tasks, but none will replace the need for backwashing.

How do I know if I need to backwash my sand filter?

You will need to check your filter’s pressure gauge. When clean, your filter will have a typical reading you should note. You’ll know it’s time to backwash once the gauge reaches 8 to 10 pounds (psi) above your baseline reading. Your water may also look cloudy or dirty when the filter is ready to be backwashed. 

What is the proper way to backwash a sand filter? 

Proper Way to Backwash Sand Filter

  1. Turn the filter system off. 
  2. Remove, empty, and replace the skimmer basket.
  3. Attach a backwash hose to your filter’s backwash port.
  4. Turn your multi-port valve to Backwash. (Make sure you never turn the multi-port valve handle while the pool filter is on and running.)
  5. Turn your filter system back on. Water should now be flowing out the backwash port and through the hose.
  6. Let the water run for about two minutes, or until the water runs clear in the site glass.
  7. Turn the filter system off again.
  8. Turn the multi-port valve to Rinse
  9. Turn the filter system back on, and rinse the filter for about 30 seconds to one minute.
  10. Turn the system off.
  11. Turn the multi-port valve to Filter.
  12. Turn the system back on.

Potential Issues and How to Avoid Them


  • Sand in your pool. If you notice sand in your pool during or after backwashing, then you might have cracked off laterals or piping inside the filter. You may also have too much sand in the filter. The space from the filter’s top to the sand line’s beginning is called “freeboard.” This space is essential to prevent sand from exiting the filter during backwash.
  • Too much of a good thing. While backwashing is essential, it is possible to backwash a sand filter too often and too much. As mentioned previously, how often you backwash should be based on the readings from your pressure gauge, as too much (or too little) backwashing can lead to some undesirable outcomes. During backwashing, turn the hose off as soon as your water runs clear. Prolonged backwashing of your sand filter can cause “channeling.” Channeling occurs when channels develop down the sides inside the filter. When this happens, water can bypass the sand altogether, defeating your sand filter’s purpose. 

As with all aspects of your pool’s operation and maintenance, please follow the sand filter’s instructions carefully, as each model varies slightly. You will likely find directions on the filter itself. Your filter and your pump are the backbones of your pool, and it’s essential to pay equal attention to both of them. A failure of either will cause problems and cost you money. You should consult a pool professional if you have any pool maintenance concerns.

Do It Yourself Inground Pool

DIY Inground Pool

Having a fiberglass swimming pool in your backyard is a dream for many, offering endless enjoyment and memories. However, fiberglass pool installation costs often tempt people to consider the DIY route. While it might seem like a cost-saving option, DIY pool installation comes with significant risks and potential hidden costs that can far outweigh the initial savings.


Is it possible to build an inground swimming pool yourself? 

The short answer is yes, it is possible to build your own inground swimming pool. With the demand for inground pools surging, many people believe they will save money and get their fiberglass pool installed faster if they opt for a do-it-yourself inground pool installation. Still, the reality is that installing a DIY inground pool, whether you put it in by yourself or with the help of friends, can be dangerous, cause issues with your pool, and be more expensive when all is said and done.


Are DIY inground pool kits worth it?

The initial cost of inground pool kits may save you money over purchasing an installed pool. However, you might spend a lot more money and experience more delays or setbacks in the long run than if you left it up to an experienced professional. It’s important to mention that we are strictly a fiberglass pool manufacturer. Thursday Pools does not offer fiberglass inground pool kits. Our fiberglass pool shells are only available through independent dealers. Additionally, independent dealers install the pools in customers’ backyards.


What are some cons to installing a DIY inground pool?

The complexity of the installation process means that a DIY approach is rarely as simple or cost-effective as it might initially appear. Some known cons of installing a DIY inground pool include:


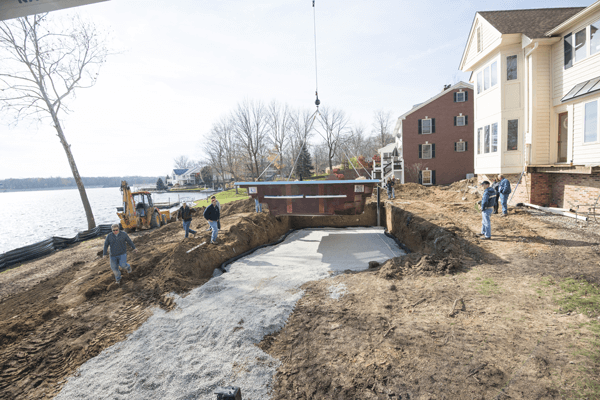
  • High installation equipment costs. Typically, homeowners will not have the equipment needed to install a pool, so you will have to purchase or rent the equipment yourself. This equipment can be expensive and not easy to find. Knowing which equipment to get and having the resources to obtain them is extremely important. Without the proper equipment, you cannot correctly install the fiberglass pool and risk expensive repair costs if something goes wrong.


  • Installation materials problems. When installing a pool, you will need access to the correct stone “backfill” material and know how much to use. If you use the wrong type of stone or not enough of it, your pool won’t be correctly  backfilled, resulting in an unstable pool that moves, cracks, and leaks.


  • Expensive mistakes. We have seen YouTube videos and heard stories of pools being dropped or crashing into the homeowner’s house. The materials needed to install a pool can be heavy and hard to transport. Stone material and the fiberglass inground pool shell must arrive safely with the proper equipment to pick up and move the pool. If not, you may drop and crack your pool before it gets put in, and that’s on you!


  • Incorrect pool equipment. Selecting the right pool equipment can be overwhelming because there are many options. A professional pool installer will ensure you have the correct equipment for your pool’s size and type, including the pump, filter, water sanitation system, and heater. If this equipment is not compatible with your pool, leaks can happen, and pipes can crack. Additionally, many equipment manufacturers only provide a limited warranty when non-professionals purchase and install it. Dealers may offer extended warranty plans when the manufacturer or retailer installs this equipment. It is expensive to replace if it breaks and is not under warranty.


  • Incorrect component placement. Knowledge of where to place the skimmer, returns, and lights for maximum efficiency is essential. Installing your lights, skimmer, and returns at the wrong height or location can cause poor water circulation and unbalanced water chemistry, which ultimately causes poor water health and damage to the pool’s surface.


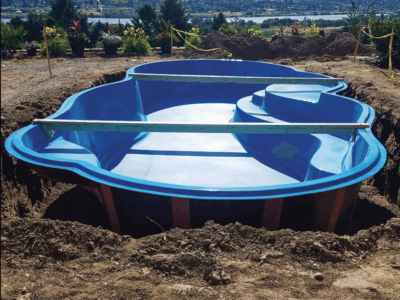
  • Excavation issues. When installing a fiberglass pool in your yard, there are things a typical homeowner wouldn’t consider, like drainage, easements, and access. The layout and hole need to be the proper slope and depth. An uneven excavation can cause the fiberglass pool to not be parallel to the house, out of level, and not adequately connected to the base material.


  • Electrical dangers. Obtaining the correct permits is critical for safety. The wrong permits can lead to improper electrical installations and inspections. A professional installer will ensure your fiberglass pool and equipment are bonded to prevent the transmission of any harmful electrical voltage to pool equipment, people, and pets.


  • Void warranty. Having a manufacturer’s  warranty on your fiberglass pool is extremely important. The manufacturer’s warranty is automatically void with our pools if an independent dealer does not install your pool. While we can’t be 100% sure, we believe most, if not all, pool manufacturers do not honor a manufacturer’s warranty on a pool that a professional didn’t install. Check with your pool’s manufacturer’s warranty. If anything goes wrong with your pool, it may not be covered. 


  • Concrete problems. Pouring concrete around a fiberglass pool is trickier than regular flatwork. Inexperienced concrete contractors can set the concrete too close to the pool wall with their equipment, causing the pool walls to move if not done correctly. Concrete can also get into the pool, which can be a nightmare to clean!


  • Longer than expected install time. Fiberglass pools are the  quickest type to install when a professional installs the pool. If you install it yourself, you may run into delays and roadblocks along the way. Additionally, you should take into account that you will most likely be doing this as a side project on the weekends while still working your regular job throughout the week, making the project take longer.


The bottom line:

Use a professional pool installer that you’ve vetted. A professional dealer’s installation knowledge will help install the fiberglass pool correctly, ensuring your manufacturer’s warranty remains intact. Additionally, most pool builders provide a workmanship warranty over the entire project. 


Dealers in our independent dealer network have formed relationships with professionals who can perform the specific tasks you need to install a pool so you can plan to relax in your pool stress-free in no time. 


We may not be able to give you DIY inground pool cost figures, but we will recommend speaking with an installer. You can always let them know what budget you have in mind and see if these are parameters they can work in. If you’d like to spend more time planning your budget first, our  inground fiberglass pool cost calculator tool can give you a ballpark estimate on your project based on your needs!

How Much Does It Cost to Resurface Your Pool?

Depending on the pool’s age and when  pool maintenance gets away from pool owners, the pool’s surface will show it, leading to questions like, “Is it worth resurfacing a pool?” or “How much does it cost to resurface your pool?” Like so many questions homeowners ask, the answer to these questions is, “It depends.” Let’s start by breaking down pool resurfacing costs by pool type. (We should also note: these prices listed here are based on the experiences of our team as well as independent dealers within our network.)

About Fiberglass Pool Maintenance

Fiberglass composites have taken off as the material of choice for many builders and homeowners. The market share for fiberglass pools more than doubled in the early 2000s and has shown steady growth since then. According to  Business Research Insights, the market expects a 5.5 % compound annual growth rate (CAGR) by 2031. Several  factors account for the popularity of fiberglass, including the development of better fiberglass manufacturing processes and the incorporation of attractive pool features like tanning ledges, wrap-around benches, and beach entries. 

The gel coat and structure of fiberglass are incredibly durable. A fiberglass pool may last for many years without needing resurfacing. In other words, if properly maintained, it can stay in beautiful working order for as long as you are in your home. Fiberglass is not maintenance-free, but the pool industry generally credits it for requiring less maintenance than other inground pool options. As an added benefit, fiberglass pools are the  most environmentally friendly inground pools.

Fiberglass Pools Resurfacing Costs

Resurfacing fiberglass pool costs may vary as you have a couple of pool resurfacing options. One is thermoplastic coating. Thermoplastic coating takes just a few days, and you can fill the pool immediately. You can choose a selection of colors that work for either fiberglass or concrete pools. Depending on the pool size, the cost can range from $16,000 to $26,000.

The other option for resurfacing your fiberglass pool is epoxy paint. Epoxy paint is relatively simple and can deliver a quality look for concrete and fiberglass. However, it only works on bare surfaces, might only last five years or so, and requires around two weeks to cure. It can be done between $2,500-$3,000, and you may even be able to do it yourself.

About Gunite Pool Maintenance

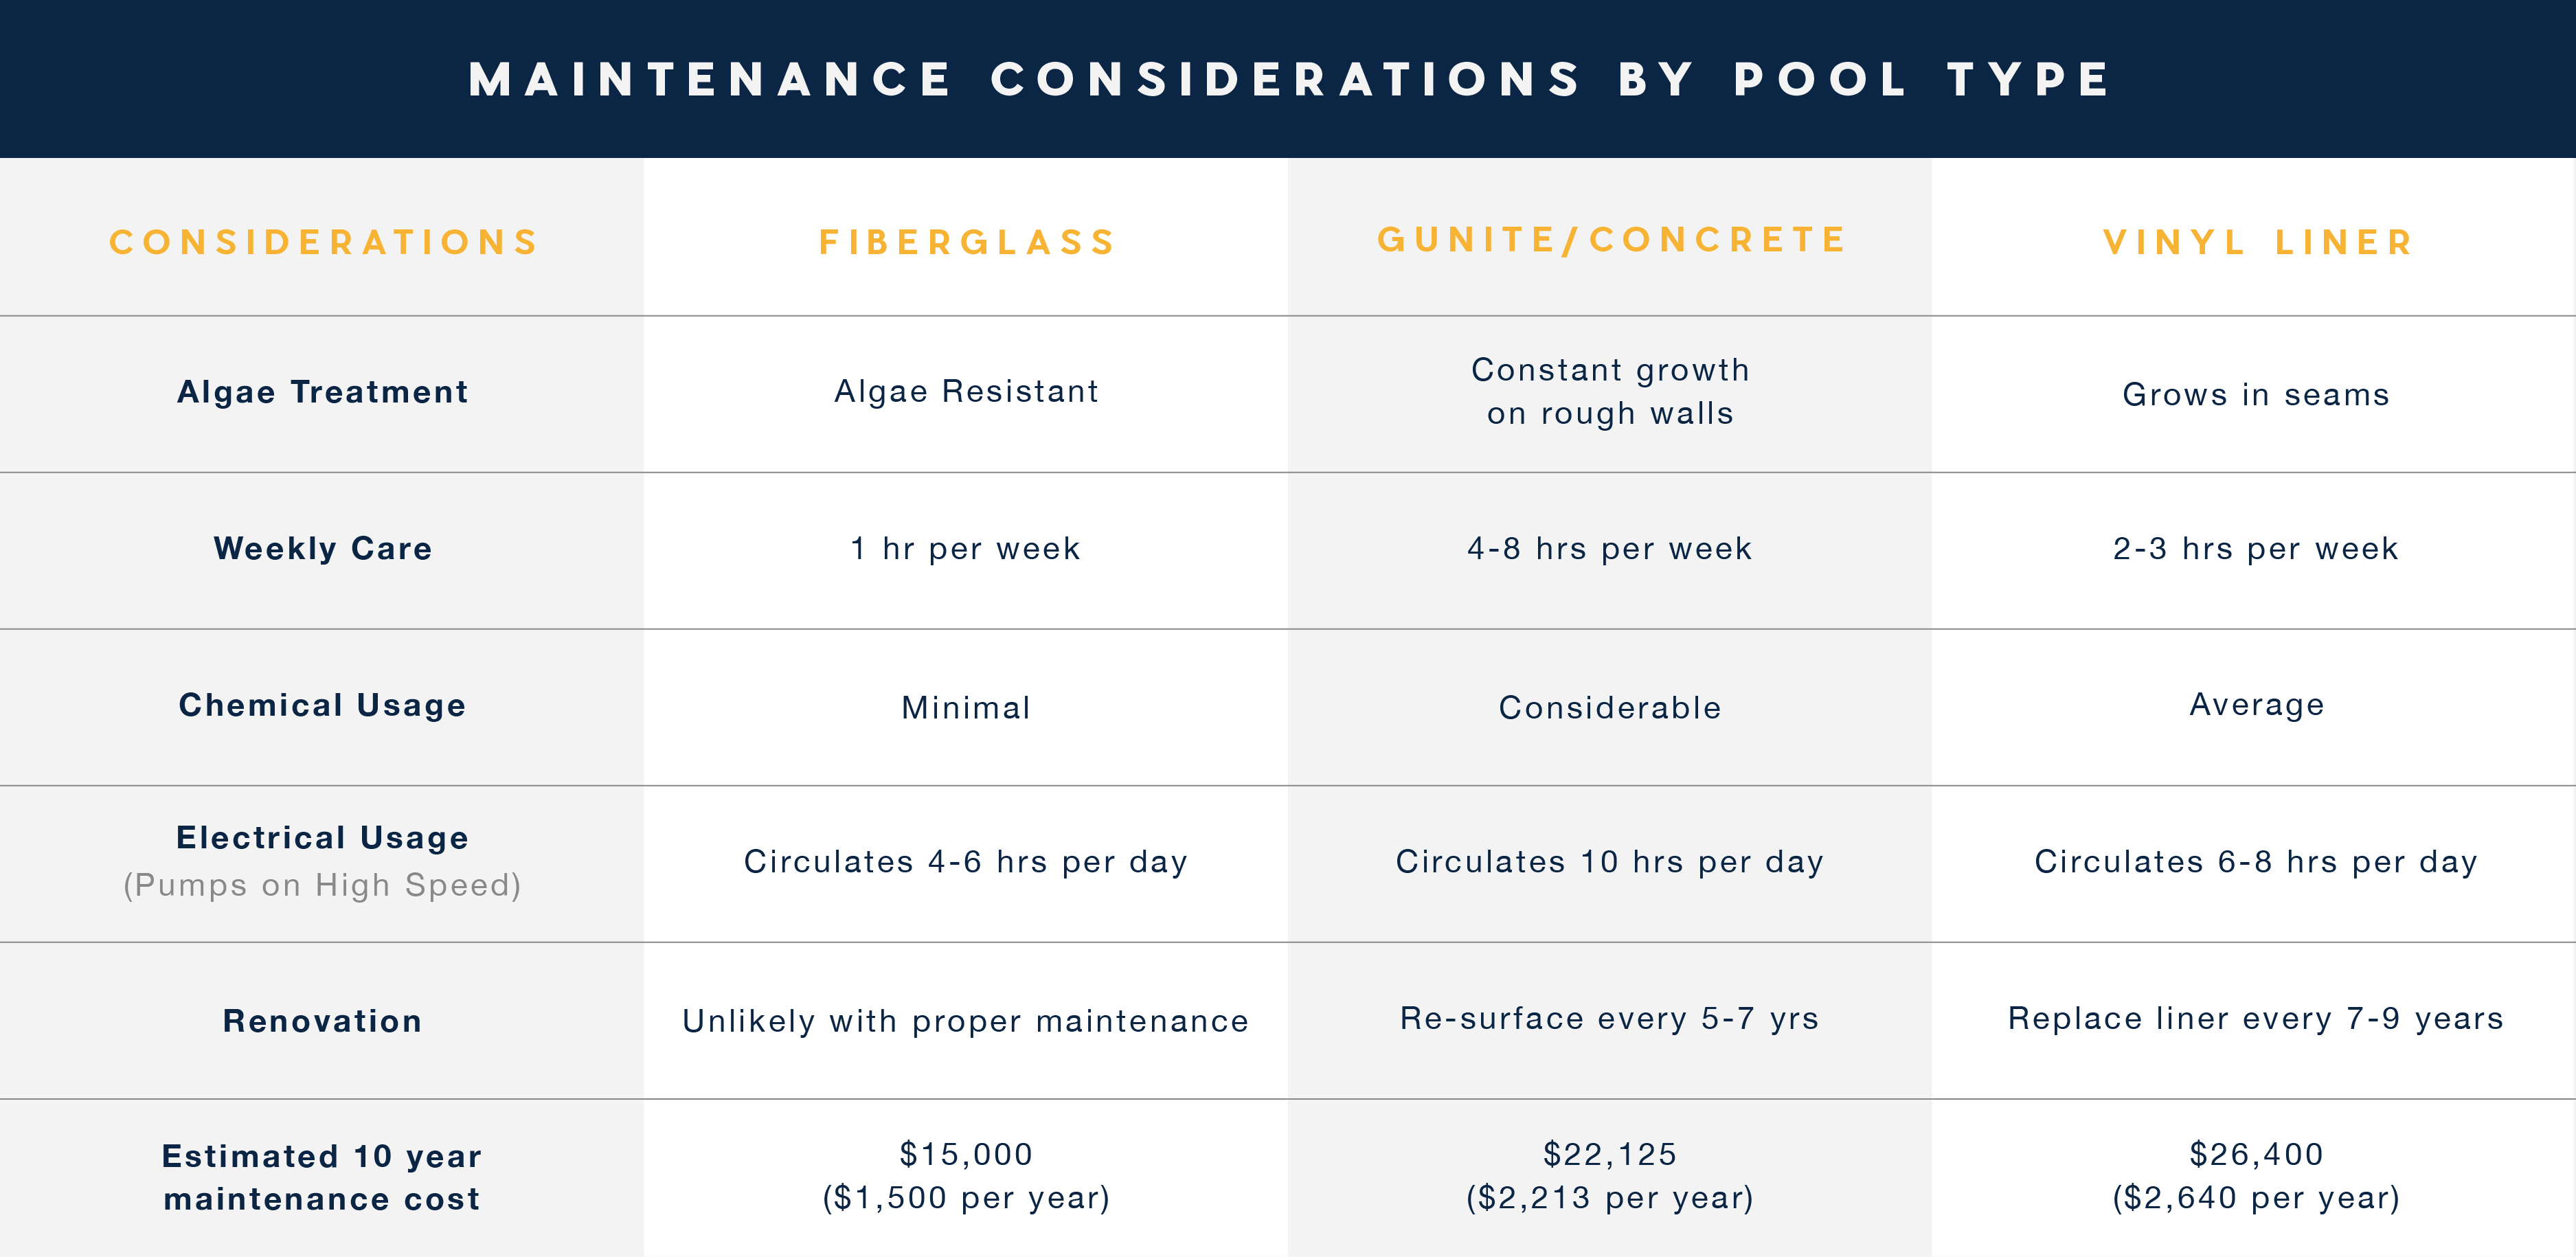
Gunite, or concrete pools, require the most resources for maintenance. The more expensive regular maintenance requirements for inground pools include chemical usage, surface care, and electrical load. Gunite pools typically need to be resurfaced as soon as five to seven years, depending on your climate, maintenance regimen, and water chemistry balance. The surface is susceptible to algae, requiring more maintenance and chemical use.

Gunite Pool Resurfacing Costs

When resurfacing is needed, you may get away with a relatively inexpensive epoxy paint option if no paint is on the surface. Otherwise, you probably need to go the route of pool tile, aggregate, or pool plaster (Note: if you’ve heard of plastering a pool, replastering a pool is not the same as resurfacing). These options often land in the $15,000-$25,000 range or more, with tile generally being the highest cost. Some homeowners are replacing their older gunite pool with a fiberglass pool.

About Vinyl Liner Pool Maintenance

Vinyl liners can be very sensitive to imbalances in water chemistry. Improper water balance can cause the liner to fade, wrinkle, or deteriorate more quickly. The seams are a place where algae can more easily grow, requiring more chemical use. Vinyl liners are also more prone to tearing, which is something to  watch if you have pets. Even well-maintained liners usually need to be replaced every seven to nine years.

Vinyl Liner Pools Resurfacing Costs

Each time you replace the vinyl liner, your costs range from $6,000 to $12,000. With a rip, you may be able to patch at a cost of a few hundred dollars. If the presence of algae becomes a problem, you may need to enlist the support of a professional pool cleaner.

Regardless of pool type, if you’re actively searching for “pool resurfacing near me,” contacting a pool builder in your area is a good place to start for a more accurate quote. If you want to talk to someone about how much it costs to resurface your pool, don’t hesitate to  contact an independent dealer in your area for more information.

Maintenance Considerations by Pool Type

More on Comparing Pool Types

Has all this talk made you want to learn more about the different pool types?  If you want to dig deeper into comparisons,  download our eBook that does just that. The eBook compares factors like upfront cost, maintenance time and cost, installation time, warranties, available features, and more.

Ask the General: How Do I Troubleshoot the Heater and Chlorinator on My Fiberglass Pool?

Some pool troubleshooting tips to try before you call in the pros. 

Dear General- 

We are fiberglass pool owner newbies. We love it, but we did have to call an inground pool service pro a couple of times—once for our heater and another time for our chlorinator. Both times, it turned out to be a fairly simple fix and we wished we had tried to troubleshoot the problem ourselves before we called. Do you have some pool troubleshooting tips to share? 

Signed- Newbies in New Orleans

Dear Newbies- 

inground fiberglass poolsOf course, I’m happy to share pool troubleshooting tips, especially for new pool owners. You didn’t say what kind of heater or filtration system you use, so I’m just going to go with one of the most common combinations: a gas heater with a sand filter and a chlorine-sanitized system.

Let’s start with the heater.

  • Do a visual inspection. Your first pool troubleshooting step is simply taking a look at the unit. You’re looking for leaks, rust or burn marks. Any of these visual clues most likely mean trouble inside the unit, and you probably need to bring in a pool maintenance pro to check it out. 
  • Clean it off. You should be regularly cleaning debris off of the heater top and inside of the cabinet. Leaves and other matter can really gunk up the works, so this is an easy way to avoid trouble before it starts. If you haven’t done this, you may find that debris is hindering your heater’s operation, so clean it up and see if that helps. 
  • Check the gas and water pressure. If the gas valve isn’t fully open, your heater will not fire. The same is true if there’s not enough water flowing through the heater, so make sure your pool pump is working properly as well. In many cases, you’ll just need to backwash the sand filter, or clean the cartridges in a cartridge filter. 
  • Consult your owner’s manual. After you’ve tried these tips, if you’re still having trouble, it’s always worth a peek at your owner’s manual. Depending on what brand and type of heater you have, you may find some additional help there. 

Some safety tips for you: 

  • Never bypass a safety feature on a heater to force it to operate. I once had a homeowner call to say that their heater’s door blew off.  Upon arrival, I discovered that the propane heater was equipped with a jumper wire to take out the safety link that protects the heater in case of a down draft. Apparently, this guy’s brother-in-law had “fixed it” by jumping the safety link to get the heater to operate, and they never called a technician to permanently repair the heater. That resulted in a very dangerous situation. Everything inside your heater is designed for safety, and other than these few pool troubleshooting tips, there are very few things that most homeowners can fix on their own. If these tips don’t yield any clues, call a professional pool service technician. 
  • Be aware that the top of a gas heater gets very hot. Use caution to prevent burns. I’ve seen melted cell phones, plastic cups and screwdriver handles as well as ruined shirts and shoes. So don’t put anything you value on top of your heater. 

The next stop is the chlorinator. 

There are many different manufacturers of chlorinators with different functionalities (such as high back-pressure systems with pop-up heads, or offline “tube” feeder systems.) So for now, we’ll just address the most common one—the inline chlorinator. Personally, I have a Hayward CL-200 inline chlorinator on my pool, and it’s been there for almost 35 years. I think it may be the only thing I haven’t had to replace. 

  • Again, start with a visual inspection. You’re looking for leaks, hairline cracks, and plant life that may have grown around the unit. If you find cracks, you may need to replace your unit. If you find plant life growing around your unit, you need to remove it.
  • Check the gaskets. If your unit is leaking, normally a lid gasket or drain plug gasket is the cause. If you find leaks here, these gaskets may just need to be replaced. 
  • Clean the canister. Turn off the pump, remove the lid and inspect the inside of the canister. There may be buildup in there that’s blocking the flow. Carefully remove any undissolved chlorine, remove the bottom plug, scrape off the inside, wipe out the residue, and flush it with water. If the unit has unions, remove and completely clean them. Using high quality chlorine pucks (or sticks) will alleviate the need to do this very often.

Some safety tips for you: 

  • Always use caution when opening the unit to avoid breathing chlorine gas buildup.
  • Take care that the chlorine doesn’t splash in your eyes or on your skin. 
  • Never use solvents or any chemical that may react with the chlorine to clean the inside.
  • Be sure to read the manufacturer safety warnings for your chlorinator.

It’s a process.

It may take some time before you learn all the things that pool owners know. To shorten your learning curve, see if your local pool company has “pool school” seminars to help you learn the ins and outs of pool ownership. In the meantime, stay on top of your regular pool maintenance to avoid problems (which should be pretty easy with your low-maintenance fiberglass pool!) and kick back and enjoy your new pool as much as you can. 

Until next time- The General

Who is The General? 

The man, the myth, the legend … we just call him The General. His organized, systematic approach to pool installations over the years had his crew members calling him “The General” and it stuck. The General has over 30 years’ experience in the pool and spa industry, working for one of Pool and Spa News’ Top 50 Pool Builders.”

Over that time, he designed, sold, project-managed and installed over a thousand inground swimming pools. As a pool owner himself, he’s the perfect authority to give you the inside scoop, with amazing tips and tricks to make pool ownership a breeze! 

Ask the General; How Do I Troubleshoot the Pump on my Fiberglass Pool?

Five pool pump troubleshooting tips before you call the pros.

Dear General- 

It’s still pretty warm in Atlanta, and we haven’t yet closed our fiberglass pool. Over the last few days, our pool pump has started making some strange noises. It doesn’t happen all the time, but we’re not sure what we should do about it. Do you have any swimming pool pump troubleshooting tips for us, or is it time to call in the pros?

Signed- Addled in Atlanta

Dear Addled- 

inground fiberglass poolsWhile northerners are thinking about winter pool maintenance, we realize that other places across the country are still enjoying swim season. That said, I appreciate your question and do have a few tricks up my sleeve that you can try before you call the pros.

  1. Check your water level. Your pool pump may be struggling to get water. Pool pumps can only operate in a “closed” system. This means that they’re only designed to pump water—not air. When your water is low and it cascades into the skimmer, it’s bringing air along with the water into the system, which is not a good thing.

If you want to know the physics behind how your pump works, here it is: a pool has a centrifugal pump with an impeller and a diffuser that spins and creates a low pressure area in the eye of the impeller. This, with the help of atmospheric pressure allows the water to be pulled through the pump. There is no diaphragm that actually pumps to move the water. So, air disrupts the pressure levels necessary to keep the water moving.

If that was “TMI” for you, then just know that your pump is just not gonna work right if you get air in your system. Add some water to your pool.

  1. Check your skimmer baskets and main drain. If your skimmer baskets are full, or your main drain is covered by debris, your pool pump will struggle to maintain prime. Again, because your fiberglass pool pump needs water to function properly, impaired water flow is going to cause it to work too hard. So, if your pump seems to be working overtime, it might be as simple a fix as cleaning out your skimmer baskets (which you should be doing regularly anyway, as part of your pool maintenance program), or clearing the debris off your main drain.
  2. Check for air leaks. A cracked pump basket gasket, or a defective O-ring on the access plug can allow air into the system. Look for loose or damaged pump drain plugs at the bottom of the basket or on the side of the pump. Also inspect the pump basket lid and the pump basket itself for cracks.
  3. Check the pump basket and impeller for clogs. If your dog swims in the pool with you, or you happen to have a cottonwood tree in the neighborhood, you’ll find that hair or seed cotton can really clog up the impeller.  A skimmer basket and pump basket can only catch debris larger than the grate holes they have molded into them. So, you should install a fine mesh filter in your skimmers to catch hair, tree buds, and cottonwood seeds before they make it to the pump and filter
  4. Backwash your filter. Whether you have a cartridge filter or a sand filter, a dirty filter will not allow water to be pumped through it. This can also put a serious strain on your pool pump. I’ve talked about the importance of backwashing your filter before, so if you need a refresher, check out this article.

If none of these tips fix your pool pump problem, it’s time to call the pros. 

If you have checked all the things I’ve outlined above, and your pump is still making noise (especially if it sounds like grinding, buzzing, or even screaming), shut it off right away and call your local pool service technician for help. They might be able to fix it, or it might be time for a new pump. Either way, it shouldn’t be too long before you’re right back in the pool, enjoying the sunshine. Happy swimming.

Until next time- The General 

Who is The General? 

The man, the myth, the legend … we just call him The General. His organized, systematic approach to pool installations over the years had his crew members calling him “The General” and it stuck. The General has over 30 years’ experience in the pool and spa industry, working for one of Pool and Spa News’ “Top 50 Pool Builders.” 

Over that time, he designed, sold, project-managed and installed over a thousand inground swimming pools. As a pool owner himself, he’s the perfect authority to give you the inside scoop, with amazing tips and tricks to make pool ownership a breeze!

Five Fantastic Tips to Close Your Fiberglass Pool Right

Close your pool right in the fall to have a great spring!

Tips For Closing Fiberglass PoolsThey say all good things must come to an end. In the Midwest, that’s a sad but true reality for inground pool season. It’s nearing time to close the pool. To ensure a quick and easy spring fiberglass pool opening, close it properly in the fall. So, here’s a list of five fantastic tips to close your fiberglass pool right.
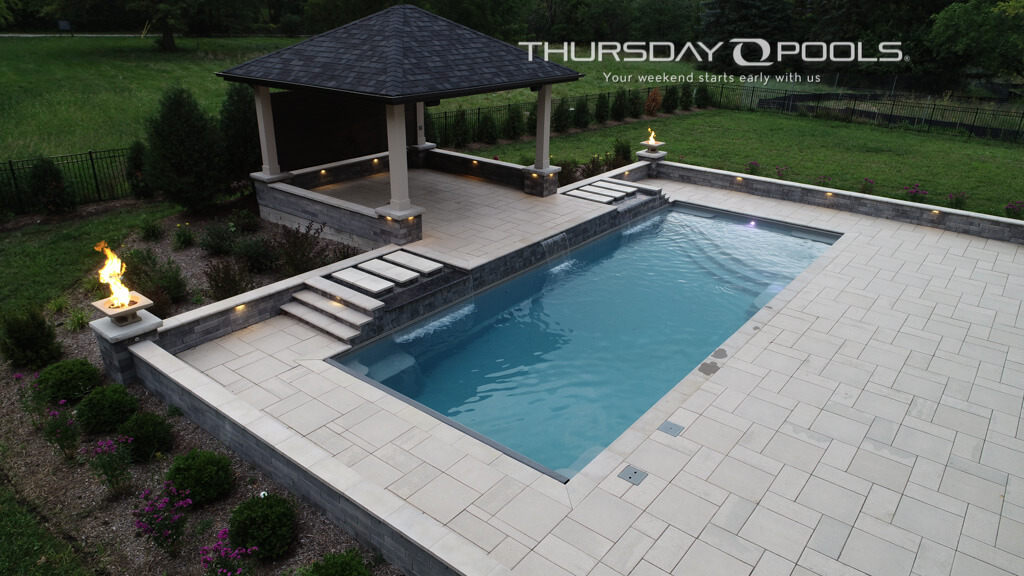
  1. Balance your water chemistry. We recommend having your water tested by a professional. If your pool maintenance schedule is a little out of whack because you’ve been in it less since school started, achieving a properly balanced pool can take a couple of days, so don’t wait until the day before closing to check levels. While test strips are good for a quick dip test, you should have a professional do a complete water analysis. A complete water analysis will check all important chemistry levels including, but not limited to, total alkalinity, pH, free chlorine, total chlorine, calcium hardness, salt, stabilizer, metals and total dissolved solids. Remember, clean and sparkling pool water does not always mean that your pool water is properly balanced. Looks can be deceiving. Some of the prettiest pool water can be the most destructive.
  2. Wipe down the scum line (or tile line.) Body oils, suntan lotions, and airborne contaminants can sometimes build up on the pool surface along the water line. These can easily be wiped away. Microfiber cloths work great. If necessary, you can use a mild detergent, fiberglass or vinyl cleaner. Remember to never use abrasive cleaners, automatic dish detergent, steel wool, metal scrapers, or other brushes or tools because they can cause permanent damage to your beautiful gel coat finish.
  3. Give it a final clean. A few days before your closing, give your pool a final clean. Skim off any debris floating on the top and vacuum any debris or leaves that may have settled on the bottom of the pool. This is also an excellent time to rinse off your pool deck and automatic safety cover tracks.
  4. Add your winterizing chemicals. The day before your pool pros are scheduled to come, add in your winterization chemicals. They’ll need several hours to circulate before your pump is shut off. Clean out your skimmer basket and remove any remaining debris that may be in the pool.
  5. Tidy up. Take the time now to organize and properly store your chemicals. Give your deck furniture and cushions a good cleaning (or you might want to leave them out for any warm and sunny days still to come). Sort through the pool toys, noodles and floats. Toss any that you plan to replace next year and tuck the rest away.

That’s it! Once you’ve zipped through this list, you’ll be prepared for your pool pros to come and finish the job so you can look forward to an easy spring opening.

Renovating, Repairing, Removing or Replacing Your Inground Pool

Not loving your swimming pool as much as you used to? Renovate or repair it, remove it, or replace it with a new, low-maintenance fiberglass pool!  

The staycation lifestyle that a backyard swimming pool creates is appealing to a lot of families. Some people dream of having an inground pool and have talked about it for years. However, some folks who already have a pool may find that they’re not using it as much as they used to, or feel like their pool has lost its luster.

Certainly, a pool that’s never used is a shame. The space it takes up in the backyard could be used for other things, like a garden, playset or a big lawn for touch football games. And a pool that’s fallen into disrepair due to age or lack of pool maintenance isn’t enhancing anyone’s life or living space.

What to do? 

Well, depending on what type of pool you have, here are some options.

  1. Renovate or repair it. If you have a vinyl liner pool with a torn or worn liner, you can replace the liner and bring new life to your pool. A gunite (concrete) pool might need a resurfacing to restore it to its original glory. Unlike fiberglass, both vinyl and gunite pools tend to provide an environment that’s attractive to algae, so if you’re looking outside at green water in your pool, you’ll probably need to enlist the services of a pool professional near you to clear up your water, restore your water chemistry balance and see if there’s underlying damage to your pool that needs to be addressed.
  2. Remove it. If your kids are grown and out of the house, or they are too busy with sports and other extracurricular activities to spend time in the pool with their friends, it might be time to remove your inground pool. However, keep in mind that it’s no small job, and there can be significant costs involved. Removal and fill for a moderately sized gunite pool can cost up to $20,000. Fiberglass and vinyl will cost less, as the materials are lighter weight. Also remember that inground pools typically increase a home’s value. So, this is not a decision to be made lightly. If your old gunite or vinyl liner pool is beyond repair, or, if you’re simply tired of all the pool maintenance involved, there is another way! You can choose to…
  3. Replace it. If you still love the idea of having a pool, but just need a fresh start, you can replace your existing pool. And if you do, a fiberglass inground pool is the way to go. Over the last 20 years, fiberglass pool manufacturers have made huge strides in terms of quality, features, installation innovations, available colors and designs. You can even get a beach entry (zero entry) fiberglass pool today (Patent US 10,358,837 and 10,472,839). This feature was previously only available in high-end, custom gunite pool installations. Recently, sunken living area fiberglass pools have also been introduced to the market. So, the sky’s the limit in terms of how you can transform your current pool area, and turn it into a true backyard swimming pool oasis that your friends and family will all enjoy. Your pool area can once again be the go-to party spot and a beautiful addition to your home.
  4. Fix it or replace it? So, the choice is yours. Will you fix it or replace it? There’s no one right answer. The swimming pool lifestyle is not for everyone, but the people who really do use their pools enjoy all the health benefits that regular swimming exercise can bring, including chronic pain relief, weight loss and stress reduction. They also enjoy the social aspect of spending time with their friends, kids and grandkids in the pool (and it’s often tech-free, or at least low-tech usage time) while folks are playing water games, visiting on the built-in benches or tanning ledges, and genuinely connecting with each other. And you can’t put a price tag on that.

The Zero Entry fiberglass pools 

Thursday Pools is the creator of the beach entry (or zero entry) fiberglass pool. Grace Beach Entry and Sandal Beach Entry (Patent US 10,358,837 and 10,472,839) are currently available to order, so you can bring the shore to your door with your new fiberglass pool.

#PSPExpo #PSPExpo2019 #NewOrleans 

Are you ready to take the plunge and get a FREE estimate on your very own, brand new fiberglass pool? Contact a Thursday Pools dealer today!

Ask the General: Cartridge Filters vs. Sand Filters; Which is Best for Your Pool?

Dear General-

We’re getting a new fiberglass pool this summer! We’ve chosen our fiberglass pool design and our add-on features. Now, we’re wondering what kind of filtration system we should get. We’ve heard pros and cons about both cartridge filtration systems and sand filtration systems. We want what’s best for our pool long-term, but of course we’re excited about low pool maintenance too. What guidance can you give us?

cartridge filtersSigned- Figuring out filtration in Fairfield
Dear Figuring in Fairfield-

Great question! If you’re a regular reader of my articles, you’ve heard me talk about sand filtration already. Cartridge filters are great too. There’s no one system that’s superior to the other, and I’ve used both over the years. But, let’s see if we can filter through some more details and help you choose what’s best for you.

Let’s first take a look at how they work.

Sand filters

Sand filters work quite simply by pushing your pool water through sand that catches the dirt and debris and returns clean water into the pool. You clean your sand filter by backwashing it. This means running water backwards through the filter until the filter is clean. Sand filters are a pretty popular option for residential inground pools.

Sand filter maintenance

Sand filters require very little maintenance, other than the aforementioned backwashing. You’ll need to replace the sand every 2-4 years, depending on how often you use your pool.

Cartridge filters

Cartridge filters have a single layer of filter media made of synthetic fabrics attached in pleats to a cylindrical core. Water is pumped through the filter and passes through the cartridge, trapping dirt and debris in the fabric. Some spas and above-ground pools have a cartridge incorporated in the skimmer. You’ll need to make sure you’ve chosen the appropriately sized filter for your pool.

Cartridge filter maintenance

Cartridge filters must be manually removed to be cleaned. When the filter gauge increases 8 to 10 psi over normal (or, your water flow is visibly reduced), it’s time to clean them. It’s a great idea to keep an extra set of cartridge filters handy, so that you can swap them out when one set is being cleaned. However, with each cleaning, you’ll only recover about 60 percent efficacy. So, after three or four cleanings, you’ll probably have to buy new filters. However, cartridge filters cut energy costs because they require less pump pressure.

Which filtration system is best for you? It depends.

How important is water clarity?

cartridge filtersBoth systems will give you clear water. But for the absolute best water clarity, cartridge filters win.
Cartridge filters typically screen out twice as much dirt and debris as sand filters do. A cartridge filter takes out so fine a particle that your water actually glistens. It can really be witnessed at night when your pool lights are on. That little foggy halo of tiny particles that the light displays is greatly reduced.

Where do you live?

For areas that tend to be debris-heavy, sand filters are your best bet.

For example, I live in an established neighborhood with very little dirt and debris floating around in the air. Therefore, I enjoyed the cartridge system and only cleaned the filters once a season, when I closed the pool for the winter. The filters lasted about four years, but were expensive to replace. However, my daughter lives in the country, and her pool is surrounded by corn, and soybean fields. The dust and pollen factors are very high, especially when the fields are freshly plowed or harvested. She had a devil of a time with her cartridge system because she needed to clean it out so often. It’s time-consuming to take a filter apart, soak it and put it back together. And the more often you clean it, the more often it will need to be replaced. We changed her to a sand filter, and it was smooth sailing from there! And obviously, if you’re planning an indoor pool, cartridge filters are absolutely your best bet.

Ask the pros

You can always consult with your pool professional for advice on what type of pool filtration system will work best for the area you live in and how you plan to use and care for your pool. They can also make recommendations about manufacturers. No matter which system you choose, you’ll love the durability and low-maintenance that a fiberglass pool offers. Happy swimming!

Until next time- The General

Ask the General: When is the Best Time to Open My Pool?

Dear General–

Spring finally made it! The weather is warming up, and the summer swim season is almost upon us. We’re ready! We’re dreaming of spending our days relaxing in our inground fiberglass pool! When is the best time to open our pool?

Signed- Amping in Ann Arbor

best time to open your inground fiberglass poolDear Amping–

Your pool opening and closing schedule will vary based on where you live. But the short answer for YOU is … now! Once we’re past the danger of a damaging freeze, it’s time to kick it into gear. The sooner you get your fiberglass inground pool open, the sooner you’ll be having fun in the sun with all your family and friends. While you may have already scheduled a pool maintenance pro to come and open up your pool, there are still some things you can do to get the ball rolling so you’ll be in the swim ASAP.

Here are some things you should be thinking about right now in order to maximize your swimming time in the days to come:

  1. Check your water level. Even with your pool tightly covered, water will find its way out over the winter. Your water level needs to be up to mid-way on your skimmer before you remove your pool cover. Groundwater levels are often at their highest in the spring (especially if you got a lot of snow in the winter). If you don’t keep your groundwater pressure equalized, you can cause catastrophic damage to your fiberglass inground pool.
  2. Remove your pool cover. After you’re sure your water level is correct, pump off any water on top of the pool cover. Make sure you’re pumping AWAY from your pool so you’re not just adding more groundwater around it. If you have a leaf blower, you might use that to blow off any leaves or other debris. After that, the process depends on which kind of pool cover you have.
    • Automatic pool covers. You’ve heard me speak the virtues of automatic pool covers before, and hopefully you have one. Your pool opening is sure easier if you do. Make sure you’re opening it gradually with your touchpad, checking to make sure your cover isn’t sticking or crooked in the tracks as you go.
    • Standard winter covers. Your winter cover needs to be properly removed, cleaned and sanitized to store away for your fall pool closing. Be sure to check with your cover’s manufacturer for removal instructions–each one is different. Removing it the wrong way can cause unwanted debris to fall into your water and contaminate it, making it more difficult to get your water healthfully balanced.
  3. Check your equipment. Once your water is at the proper level, your cover is off, and you’ve skimmed off any large debris from removing the cover, you can turn on and check your pool equipment. Pumps, filters, filter media, skimmer baskets and lights that have been sitting idle in the elements all winter might need tuning up or replacing. The time to find that out is now, before swimming season kicks off. Most professional pool opening services will do a complete check and alert you to any problem areas or necessary repairs. If all is working well, leave your pump on and let the water circulate for at least 12 hours.
  4. Check your pool water chemistry. Once your water has had a chance to circulate, you’ll need to test it to see where you’re starting out in terms of water balance. This can be very challenging at the start of the season. Whether or not you have a pool service pro open your pool, you might need help getting your water balanced after a long winter. Many swimming pool professionals provide a free, computerized water analysis that tests for many more water balance factors than a standard home test kit. It’s always a good idea to have your pool water professionally tested on a regular basis so that you’re keeping track of all the necessary components of balanced and healthy water. If you get your water properly balanced when you’re opening your pool, you’ll have an easier time keeping your water chemistry balanced throughout the swim season.
  5. Give the pool a spring cleaning. Now is the time to give your pool a good cleaning before the swim season gets underway. Start by scrubbing the pool walls. Be sure to use a soft brush or sponge when cleaning your pool walls, and avoid abrasives such as sandpaper and steel wool will damage the finish of your pool. After you’ve given the walls a good cleaning, it’s time to vacuum. Start from the shallow end and work your way down the slope of the pool. Be sure to clean thoroughly around the steps and other crevices where debris can accumulate.
  6. Inspect your safety equipment and pool accessories. Your handrails and lifesavers need to be swim-ready by the time you are. Take time in the spring to inspect, maintain or replace safety equipment, fiberglass pool accessories and even outdoor furniture so that you can be ready to relax poolside on opening day!

Take some steps now to get as many tasks checked off your list to prepare your inground fiberglass pool for opening. Have a safe, fun, relaxing pool season. Almost time to float around and enjoy.

Until next time–

The General

Ask the General: What Do I Need to Know About Groundwater in the Spring?

Dear General;


Our family got a new inground pool last summer, and our pool installer told us that we need to keep an eye on our groundwater pressure and levels in the springtime. What advice can you give us pool owner newbies about springtime pool maintenance, and what do I need to know about the possibility of groundwater damaging our pool in the spring?

Signed; Waiting for Spring in Walnut Ridge

Dear Waiting;

groundwater pressureYour pool installer is correct. There IS quite a lot to think about in the spring, and the risks from excess groundwater pressure should be top-of-mind as we get ready to open our pools for the season.

When your pool was installed, your pool builder probably explained all about groundwater pressure and how their installation process was intended to protect your pool from it (along with a host of other forgotten tips). No one really expects pool owners to memorize every detail about their pools. So, I’m glad you asked about groundwater and spring pool maintenance. Here’s what you need to know:

Groundwater pressure is no joke.

I can’t stress this enough. Spring showers, coupled with thawing snow, saturate the ground around your pool. Your pool is probably backfilled with pea gravel, crushed gravel or sand. The backfill creates a natural place for groundwater to migrate and accumulate. Groundwater pressure is no joke.

  • On vinyl liner pools: Your liner can float. This is a very bad thing and will be an expensive fix. Your pool builder will have to drain the pool, control the surface water, fix any pool base that has washed out, reset the liner and then refill your pool, which means you’ll have to start over with water stabilization and treatment. To add insult to injury, this process can only take place when it’s warm enough to get the liner reset which means you’ll lose swim time. Another problem is that liners that float will develop wrinkles that may never go away, and you’ll have to choose between buying a new liner or living with the wrinkles.
  • On fiberglass pools and concrete pools: The force of excess groundwater can cause cracks in your pool walls. In extreme cases, such as flooding in the spring, both fiberglass pools and gunite (concrete) pools could potentially pop out of the ground, particularly if the water level is very low or the pool has been drained.

How your pool was installed and what your groundwater alleviation plan is.

To balance the pressure of groundwater as you’re taking off your cover and getting ready to open your pool for the spring, there are several systems pool builders use:

  • A sump pit. In my installing days, we always put a sump pit next to the pool (usually in the deck with a skimmer lid).  This allowed a way to visually inspect and pump out any groundwater that had accumulated around the pool.
  • A wellpoint (also known as a driven point) system. Wellpoint systems consist of a series of small diameter wells that are connected by a header pipe to a wellpoint pump.
  • A pipe around the pool. Some installers will simply run a pipe from the over dig around the pool to a remote sump pit.

No matter what groundwater alleviation system your pool has, it’s important that you understand it and know what to look for and how to remedy groundwater pressure on your pool.

What’s under the cover.

Hopefully, you’ve kept an eye on your cover and the water level underneath it all winter. Now, it’s time to see what’s going on under there. Whether you have a standard winter cover or an automatic pool safety cover, your first step is to pump off the standing water. While you’re doing this, you need to add water to the pool to ensure that your water level is high enough to counteract groundwater pressure.

So, what have we learned? If you said, “Groundwater is no joke,” you win the grand prize. It’s physics. Groundwater pressure is a pretty basic concept. All the water has to go somewhere. So, take a minute now to go out to your pool and check your water level under your winter cover. You’ll save yourself time and money by keeping groundwater pressure at bay.

Until next time; The General

About the General

The General is our guest blogger. He speaks from years of pool building experience and shares his expertise with our readers monthly. He’s also a great storyteller and really fun at a party.